


TOPEX BYTTON HSDPA
User’s Manual
pag. 16
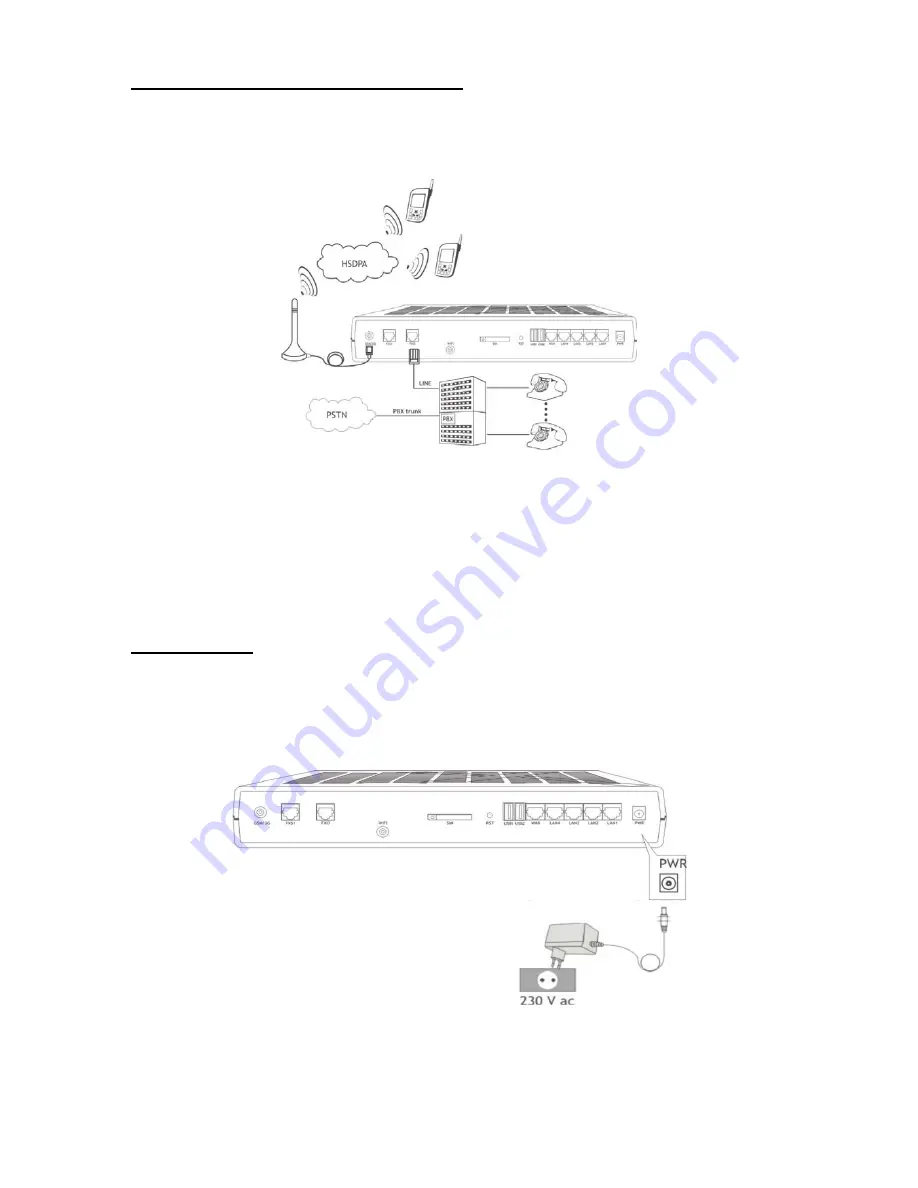
Connecting the telephone cable for FXO interface
If you use the FXO interface of BYTTON HSDPA, connect the phone cable with one of the end to the
FxO connector of the equipment, and the other end to a
line interface
(local extension) of your PBX.
Take care NOT to connect the FXO interface to a trunk (outgoing line) of the PBX.
Also, the FXO interface of BYTTON must be properly configured (use the Web interface to change the
settings).
Figure 4: Connecting the telephone cable for FXO interface
Note:
In this case, if no restrictions exist for subscriber access rights assigned for extension where
BYTTON HSDPA was installed, any caller from fixed network who rings to the BYTTON number can
obtain the access to outgoing trunks. So his calls will be billed to the owner of the PBX.
For avoiding this you have the following solutions.
- either configure the phone exchange to reject the outgoing calls on the extension where BYTTON
HSDPA interface is connected
- or set the BYTTON HSDPA equipment so that when it receives a call from mobile network, it will
automatically direct the call to a specified extension (generally the operator’s desk).
For power supply:
To power the BYTTON unit, just insert the jack of the power supply adapter into the supply
connector. Do
not
yet plug the adapter into the 230V
A.C.
mains outlet on the wall. The special adapter
from Topex, which is part of the Bytton HSDPA package, supplies the voltage required to power the
equipment. It is an external power supply adapter.
Note: The adapter is the disconnection device (there is no POWER switch), so the 230 V
AC
socket-outlet
shall be installed near the equipment and shall be easily accessible.
Figure 5: Connecting the power supply


