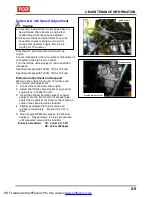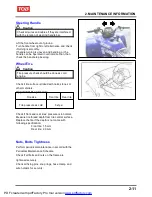
Loosen 2 screws and 2 bolts
To this chapter contents
2. MAINTENANCE INFORMATION
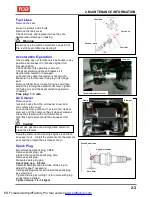
Fuel Lines
Remove the seat
Remove the tank cover
Check all lines, and replace it when they are
deterioration, damage or leaking
Warning
Gasoline is a low ignition material so any kind of
fire is strictly prohibited as dealing it.
Acceleration Operation
Have a wide open of throttle valve as handle in any
position and release it to let back original (full
closed) position.
Check handle if its operation is smooth.
Check acceleration cable and replace it if
deteriorated, twisted or damaged.
Lubricate the cable if operation is not smooth.
Measure the throttle lever free play in its flange
part.
Remove rubber boot, loosen fixing nut, and then
adjust it by turning the adjustment screw. Tighten
the fixing nut, and check acceleration operation
condition.
Free play: 1~3 mm.
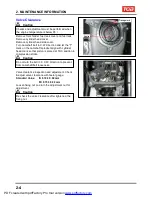
Air Cleaner
Remove seat.
loosen 4 hooks from the air cleaner cover and
then remove the cover.
Loosen the clamp strip and 1 screw of air cleaner
element, and then remove the air cleaner element.
Clean the element with non-flammable or
high-flash point solvent and then squeeze it for
dry.
Caution
Never use gasoline or acid organized solvent to
clean the element.
Soap the element into cleaning engine oil and then
squeeze it out. Install the element onto the element
seat and then install the air cleaner cover.
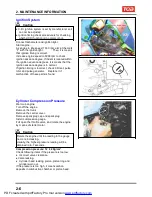
Spark Plug
Recommended spark plug: CR8E
Remove spark plug cap.
Clean dirt around the spark plug hole.
Remove spark plug.
Measure spark plug gap.
Spark plug gap
:
0.8 mm
Carefully bend ground electrode of the plug to
adjust the gap if necessary.
Hold spark plug washer and install the spark plug
by screwing it.
Tighten the plug by turning 1/2 turn more with plug
socket after installed.
Tighten torque: 1.0
~
1.2kgf-m
Vacuum hose
Throttle adjustment screw
Clamp
Ground electrode
Central electrode
0.8~0.9mm
Fuel hose
Fuel filter
Lock nut
Element
2-3
Fuel tank
PDF created with pdfFactory Pro trial version
www.pdffactory.com
Содержание BLADE 250
Страница 1: ...BLADE 250 300 SERVICE MANUAL PDF created with pdfFactory Pro trial version www pdffactory com ...
Страница 145: ...13 BODY COVER Mechanism Diagram 13 1 13 PDF created with pdfFactory Pro trial version www pdffactory com ...
Страница 217: ...Home page Contents 18 ELECTRICAL DIAGRAM 18 18 1 PDF created with pdfFactory Pro trial version www pdffactory com ...
Страница 218: ...Home pae Contents 18 ELECTRICAL DIAGRAM Notes 18 2 PDF created with pdfFactory Pro trial version www pdffactory com ...


