To this chapter contents
12. COOLING SYSTEM
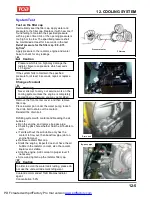
Loosen the radiator 4 bolts.
Remove coolant upper side pipes.
Coolant inlet pipe
4 bolts
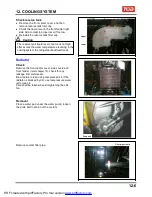
Remove coolant outlet pipe.
Disconnect the couplers for the thermo switch and
fan motor, and then remove radiator and cooling fan.
r
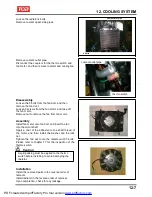
Disassembly
Loosen the 3 bolts from the fan duct, and then
remove the fan duct.
Loosen 3 screws from the fan motor, and take off
the fan motor.
Remove nut to remove the fan from fan motor.
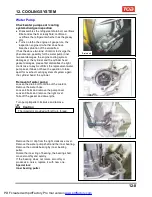
Assembly
Install fan motor onto fan duct and insert the fan
into the motor shaft.
Apply a coat of the adhesive to the shaft thread of
the motor, and then install the washer and the lock
nut.
Tighten the fan duct onto the radiator with 3 bolts.
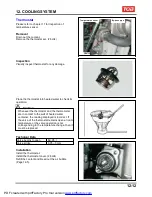
Please refer to chapter 17 for the inspection of the
thermo switch.
Caution
Liquid packing must be applied to the thermo
switch before installing to avoid damaging the
radiator.
Installation
Install the removed parts in the reverse order of
removal.
Install radiator in the reverse order of removal.
Upon completion, check for any leakage.
12-7
thermo switch
coolant outlet pipe
PDF created with pdfFactory Pro trial version
www.pdffactory.com
Содержание BLADE 250
Страница 1: ...BLADE 250 300 SERVICE MANUAL PDF created with pdfFactory Pro trial version www pdffactory com ...
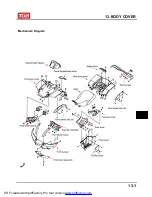
Страница 145: ...13 BODY COVER Mechanism Diagram 13 1 13 PDF created with pdfFactory Pro trial version www pdffactory com ...
Страница 217: ...Home page Contents 18 ELECTRICAL DIAGRAM 18 18 1 PDF created with pdfFactory Pro trial version www pdffactory com ...
Страница 218: ...Home pae Contents 18 ELECTRICAL DIAGRAM Notes 18 2 PDF created with pdfFactory Pro trial version www pdffactory com ...

