RU
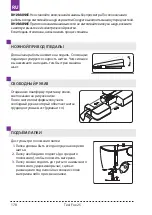
Чтобы открыть бокс для
принадлежностей, нужно потянуть его
на себя ( см. рисунок).
Принадлежности находятся в
выдвижном боксе.
1.
3 шпульки
2.
Комплект игл (3+ Двойная игла)
3.
Отвёртка
4.
Вспарыватель со щеткой
5.
Лапка для обмётки петель
6.
Направляющая
7.
Лапка для пришивания молнии
8.
Лапка для пришивания пуговиц
Поставьте машину на стабильном столе.
Удалите излишки масла с игольной пластины перед
первым включением машины. Перед включением
машины убедитесь, что выключатель установлен на
„0”. Перед подключением машины к сети проверьте
соответствие показателей напряжения и частоты
электричества, указанных на машине и в Вашей
электросети.
1.
Вставьте штекер сетевого кабеля в разъем
питания машины.
2.
Вставьте вилку сетевого кабеля в розетку
питания.
3.
Включите питание.
4.
При включении питания на машине
зажжется лампочка.
5.
Чтобы отключить машину, выключите питание машины и вытяните штепсель из
розетки.
ВЫДВИЖНОЙ СТОЛИК С АКСЕССУАРАМИ
АКСEССУАРЫ
ПОДКЛЮЧЕНИЕ ПИТАНИЯ МАШИНЫ
3
2
1
3
5
4
7
6
8
9
KNOWING
YOUR
SEWING
MACHINE
Power line cord/foot control
Make sure that the sewing machine is turned off (the
power switch is set to “O”), and then connect the plug
of the power line and into the appliance inlet and your
wall outlet.
The foot that comes on your sewing machine
is called zigzag foot and will be used for the
majority of your sewing.
Setting up your machine
Bu
sure to wipe off any surplus oil from needle
plate area before using your machine the first
time.
Power/light switch
Your machine will not operate until the power/light switch is turned on. The same switch controls
both the power and the light.
When servicing the machine, or changing needles, etc., machine must be disconnected from
the power supply.
NOTE
:
When foot control is disconnected,
the machine will not operate.
Always disconnect the machine from power
supply by removing the plug from the wall-outlet.
Sewing speed can be varied the foot control.
The harder you press on the control, the faster
machine runs.
Accessories
1. Bobbins (3pcs)
2. Needle 3 pcs and twin needle 1 pc
3. Multi-function screwdriver
4. Seam guide(optional)
5. Ripper/Brush
6. Buttonhole foot
7. Guide presser foot
8. Zipper foot
9. Button fitting foot
Power/light
switch “OFF”
Power/light
switch “ON”
3
2
1
3
5
4
7
6
8
9
KNOWING
YOUR
SEWING
MACHINE
Power line cord/foot control
Make sure that the sewing machine is turned off (the
power switch is set to “O”), and then connect the plug
of the power line and into the appliance inlet and your
wall outlet.
The foot that comes on your sewing machine
is called zigzag foot and will be used for the
majority of your sewing.
Setting up your machine
Bu
sure to wipe off any surplus oil from needle
plate area before using your machine the first
time.
Power/light switch
Your machine will not operate until the power/light switch is turned on. The same switch controls
both the power and the light.
When servicing the machine, or changing needles, etc., machine must be disconnected from
the power supply.
NOTE
:
When foot control is disconnected,
the machine will not operate.
Always disconnect the machine from power
supply by removing the plug from the wall-outlet.
Sewing speed can be varied the foot control.
The harder you press on the control, the faster
machine runs.
Accessories
1. Bobbins (3pcs)
2. Needle 3 pcs and twin needle 1 pc
3. Multi-function screwdriver
4. Seam guide(optional)
5. Ripper/Brush
6. Buttonhole foot
7. Guide presser foot
8. Zipper foot
9. Button fitting foot
Power/light
switch “OFF”
Power/light
switch “ON”
Выключатель в позиции 0:
машина выключена
Выключатель в позиции
1: машина включена
2
1
3
4
6
5
7
8
Texi Fox 25
177
Содержание Fox 25
Страница 1: ...MULTIFUNCTIONAL SEWING MACHINE 2 A L K J I H G F E D C B 3...
Страница 2: ......
Страница 5: ...Texi Fox 25 5 CS...
Страница 172: ...RU 1 2 3 1 2 3 4 5 6 7 8 9 Texi Fox 25 172...
Страница 173: ...RU 10 11 12 13 14 15 16 17 Texi Fox 25 173...
Страница 175: ...RU 192 193 193 194 194 194 194 195 195 195 196 196 198 Texi Fox 25 175...
Страница 193: ...RU 1 A 2 3 4 5 6 H 3 9 2 3 Machine Setting Texi Fox 25 193...
Страница 195: ...RU 4 10 1 2 2 3 D 1 4 S S Machine Setting 10mm 3 8 Wrong side of fabric Texi Fox 25 195...
Страница 196: ...RU 4 1 2 3 4 1 2 5 6 Texi Fox 25 196...
Страница 197: ...RU 1 3 4 1 2 2 4 6 Texi Fox 25 197...
Страница 198: ...RU Texi Fox 25 198...
Страница 199: ...RU 0 0 I 0 I 2014 30 EU Texi Fox 25 199...


