PL
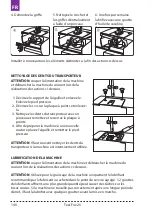
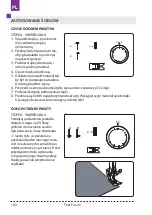
ZAKŁADANIE SZPULKI W BĘBENKU
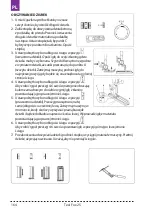
WYMIANA STOPKI (SYSTEM MATIC)
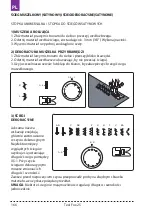
NAWLEKANIE NITKI GÓRNEJ
1.
Umieść nawleczoną wcześniej szpulkę w bębenku. Upewnij się, że nitka odwija się
zgodnie ruchem wskazówek zegara, za strzałką - tak jak pokazano to na rysunku.
2.
Przeciągnij nitkę przez szczelinę bębenka.
3.
Następnie przeciągnij nitkę przez sprężynkę regulującą naprężenie nitki,
aż do otworu wyjściowego. Wyciągnij przynajmniej 10 cm nitki poza bębenek.
1.
Obróć koło napędowe do siebie tak, aby igła znalazła się w najwyższym położeniu.
2.
Podnieś stopkę do góry, jeśli jest opuszczona (1).
3.
Naciśnij dźwignię zwalniającą uchwyt stopki (2).
4.
Stopka zwolni się z zatrzasku.
5.
Umieść pożądaną stopkę na płytce ściegowej pod uchwytem stopki tak, aby
wycięcie w uchwycie znajdowało się dokładnie nad sworzeniem stopki (3).
6.
Opuść dźwignię stopki i dociśnij ją na stopce, aby zaskoczył mechanizm
zatrzaskowy stopki.
Uwaga: Niewłaściwa kolejność nawleczenia, czy też błędne prowadzenie nitki może
powodować zrywanie nitki, przepuszczanie ściegów, marszczenie materiału.
1.
Ustaw igłę w najwyższym położeniu, obracając kołem napędowym do siebie.
Podnieś stopkę.
2.
Umieść szpulę z nicią na stojaku tak, aby nitka odwijała się od tyłu - jak pokazano
na rysunku.
6
KNOWING
YOUR
SEWING
MACHINE
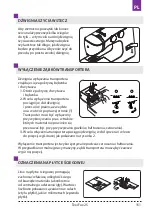
Removing or replace the bobbin case
1. Refer to page 4 to remove the Extension table, raise the needle by turning the hand wheel
toward you, then open the shuttle cover.
2. Take out bobbin case holding the latch.
3. When installing the bobbin case, the pin on the case should fit into the gap of the shuttle race.
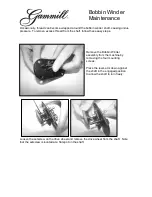
Threading the bobbin case
1. Install the bobbin into bobbin case. Make sure the thread unwinds in the direction of arrow.
2. Pull the thread into the groove in the bobbin case slot.
3. Now pull the thread under the tension spring and into the delivery eye.
NOTE: Leave about 10cm (4 inches) of the thread hanging out of the bobbin case. When
you pull the thread, the bobbin should spin clockwise.
Changing the presser foot
1. Turn the hand wheel toward you to raise the needle to its highest position.
Raise the presser foot.
2. Press the lever on the back of the presser foot holder. The presser foot will drop off.
3. Place the presser foot so the pin on the foot lies just under the groove of the holder.
Lower the presser foot holder to lock the foot in place.
Be sure to disconnect the power supply before operating the machine.
Attaching the seam guide(optional)
Attach the seam guide in the slot as illustrated. adjust according to
need for hems pleats etc.
Gap
1
Texi Fox 25
153
Содержание Fox 25
Страница 1: ...MULTIFUNCTIONAL SEWING MACHINE 2 A L K J I H G F E D C B 3...
Страница 2: ......
Страница 5: ...Texi Fox 25 5 CS...
Страница 172: ...RU 1 2 3 1 2 3 4 5 6 7 8 9 Texi Fox 25 172...
Страница 173: ...RU 10 11 12 13 14 15 16 17 Texi Fox 25 173...
Страница 175: ...RU 192 193 193 194 194 194 194 195 195 195 196 196 198 Texi Fox 25 175...
Страница 193: ...RU 1 A 2 3 4 5 6 H 3 9 2 3 Machine Setting Texi Fox 25 193...
Страница 195: ...RU 4 10 1 2 2 3 D 1 4 S S Machine Setting 10mm 3 8 Wrong side of fabric Texi Fox 25 195...
Страница 196: ...RU 4 1 2 3 4 1 2 5 6 Texi Fox 25 196...
Страница 197: ...RU 1 3 4 1 2 2 4 6 Texi Fox 25 197...
Страница 198: ...RU Texi Fox 25 198...
Страница 199: ...RU 0 0 I 0 I 2014 30 EU Texi Fox 25 199...


