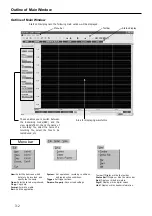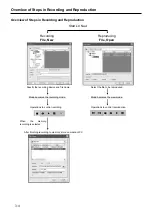
System Settings
4-3
Memo
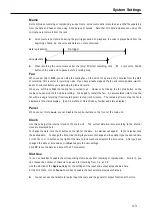
Set to ON when recording or reproducing a voice memo. Voice memo data is recorded as a WAV file separately
from the data and header files, using 8,000 bytes per second. Note that this data increases even when the
microphone is removed from the jack.
z
Voice memo is not recorded during the pre-trigger period. In playback, the voice is played back from the
beginning of data. So, the voice and data are not synchronized.
z
When recording the voice memo under the (only) PC direct recording, click or press the PAUSE
button of the main unit to pause before recording stop.
Fan
When you set this to
OFF
, you can stop the cooling fan on the LX-10 for a period of 10 minutes from the start
of recording. This is useful for recording noise. If you have already stopped the fan and recorded data, wait for
about 10 minutes before you again stop the fan and record.
When you set this to
ON
, the cooling fan is turned to on. However, by clicking the fan stop button on the
toolbar, you can stop the fan while recording. Click again to restart the fan. An accumulated time to stop the
fan within a single recording (from recording start to stop) is 10 minutes. The remaining time to stop the fan is
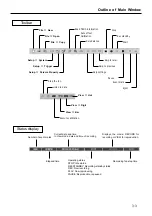
displayed at the status display. (See 3-3 Outline of Main Window, Toolbar and Status Display.)
Panel
When you set this to
Lock
, you can disable the control buttons on the front of the main unit.
Clock
Use this to adjust the internal clock on the main unit.
The current date and time according to the internal
clock are displayed here.
To change the date, click the
▼
button on the right of the date.
A calendar will appear.
In the calendar, click
the desired date.
To change the time, click the digits you want to change and then either type the desired time
or click the
▲
or
▼
button on the right of the time to increment or decrement the time value.
After you have
changed the date or time values, click
Set
to apply the new settings.
Click
PC
to set the date and time of the PC connected.
Slot Use
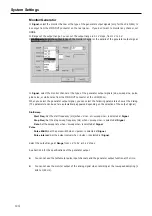
Turn on a check box to enable the corresponding slot to be used for recording or reproduction. For Slot 1, you
can choose the number of channels to be used for recording from 2, 4, and 8.
Use the slot tab of the
System
dialog for the settings of the input and output amps enabled here.
At the LX-20/20L, turn on
Tacho
check box to enable the tachometer pulse input channels.
z
You cannot use the tachometer pulse input channels and the generator output function at the time.
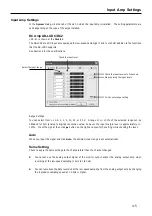
Data reproduction
Voice playback
Pre-trigger
Содержание LX Series
Страница 2: ......
Страница 10: ...Contents viii...
Страница 26: ...Sampling Frequency and Number of Channels 1 16...
Страница 117: ...Main Unit Specifications 6 3 External Dimensions...
Страница 142: ...Recording Synchronization Specifications 6 28...
Страница 143: ...7 1 Section 7 Appendixes Troubleshooting 7 2 Supplied Accessories and Options 7 3 Supplied Accessories 7 3 Options 7 3...
Страница 146: ...Note 7 4 Note...
Страница 147: ......

