EN / 10-2015 / 1000683
© STULZ GmbH, Hamburg
-
88
-
Maintenance
STULZUltraSonic-SystemforDirectRoomHumidificationBNB-
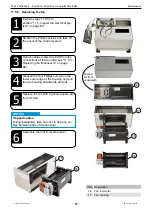
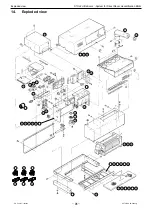
11.5.4. Replacing the nebulizer print plate
3
Slacken the two thumb screws of the PCB
and remove the PCB.
5
Use the silicon sheet!
2
Remove the orange and yellow cables of
the transducer, and the black and white
supply cables.
4
When installing the new PCB, make sure
that silicone thermal compound has been
applied between the contact surface of
the PCB and the PCB carrier.
1
Perform steps 1-10 from
section "11.5. Inspect the electrical sys-
6
Replace the PCB with a genuine spare
part from STULZ.
5
Reconnect the orange and yellow cables
of the transducer and the black and white
supply cables, and assemble the unit in
reverse order.
8
9
14
15
9
Item Description
8
Water tank
9
Nebulizer print plate
14 Transducer
15 Nebulizerunit(9+14)
CAUTION
Replace transducer.
We recommend also replacing the transducers if
you are replacing the Nebulizer print plate.
Note
CAUTION
Color coded cables.
The cables are color coded and
must not be interchanged!
ORG = orange cable, YEL = yellow cable
NOTICE
CAUTION
Trapped cables.
During installation, take care not to trap
any cables between parts of the housing!
NOTICE
CAUTION
Risk of injury from hot PCBs.
The nebulizer print plate can be very hot immedi-
ately after operation.
• Always allow PCBs to cool down.

