


– 26 –
REPLACEMENT AND ADJUSTMENT OF PARTS
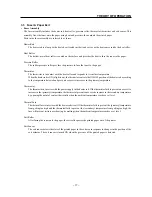
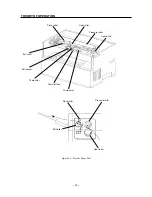
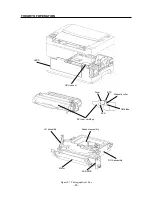
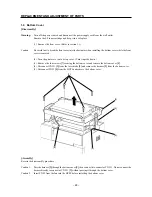
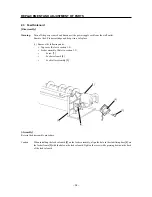
1.2 Top Cover
[Disassembly]
Warning:
Turn off the power switch and disconnect the power supply cord from the wall outlet.
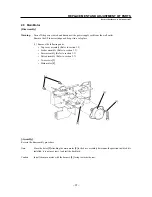
(1) Open the front cover
[1]
, remove the EP toner cartridge and keep it in a safe place.
(2) Remove the two screws
[2]
that can be seen when the front cover is opened.
(3) While pressing down on the center of the printer with one hand, separately unhook the left and right
bosses
[3]
on the input tray assembly
[4]
and remove the input tray assembly.
Caution:
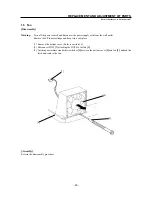
In order to illustrate the positions of the screws in relation to the input tray assembly, fig.
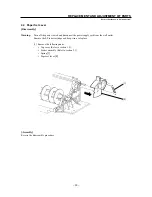
(4) Remove the two screws
[5]
revealed when the input tray assembly is removed and raise the top cover
[6]
a few centimeters.
(5) Raise the top cover to disconnect PJ321
[7]
from the LED PWB.
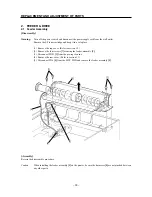
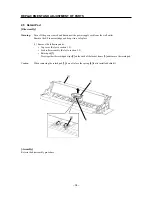
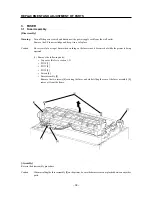
[Assembly]
Reverse the disassembly procedure.
Caution:
When installing the top cover
[1]
on the printer, be sure that the harness is not pinched between any other
parts.
[1]
[2]
[5]
[6]
[3]
[4]
[7]
Содержание WinType 4000
Страница 1: ...WinType 4000 TECHNICAL MANUAL SECOND EDITION LASER PRINTER ...
Страница 4: ......
Страница 6: ... 2 GENERAL SPECIFICATIONS ...
Страница 14: ... 10 THEORY OF OPERATION ...
Страница 26: ... 22 THEORY OF OPERATION Figure 2 9 Electrical ...
Страница 28: ... 24 REPLACEMENT AND ADJUSTMENT OF PARTS ...
Страница 62: ... 58 REPLACEMENT AND ADJUSTMENT OF PARTS ...
Страница 64: ... 60 MAINTENANCE GUIDE ...
Страница 111: ... 107 MAINTENANCE GUIDE Direction the paper is fed through the printer H G F 3 Skew 2 0mm E 2 0mm E F G H 245mm ...
Страница 114: ... 110 MAINTENANCE GUIDE ...
Страница 116: ... 112 TROUBLESHOOTING ...
Страница 176: ... 172 5 ELECTRICAL 5 1 Disassembly Drawing 1 2 3 4 14 4 14 2 14 1 14 3 13 12 11 6 5 7 8 9 10 ...
Страница 179: ......


