Page 8 of 56
fit on a single display screen so it may be necessary to press the question-mark button (
?
) a
second or third time in order to view the next help screen. The help screens include detailed
information that pertains to the feature you are viewing or setting.
5.
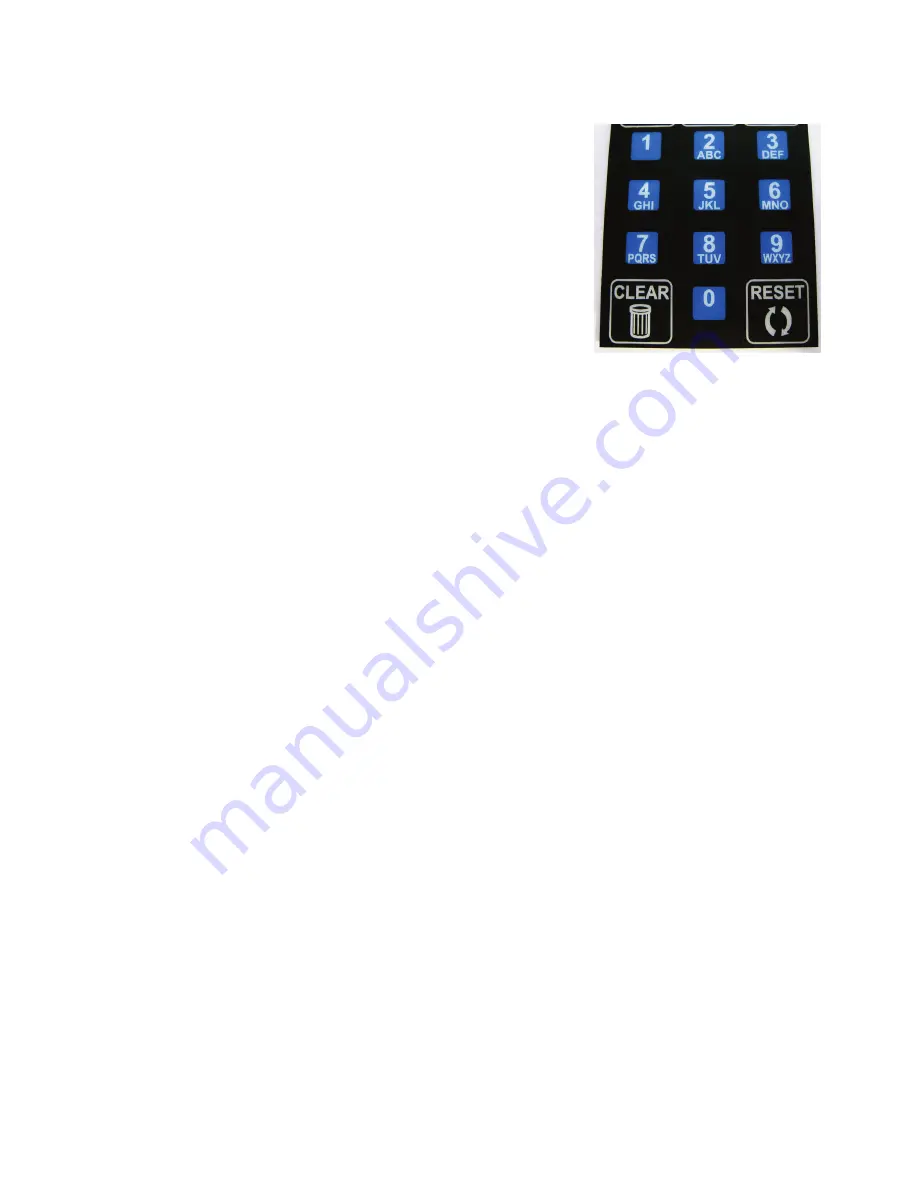
ENTERING TEXT –
some
Settings
, for example setting the
header information for a transaction receipt, require that you
enter text. The text entry process was modeled after the
process used in older cell phones, whereby the numeric
keypad also doubles as a text keypad. For example: the #2
button is also used to enter the A-B-C text characters, the #3
button is for the D-E-F characters and so on. Use the picture
shown here to determine which text characters are
associated with the EF+ Module numeric keys. The lower
case text characters are also available. To view these, you
will need to press the associated numeric key multiple times.
6.
DEFINITIONS
– In this manual the words value and type
will be used to describe dispensers. Such as a 25¢ coin dispenser. The value is 25¢ and the type
is coin. The value can be in nickel increments from 5¢ up to $99.95. The type can be coin,
token, bill, card and ticket. The type and value are set at the dispenser.
1.2 Main Menu Descriptions And Menu Navigation
Following is a list of the features along with a brief description of how each one is used to enhance the
operation of machine. A detailed explanation for each feature along with an explanation for each setting
available is also available with the
built in help
feature in the EF+ Module.
Also included in this document is a diagram (flowchart) showing how to step through the detail list for
each Menu. Things to remember when using the EF+ Module:
x
Pressing the Help button at any time will show display help text explaining more about the Menu item
you are looking at.
x
If the “Clear” button is pressed at the beginning (top) of a Main Menu, the details for that list will be set
to the factory defaults if it is a
Setting,
or cleared if it is a
Report
. Example: pressing the Clear button at
the beginning of the
Audit Report menu
will clear (set to zero) all audit totals.
x
If you lose track of where you are at in the menu, you can return to the Main Menu screen at any time
by pressing the EXIT button one or more times.
x
Pressing the “right arrow” or “left arrow” button will step you through the feature groups as illustrated
below.
x
The machine is disabled anytime the menu is at a report or setting menu item. If the machine has been
left in a report menu, the menu will be returned to the Main Menu two minutes after the last key was
pressed. This is to prevent the machine from inadvertently being left out of service. If the machine is
left at a setting menu item, it will remain out of service until manually returned to the Main Menu.
Содержание CMP-20
Страница 1: ......
Страница 2: ...Page 2 of 56 ...
Страница 6: ...Page 6 of 56 ...
Страница 55: ...Page 55 of 56 NOTES ...


