5.
Answering with the headset
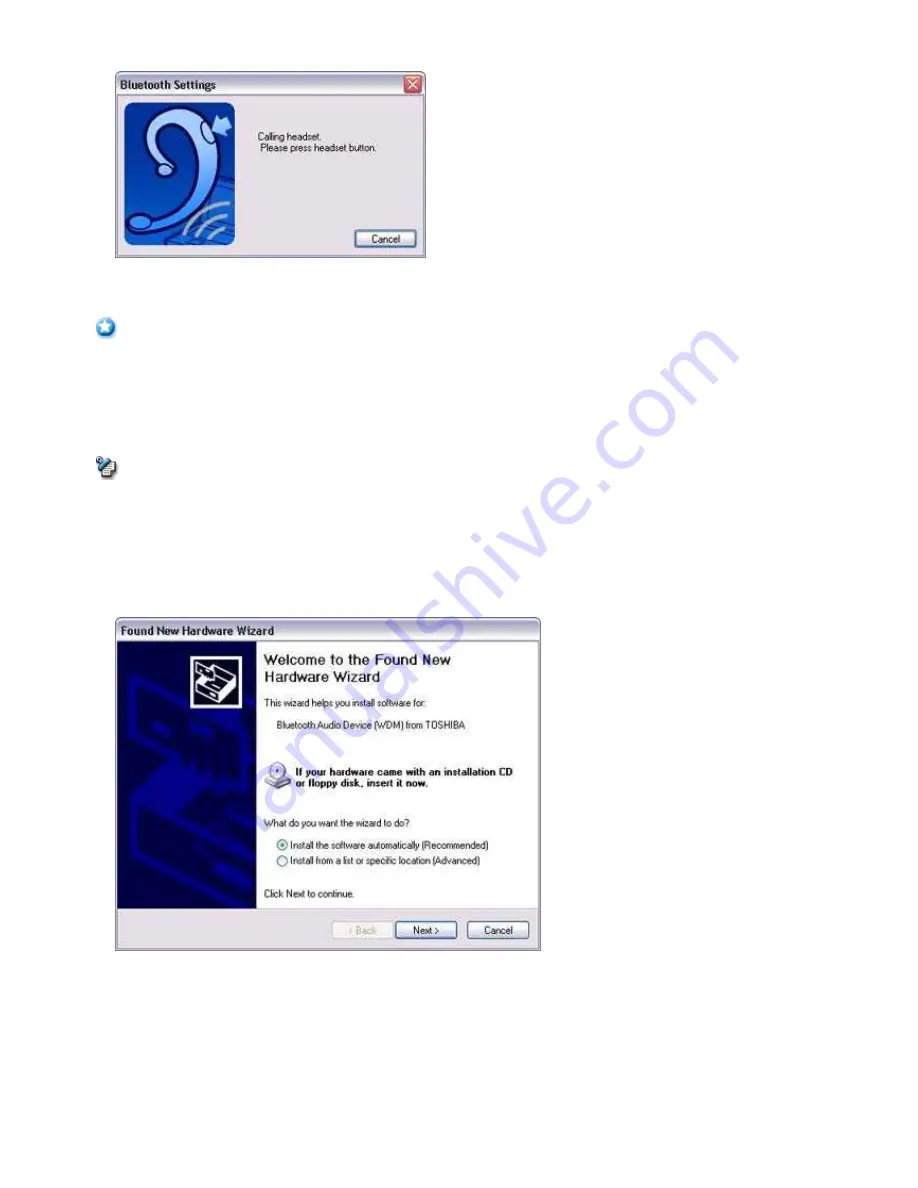
If the service has been properly detected, a screen will appear indicating that the headset is being called, and a tone will accordingly
sound in the headset.
Please press the headset switch.
Important
o
The procedure for operating the headset may differ depending on the manufacturer and model.
Please consult your user guide for a detailed description of how to operate the unit.
The [Add New Connection Wizard (Configuring (Connecting to Voice Circuit))] screen will appear, and device configuration will be
performed.
Note
o
If you are connecting to the headset for the first time, or if another audio device has not yet been registered, the following [Found
New Hardware Wizard] screen will appear, from which you can proceed to install the driver.
If another audio device has already been registered (i.e., the driver has been installed), you can proceed to Step 9 without having
to install the driver.
6.
Click on the [Next] button
The [Install Hardware] screen will appear.
7.
Click on the [Continue Anyway] button
The following screen will appear automatically. You may disregard it and click on the [Continue Anyway] button.
Page 173
Содержание VGN-BX563B - VAIO - Pentium M 1.73 GHz
Страница 10: ...Relatedtopics Exchanging files with PCs and PDAs Page 10 ...
Страница 54: ...Click on the Yes button in the disconnection confirmation dialog boxthat appears Page 54 ...
Страница 67: ...Page 67 ...
Страница 81: ...An image of the received faxwill be displayed Related topic Sending a fax Page 81 ...
Страница 95: ...An image of the received faxwill be displayed Related topic Sending a fax Page 95 ...
Страница 112: ...Page 112 ...
Страница 139: ...Please click on the OK button to close the message and repeat the procedure Page 139 ...
Страница 157: ...Page 157 ...
Страница 197: ...An image of the received faxwill be displayed Related topic Sending a fax Page 197 ...
Страница 218: ...An image of the received faxwill be displayed Related topic Sending a fax Page 218 ...
Страница 223: ...Please click on the OK button to close the message and repeat the procedure Page 223 ...
Страница 231: ...Click on the Yes button in the disconnection confirmation dialog boxthat appears Page 231 ...
Страница 254: ...Page 254 ...
Страница 294: ...Page 294 ...
Страница 301: ...Page 301 ...
Страница 327: ...Page 327 ...
Страница 361: ...Page 361 ...
Страница 366: ...The mouse will be connected Page 366 ...
Страница 370: ...The new icon will appear Page 370 ...
Страница 372: ...Page 372 ...
Страница 378: ...Page 378 ...
Страница 404: ...Page 404 ...
Страница 427: ...Click on the Yes button in the disconnection confirmation dialog boxthat appears Page 427 ...
Страница 440: ...Page 440 ...
Страница 454: ...An image of the received faxwill be displayed Related topic Sending a fax Page 454 ...
Страница 468: ...An image of the received faxwill be displayed Related topic Sending a fax Page 468 ...
Страница 485: ...Page 485 ...
Страница 512: ...Please click on the OK button to close the message and repeat the procedure Page 512 ...
Страница 530: ...Page 530 ...
Страница 570: ...An image of the received faxwill be displayed Related topic Sending a fax Page 570 ...
Страница 591: ...An image of the received faxwill be displayed Related topic Sending a fax Page 591 ...
Страница 596: ...Please click on the OK button to close the message and repeat the procedure Page 596 ...
Страница 604: ...Click on the Yes button in the disconnection confirmation dialog boxthat appears Page 604 ...
Страница 627: ...Page 627 ...
Страница 667: ...Page 667 ...
Страница 674: ...Page 674 ...
Страница 700: ...Page 700 ...
Страница 738: ...Page 738 ...


