background image

1-62

PCS-1500/1500P

18

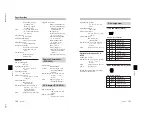
NUMBER OF LINES

2B: Connects via 2B-channel.
1B: Connects via 1B-channel.

ISDN RATE

AUTO: Connects to a remote party

with a normal ISDN line.

56K: Connects to a region or country

with the 56 Kbps ISDN transfer
rate.

AUDIO MODE

G.711: When not using G.722 and

G.728.

G.722: The audio bandwidth is

wider for better sound quality.
(7 kHz)

G.728: The audio bandwidth is

narrow but the image quality is
better. (3.4 kHz)

Notes

• The settings in the MCU SETUP

menu are only available when the
MCU MODE is set to ON.

• If the terminal that is not adequate

for the setting in the MCU SETUP
menu is connected, see “Notes on
Secondary Terminals ” on page 25.

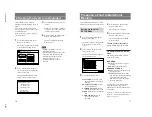
Preparing a Point to Multi-Point Meeting

19

You can hold a point to multi-point
meeting among four terminals
(including this terminal). You can add
one normal audio phone in the
network.

Note

Before you start a meeting verify that
MCU MODE is set to ON in the MCU
SETUP menu.

For details on registration on the Dial
List menu, operation of the Manual
Dial menu, and receiving calls, refer
to the operating instructions supplied
with the Compact Conference
Package.

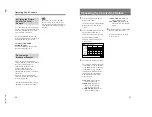
Calling Remote Parties

To call registered remote
parties

1

Press the LIST button, the START
( ) button, or the joy stick on the
Remote Commander.

The Dial List menu appears on the
monitor screen.

2

Select a index title (the first
remote party) with the joy stick on
the Remote Commander.

3

Press the DIAL (

) button on the

Remote Commander.

The system dials the selected
remote party in step 

2

, and the

indication “Dialing” appears on
the monitor screen.
When the connection is
completed, the indication
“MEETING STARTS!” appears
on the monitor screen.

4

Repeat steps 

1

 to 

3

 to connect

with the second and third parties.

Note

When connecting to the remote party
that is set to be connected via 3B-
channel or more, the system only dials
the number in the A1 box, or the ones
in the A1 and A2 boxes.

To call unregistered remote
parties

1

Press the DIAL (

) button or one

of the number buttons (0 – 9) on
the Remote Commander.

The Manual Dial menu appears on
the monitor screen.

Starting a Point to Multi-Point
Meeting

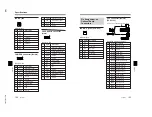
SELECT:

Dial?

Yes:

Dial List

1/7

BRI

ABC--

No: CANCEL

Bonding

Speech

V. 35

BRI

BRI

BRI

Atlanta branch

Boston branch

Buffalo branch

Chicago branch

Cleveland branch

Dallas branch

Denver branch

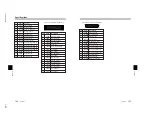
SELECT:

Dial?

Yes:

Manual Dial

A1

NUMBER OF LINES

No: CANCEL

A2

B1

B2

C1

C2

6

BRI

Содержание PCS-1500

Страница 1: ...OCESSOR PCS P150 P150P CAMERA UNIT PCS C150 C150P REMOTE COMMANDER PCS R150 AC ADAPTOR PCS AC15 2BRI BOARD PCS I150 V 35 BOARD PCS I151 SONY UPGRADE KIT PCS UC150 Printed in Japan Sony Corporation 1999 9 16 Broadcasting Professional Systems Company 1999 PCS 1500 UC PCS 1500P CE E 9 955 177 11 ...

Страница 2: ...Gefahr eines elektrischen Schlages Feuergefahr und Verletzungen zu vermeiden sind bei Wartungsarbeiten strikt die Angaben in der Anleitung zu befolgen Andere als die angegeben Wartungsarbeiten dürfen nur von Personen ausgeführt werden die eine spezielle Befähigung dazu besitzen AVERTISSEMENT Ce manual est destiné uniquement aux personnes compétentes en charge de l entretien Afin de réduire les ris...

Страница 3: ... par le constructeur Mettre au rebut les batteries usagées conformément aux instructions du fabricant ADVARSEL Lithiumbatteri Eksplosionsfare ved fejlagtig håndtering Udskiftning må kun ske med batteri af samme fabrikat og type Levér det brugte batteri tilbage til leverandøren ADVARSEL Lithiumbatteri Eksplosjonsfare Ved utskifting benyttes kun batteri som anbefalt av apparatfabrikanten Brukt batte...

Страница 4: ...ry back up Raadpleeg uw leverancier over de verwijdering van de batterij op het moment dat u het apparaat bij einde levensduur afdankt Gooi de batterij niet weg maar lever hem in als KCA Bij dit produkt zijn batterijen geleverd Wanneer deze leeg zijn moet u ze niet weggooien maar inleveren als KCA ...

Страница 5: ...ain Parts 2 4 2 5 1 Speaker 2 4 2 5 2 Microphone 2 5 2 5 3 Optional Boards 2 7 2 5 4 RX 47 Board 2 8 2 5 5 IPM 92 Board 2 9 2 5 6 IPM 93 Board 2 10 2 5 7 DE 54 Board 2 11 2 5 8 MA 97 Board 2 12 2 5 9 Flexible Card Wire 2 13 2 6 Notes on Repair Parts 2 14 2 6 1 Notes on Repair Parts 2 14 2 6 2 Replacement Procedure for Chip Parts 2 14 3 Overall Description 3 1 Overall Function 3 1 3 1 1 Interface b...

Страница 6: ...rall Function of IF 744 Board 3 35 3 2 6 Overall Function of IF 745 Board 3 37 3 3 Signal Flow of Communication Data 3 39 4 Troubleshooting 4 1 Check Items Before Starting Self diagnostics 4 1 4 2 Self diagnostics Function 4 22 4 2 1 About Self diagnostics Function 4 22 4 2 2 Diagnostics on Each Block 4 28 4 2 3 When Self diagnostics Results in FAIL 4 45 5 On Screen Messages 5 1 On Screen Messages...

Страница 7: ...sections for understanding the contents of this manual Section 1 Operating Instructions This section describes the contents of the operating instructions Section 2 Service Overview This section describes the system configuration external panel removal procedures during servicing layouts of the main parts and boards board removal procedures notes and so on Section 3 Circuit Descriptions Illustrates...

Страница 8: ......

Страница 9: ...ns This section is extracted from operation manual 1999 by Sony Corporation 3 867 208 12 1 Compact Conference Package Operating Instructions Before operating the unit please read this manual thoroughly and retain it for future reference PCS 1500 1500P ...

Страница 10: ... equipment complies with Part 68 of the FCC Rules On the bottom of this equipment is a label that contains among other information the FCC registration number for this equipment If requested this information must be provided to the telephone company 2 If this terminal equipment causes harm to the telephone network the telephone company will notify you in advance that temporary discontinuance of se...

Страница 11: ...otection that the electrical ground connections of the power utility telephone lines and internal metallic water pipe system if present are connected together This precaution may be particularly important in rural areas Caution Users should not attempt to make such connections themselves but should contact the appropriate electric inspection authority or electrician as appropriate Table of Content...

Страница 12: ...tration 70 Entering Characters 71 Setting Up the System 73 Displaying the Menu 73 Menu Settings 74 Chapter 5 Meetings With Optional Equipment Installing the Optional Board 78 Using Three ISDN Lines 79 Using the V 35 Interface 79 Using Optional Microphones 80 Table of Contents 7 Using the External Equipment 81 Connecting External Video Equipment for Input 81 Connecting External Equipment for Output...

Страница 13: ...necting cords Then contact the place of purchase or an authorized Sony representative ISDN Never install telephone wiring during a lightning storm Never install telephone jacks in wet locations unless the jack is specifically designed for wet locations Never touch uninsulated telephone wires or terminals unless the telephone line has been disconnected at the network interface Use caution when inst...

Страница 14: ...pter 1 Light weight and small size The Compact Processor has come to miniaturized to 2 5 kg 5 lb 8 oz of mass and it has a small size 258 55 206 mm 10 1 4 2 1 4 8 1 8 inches you can easily install the Compact Processor on your TV monitor Simple setup The Compact Conference Package has the integral type camera and microphone You do not have to do a comlicated connection simply connect the TV monito...

Страница 15: ...apter 1 Preparation 13 Chapter 1 Options TV monitor A TV monitor is required for your meetings A TV is used as a meeting monitor and speaker It displays the remote party graphics and menus If you use a Sony TV you can operate it with the Remote Commander supplied with the Compact Conference Package Other options The following optional devices are also available to improve your meetings Allows you ...

Страница 16: ...put to S video input S video cord 1 3 m 4 3 ft supplied Compact Processor Basic System Connection ISDN modular cable 5 m 16 4 ft supplied Audio cord 1 m 3 3 ft supplied TV monitor to a wall outlet Power cord Set the BACKUP switch to ON Connect the TV monitor and the AC adaptor to the Compact Processor and connect to the ISDN line with the supplied ISDN modular cable The following cables the ISDN m...

Страница 17: ... OUT VIDEO IR repeater supplied Battery life When the Remote Commander no longer functions properly replace both the batteries Notes on batteries To avoid possible damage from battery leakage or corrosion observe the following Be sure to insert the batteries in the correct direction Do not mix old and new batteries or different types of batteries Do not attempt to charge dry cell batteries If you ...

Страница 18: ... the TV monitor 3 Attach the Compact Processor and the TV monitor by securing the Velcro Preparing the System Chapter 1 Preparation 19 Chapter 1 Turning the System On Off POWER DC12V T 120 IN AUX 2 AUX1 MONITOR IR OUT ISDN A AUX OUT MIC 1 IN OUT 2 PLUGINPOWER AUDIO VIDEO POWER switch POWER lamps Rear Front This section describes how to turn on and off the Compact Processor Note Set the CONF DOC TV...

Страница 19: ... on Standby When the system is on standby you can turn the system on with the I u button on the Remote Commander Note Do not turn off the POWER switch on the rear panel while the menu is displayed on the monitor screen 1 Press the I u button on the Remote Commander The indication POWER OFF Are you sure appears on the monitor screen Turning the System On Off Chapter 1 Preparation 21 Chapter 1 2 Pre...

Страница 20: ...You cannot receive any calls from remote parties if the POWER switch is set to off Machine Information menu Machine Information HOST VERSION Ver1 00 Exit CANCEL BRI VERSION Ver3 28 VCP VERSION Ver1 16 DSP VERSION Ver1 00 Turning the System On Off Chapter 2 Basic Operation During a Meeting 23 Chapter 2 Chapter 2 Basic Operation During a Meeting Calling a Remote Party You can start a meeting with a ...

Страница 21: ...es SELECT Dial Yes Manual Dial A1 No CANCEL A2 B1 B2 C1 C2 Calling a Remote Party Chapter 2 Basic Operation During a Meeting 25 Chapter 2 If you want to check or change the settings of the Dial Setup menu follow step 3 dial the number follow step 6 3 Press the EXEC button on the Remote Commander The Dial Setup menu appears on the monitor screen 4 Set up or check the following items LINE I F Select...

Страница 22: ...During a Meeting 27 Chapter 2 V 35 with RS 366 Connects to a remote party via the V 35 interface by specifying the telephone number V 35 without RS 366 Connects to a remote party via the V 35 interface without specifying the telephone number ISDN RATE AUTO Connects to a remote party with a normal ISDN line 56K Connects to a region or country with a 56 Kbps ISDN transfer rate AUDIO MODE G 722 The a...

Страница 23: ...een SELECT Dial Yes Dial List Atlanta branch ABC No CANCEL Boston branch Buffalo branch Chicago branch Cleveland branch Dallas branch Denver branch Calling a Remote Party Chapter 2 Basic Operation During a Meeting 29 Chapter 2 To cancel dialing before the call is connected Press the CANCEL button on the Remote Commander To sort the list on the Dial List menu You can sort the list on the Dial List ...

Страница 24: ... SETUP with the joy stick then press it The Communication Setup menu appears on the monitor screen Chapter 2 Basic Operation During a Meeting 31 Chapter 2 4 Select ANSWER MODE with the joy stick then press it The ANSWER MODE items appear 5 When selecting the auto answer mode select AUTO with the joy stick then press it When selecting the manual answer mode select MANUAL with the joy stick then pre...

Страница 25: ...NECTION appears along with an ISDN cause code and a message on the monitor screen For details on ISDN cause codes and messages see On Screen Messages on page 95 Receiving a Call Chapter 2 Basic Operation During a Meeting 33 Chapter 2 Checking the Connection Status Communication Status 00 05 CODEC LINE I F RATE AUDIO MODE VIDEO MODE FRAME RATE CAMERA CONTROL DATA CONTROL H 320 BRI 1 x 64K Encode G ...

Страница 26: ...me sent from remote parties Press the VOLUME BRIGHT button to increase the volume the VOLUME BRIGHT button to decrease it The VOL volume bar appears on the monitor screen After awhile the bar automatically disappears if you do not operate Notes You have to set the volume of the TV monitor at first If feedback occurs decrease the volume Muting Local Conversations Mute Function You can mute local co...

Страница 27: ...ng is completed 7 Press the CANCEL button on the Remote Commander repeatedly The menu disappears from the monitor screen SELECT Save Yes EXEC Audio Configuration LIP SYNC No CANCEL MIC SELECT OFF INTERNAL OFF ON ECHO CANCELER ON Adjusting the Sound Chapter 2 Basic Operation During a Meeting 37 Chapter 2 To cancel lip synchronization Select OFF in step 5 Note The lip synchronization function only w...

Страница 28: ...u must select the local or remote camera to be controlled 1 Press the FAR NEAR button on the Remote Commander When the remote camera is selected the indication FAR appears on the monitor screen When the local camera is selected the indication FAR does not appear on the monitor screen Note When you control the remote camera the CAMERA CTR RX setting at the remote party must be set to ON in the Came...

Страница 29: ...he monitor screen SELECT Save Yes EXEC Camera Setting FOCUS ADJUST No CANCEL BRIGHT ADJUST BACKLIGHT CAMERA CTL RX OFF OFF FAR NEAR AUTO MANUAL Adjusting the Camera Chapter 2 Basic Operation During a Meeting 41 Chapter 2 To adjust focus automatically Select AUTO in step 4 To adjust brightness 1 Press the MENU button on the Remote Commander The Menu System Configuration Index 1 3 menu appears on th...

Страница 30: ...g FOCUS ADJUST No CANCEL BRIGHT ADJUST CAMERA CTL RX OFF ON OFF BACKLIGHT OFF Adjusting the Camera Chapter 2 Basic Operation During a Meeting 43 Chapter 2 6 Press the CANCEL button on the Remote Commander repeatedly The menu disappears from the monitor screen To cancel the backlight Select OFF in step 4 Presetting Angle Zoom and Brightness Settings You can store the camera settings in memory up to...

Страница 31: ...cular color or brightness so that automatically tracks a subject having the memorized color or brightness If a subject almost goes off the screen the camera performs the pan tilt action so that the subject is placed back in the middle of the screen Note The automatic target tracking function is only available for the local camera Adjusting the Camera Chapter 2 Basic Operation During a Meeting 45 C...

Страница 32: ...equipment 1 Press the DISPLAY FAR NEAR button on the Remote Commander Each time you press the button the picture on the monitor screen switches between the local and the remote 2 Press one of the INPUT buttons on the Remote Commander to switch the picture on the screen MAIN Displays the picture from the main camera OBJECT Displays a picture of the equipment This is soon to be available via the IR ...

Страница 33: ...appears The inset window allows you to monitor your own party while viewing the remote party Picture in picture function Press the PinP button on the Remote Commander If an inset window is not displayed the inset window appears on the monitor screen When it is already displayed each time you press the PinP button the inset window moves as follows Notes The position of the inset window is set to th...

Страница 34: ...reen When the local picture is displayed the still picture is sent To cancel sending still pictures Press the PIX SHOT AUTO or SNAP button on the Remote Commander Note The interval time between still pictures depends on the transfer rate Sending One Still Picture 1 Press the PIX SHOT SNAP button on the Remote Commander The moving picture on the monitor screen is frozen and the indication appears o...

Страница 35: ...Control menu Note When you do an incapable operation the indication COMMAND IS REJECTED BY MCU appears on the monitor screen To see a picture of the selected terminal 1 Enter the terminal number in the box 1 in the Chair Control menu with the number buttons on the Remote Commander 2 Press the VIEW SEL button on the Remote Commander The picture of the selected terminal appears on the local monitor ...

Страница 36: ...ing using the sound only Voice Meeting The basic procedure is same as one with images and sound To start a voice meeting with unregistered remote parties Set LINE I F to ISDN BRI Speech in the Dial Setup menu For details on the setting see Calling an Unregistered Remote Party on page 24 The indication VOICE ONLY appears on the monitor screen and the local picture is displayed on the local monitor ...

Страница 37: ...ith the joy stick then press the ENTER button The System Setup System Configuration Index 2 3 menu appears on the monitor screen Chapter 4 Registration and Setup 57 Chapter 4 3 Select ISDN PROTOCOL with the joy stick then press it The ISDN Configuration COUNTRY menu appears on the monitor screen 4 Select your country with the joy stick then press the EXEC button The ISDN Configuration PROTOCOL men...

Страница 38: ...ange e g enter 9 if you have to dial nine to reach an outside line SELECT NEXT EXEC ISDN Configuration LDN AREA CODE LOCAL NUMBER BACK CANCEL A1 A2 B1 B2 C1 C2 COUNTRY CODE PREFIX Registering Local Information Chapter 4 Registration and Setup 59 Chapter 4 Note The number input in the PREFIX box is automatically dialed before the telephone number is dialed 10Press the EXEC button on the Remote Comm...

Страница 39: ...n and Setup 61 Chapter 4 2 Enter your country code in the COUNTRY CODE box If the network switch type is AT T 5ESS National ISDN or NTI DMS 100 National ISDN COUNTRY CODE is 1 If the network switch type is AT T 5ESS Multipoint Custom ISDN COUNTRY CODE is 1 10 If the network switch type is AT T 5ESS Point to Point Custom ISDN COUNTRY CODE is 1 12 If the network switch type is NTI DMS 100 Custom ISD...

Страница 40: ...356 9871356 9852464 9852464 1 12 COUNTRY CODE PREFIX SPID Registration for Customers in the USA Chapter 4 Registration and Setup 63 Chapter 4 If the network switch type is NTI DMS 100 National ISDN or Custom ISDN Each LDN is different as a separate LDN is given for each channel The following shows the use of three ISDN lines for NTI DMS 100 National ISDN The following shows the use of three ISDN l...

Страница 41: ...A only BACK CANCEL A1 019876532001 A2 B1 019871356001 B2 C1 019852464001 C2 1 10 SPID Registration for Customers in the USA Chapter 4 Registration and Setup 65 Chapter 4 If the network switch type is AT T 5ESS Point to Point Custom ISDN You do not have to enter SPID The following shows the use of three ISDN lines If the network switch type is NTI DMS 100 National ISDN The following shows the use o...

Страница 42: ...EL A1 913219876543 A2 913219876544 B1 913219871234 B2 913219871235 C1 913219852468 C2 913219852469 SPID Registration for Customers in the USA Chapter 4 Registration and Setup 67 Chapter 4 Registering a Remote Party SELECT Dial Yes Dial List 012 No CANCEL SELECT Dial Setup List Input Index No CANCEL A1 A2 B1 B2 C1 C2 Yes EXEC You can register a remote party before making the connection You can regi...

Страница 43: ...I F No CANCEL ISDN RATE AUDIO MODE VIDEO MODE CAMERA CONTROL DATA ISDN BRI AUTO G 728 G 722 H 263 CIF 15fps H 281 OFF Registering a Remote Party Chapter 4 Registration and Setup 69 Chapter 4 For details on each setting of the items see On Items in the Dial Setup Menu on page 26 To select an item to be changed select it with the joy stick on the Remote Commander then press it To set up an item sele...

Страница 44: ... select V 35 without RS 366 Do not enter the telephone numbers When using RS 366 select V 35 with RS 366 Enter the the telephone numbers You do not need to set up ISDN RATE Registering a Remote Party Chapter 4 Registration and Setup 71 Chapter 4 CLEAR button ALPHA NUM button Number buttons BACK SPACE button LINE COPY button To change the ISDN transfer rate temporarily The Compact Processor is set ...

Страница 45: ...Registering a Remote Party Chapter 4 Registration and Setup 73 Chapter 4 Setting Up the System Press the MENU button Menu System Configuration Index 1 3 menu Camera Setting menu Communication Setup menu System Setup System Configuration Index 2 3 menu Communication Status menu This is only displayed during communication Audio Configuration menu Other Setup Configuration Index 3 3 menu Machine Info...

Страница 46: ...p the System Chapter 4 Registration and Setup 75 Chapter 4 Other Setup Configuration Index 3 3 menu Switches the menu or sets up the system ISDN LDN Switches to the ISDN Configuration LDN menu MONITOR Selects the remote control mode of the IR repeater Normally set it to MODE1 PCS 1500 or to MODE3 PCS 1500P MODE1 Sets it to 1 MODE2 Sets it to 2 MODE3 Sets it to 3 MODE4 Sets it to 4 IR RECEIVER Sele...

Страница 47: ...to have a T 120 data meeting T 120 Holds a T 120 data meeting OFF Does not hold a T 120 data meeting TELEPHONE Selects the audio protocol for the voice meeting AUTO Selects the protocol automatically G 711 µ law Selects the µ law protocol G 711 A law Selects the Α law protocol Setting Up the System Chapter 4 Registration and Setup 77 Chapter 4 Machine Information HOST VERSION Ver1 00 Exit CANCEL B...

Страница 48: ...onnects via the V 35 interface Chapter 5 Meetings With Optional Equipment 79 Chapter 5 IN AUX 2 AUX1 MONITOR IR OUT ISDN A AUX OUT IN OUT AUDIO VIDEO IN AUX 2 AUX1 MONITOR IR OUT ISDN A ISDN C ISDN B AUX OUT IN OUT AUDIO VIDEO Using Three ISDN Lines You need to install the optional PCS I150 BRI Board You can connect with 6B channels Using the V 35 Interface You need to install the optional PCS I15...

Страница 49: ...Microphone Install the microphone at a half meter apart from participants Install the speaker in direction of the rear of the microphones Install the microphone in a quiet echo free room Install the microphone away from potential noise sources Do not place a sheet of paper over the microphone or move the microphone since reflecting echoes to a remote party may increase temporarily It needs an inpu...

Страница 50: ...a conference based on ITU T Recommendation T 120 standards when you connect a PC which NetMeeting not supplied has been installed with the Compact Processor NetMeeting is a registered trademark of Microsoft corporation Connecting With a PC Connect the Com1 serial port of your PC and the T 120 connector on the Compact Processor using the RS 232C cross cable 9 pin female 9 pin female When the Com1 p...

Страница 51: ...k Null Modem 4 Click on the Properties button then select the COM port to be used 5 Click on the Properties button then set the transfer rate to 115200 Verify the following settings Data bits 8 Parity None Stop bit 1 Flow control None 6 Click on the OK button repeatedly until the menu returns to its first one Holding a T 120 Data Conference Chapter 5 Meetings With Optional Equipment 85 Chapter 5 C...

Страница 52: ...ghts up when the system is on standby This lamp goes off when the system is in sleep mode 3 IR Infrared sensor Detects the infrared video signal emitted from the equipment this is soon to be available The infrared video input via this sensor is assigned as OBJECT 4 Remote sensor When operating the Compact Processor with the Remote Commander point it toward this sensor If you use this sensor set IR...

Страница 53: ...equipment 8 VIDEO MONITOR OUT jack mini DIN 4 pin Connect to the video input jack of the TV monitor POWER DC12V T 120 IN AUX 2 AUX1 MONITOR IR OUT ISDN A AUX OUT MIC 1 IN OUT 2 PLUGINPOWER AUDIO VIDEO 1 2 3 4 5 6 7 8 9 0 Location and Function of Parts and Controls Appendix 89 Appendix 9 IR OUT jack minijack Connect the supplied IR repeater to this jack 0 ISDN A jack 8 pin modular Connect the ISDN ...

Страница 54: ...ted in this system Front Rear 1 3 2 5 4 6 6 BACKUP switch Set it to ON to store the presets Location and Function of Parts and Controls Appendix 91 Appendix The Indications on the Screen 1 VOL volume bar 2 Mute indication 3 T 120 indication 4 Auto target tracking indication 5 FAR indication 6 Broadcasting indication 7 Still picture indication 8 Audio and video input indication camera control indic...

Страница 55: ...ss this button to call a remote party 3 START button Press this button to display the Manual Dial menu 4 Number 0 9 buttons Press these buttons to input characters such as a telephone number sub address or a name 5 ENTER button Press this button to register a new entries in the List Input menu 6 LIST button Displays the Dial List menu 7 EXEC button Press to execute the setup 8 CAMERA control V v B...

Страница 56: ...TV monitor Turns off the TV monitor when using a PAL type TV monitor Location and Function of Parts and Controls Appendix 95 Appendix On Screen Messages Remedy Make sure the selected entry is correctly registered Please try again later Please check the number and try again Please try again later Normal disconnect Please try again later Please check if remote system is connected Please check if oth...

Страница 57: ...io input with the AUDIO button See page 47 Adjust the focus See page 39 Select manual focus and adjust manually See page 39 Turn on the selected video equipment Select the video input with the INPUT buttons See page 47 Check the connection See pages 81 and 82 If you have installed an optional V 35 Board make sure the system is connected to an ISDN outlet or a digital line outlet with the terminal ...

Страница 58: ... Still Picture Pixels 704 pixels 480 lines PCS 1500 704 pixels 576 lines PCS 1500P Encoding H 261 Annex D 4CIF Sound Bandwidth 7 kHz G 722 ITU T Recommendation 3 4 kHz G 711 G 728 ITU T Recommendation Transfer rate 48 Kbps to 64 Kbps G 722 ITU T Recommendation 56 Kbps to 64 Kbps G 711 ITU T Recommendation 16 Kbps G 728 ITU T Recommendation Network Multiplexing Video audio data Frame format H 221 I...

Страница 59: ...ons 1 Remote Commander PCS R150 Signal format Infrared SIRCS Control DC 3V using two size AA LR6 alkaline batteries Dimensions 50 35 239 mm w h d 2 1 7 16 9 1 2 inches Mass Approx 180 g 6 oz including batteries AC Adaptor PCS AC15 Power requirements 100 to 240V AC 50 60 Hz Power consumption Approx 1 0A to 0 6A Specifications Appendix 101 Appendix 6 9 1 5 4 2 3 1 Operating temperature 5 C to 35 C 4...

Страница 60: ...Transmit data 9 12V 12V 10 12V 12V 11 GND Ground 12 SIRCS Remote control data 13 DTR Data terminal ready 14 GND Ground 15 GND Ground 15 9 8 1 9 15 1 8 Specifications Appendix 103 Appendix 1 8 Pin Assignment on Optional Board Connectors ISDN B C jacks PCS I150 Modular jack Pin Signal Description 1 NC 2 NC 3 TA Transmit 4 RA Receive 5 RB Receive 6 TB Transmit 7 NC 8 NC V 35 connector female PCS I151...

Страница 61: ... ground B SGND Signal ground C V35RS Request to send D V35CS Clear to send E V35DR Data ready H V35ER Data terminal ready J V35RI Call diaplay P V35SD Send data R V35RD Receive data S V35SD Send data T V35RD Receive data U V35TT Transmit timing V V35RT Receive timing W V35TT Transmit timing X V35RT Receive timing Y V35ST Send timing AA V35ST Send timing Specifications Appendix 105 Appendix D sub 2...

Страница 62: ...ayout of your videomeeting room Top view horizontal range at maximum zoom out Appendix 107 Appendix 2 9 m 7 87 ft 4 m 13 12 ft 40 25 25 Camera Side view vertical range at maximum zoom out Layout Considerations Avoid allowing large moving objects especially people behind the participants the quality of the local transmission will deteriorate Do not seat participants with fine line patterns in front...

Страница 63: ...ay code excited linear prediction H 221 Frame structure for a 64 to 1920 Kbps channel in audiovisual teleservices H 261 Video codec for audiovisual services as p 64 Kbps H 320 Narrow band visual telephone systems and terminal equipment Interface A device that goes between two different devices so that they can communicate with each other ISDN An acronym for Integrated Services Digital Network This...

Страница 64: ... 76 Communication Status menu 33 Dial List menu 28 67 Dial Setup menu 25 68 ISDN Configuration COUNTRY menu 57 ISDN Configuration LDN menu 58 ISDN Configuration PROTOCOL menu 57 ISDN Configuration SPID menu 59 List Input menu 67 Machine Information menu 77 Manual Dial menu 24 Menu System Configuration Index 1 3 menu 74 Other Setup Configuration Index 3 3 menu 75 System Setup System Configuration I...

Страница 65: ...onable protection against harmful interference when the equipment is operated in a commercial environment This equipment generates uses and can radiate radio frequency energy and if not installed and used in accordance with the instruction manual may cause harmful interference to radio communications Operation of this equipment in a residential area is likely to cause harmful interference in which...

Страница 66: ...eräte durch Feuer elektrische Schläge oder andere Unfälle Überlassen Sie deshalb die Installation ausschließlich qualifiziertem Fachpersonal Wenden Sie sich dazu an Ihren Sony Händler Übersicht Die folgenden Karten sind für das Kompaktkonferenzpaket PCS 1500P von Sony konzipiert und müssen installiert werden wenn Sie die folgenden Funktionen nutzen möchten Zwei modulare ISDN Kabel werden mit der B...

Страница 67: ...1 59 PCS 1500 1500P 3 867 901 01 1 1999 Sony Corporation Upgrade Kit Operating Instructions PCS UC150 GB ...

Страница 68: ...ing the Picture Shot by the Local Camera 22 Receiving the Broadcast Request 22 Checking the Connection Status 23 Ending a Point to Multi Point Meeting 24 Notes on Secondary Terminals 25 The Attribute 26 Specifications 27 Features The PCS UC150 Upgrade Kit is designed to add the MCU function to the PCS 1500 1500P Compact Conference Package You can hold an MCU conference based on the ITU T Recommend...

Страница 69: ...oint to multi point meeting Setting Up the MCU SETUP Menu 1 Press the MENU button on the Remote Commander The Menu System Configuration menu appears on the monitor screen 2 Select MCU with the joy stick then press the stick The MCU SETUP menu appears on the monitor screen 3 Set up the following items MCU MODE Set to ON when holding a point to multi point meeting BROADCAST MODE Selects the broadcas...

Страница 70: ... the Compact Conference Package Calling Remote Parties To call registered remote parties 1 Press the LIST button the START button or the joy stick on the Remote Commander The Dial List menu appears on the monitor screen 2 Select a index title the first remote party with the joy stick on the Remote Commander 3 Press the DIAL button on the Remote Commander The system dials the selected remote party ...

Страница 71: ...t support connections via the Inverse Multiplexer interface BONDING Starting a Point to Multi Point Meeting 21 You can do the following operations during a meeting Switching the Broadcast Mode There are two broadcast modes 4SPLIT mode Displays each party on the four split screen VOICE ACTIVATE mode Detects the terminal that speaks at the highest level among the connected terminals and sends the pi...

Страница 72: ...n on the Remote Commander The Menu System Configuration menu appears on the monitor screen 2 Select COMMUNICATION with the joy stick on the Remote Commander then press the stick The COMMUNICATION STATUS menu appears on the monitor screen 3 Check the communication status The column A indicates the status via the ISDN A jack B indicates via the ISDN B jack C indicates via the ISDN C jack And the col...

Страница 73: ...re mixed when NUMBER OF LINES is set to 2B Holds a meeting via 2B channel with the 2B channel terminals and via 1B channel with the 1B channel terminals The meeting with the 1B channel terminals is as follows Send receive the audio Receive the video If 2B channel terminals end a meeting and only 1B channel terminals are in the network the meeting holds via 1B channel This 1B channel meeting can se...

Страница 74: ...terminals Simple chair control using BAS 13 2 MLP facilities refer to ITU T T series The Attribute Value 3 4 when including this terminal 1 0 BRI Restrict_Required 2B 1B Equipped Mixed No G 711 G7 28 G 722 Equipped Voice activate four split user control H 261 No No No No Not support Set with users ISDN rate 1B 2B audio G 711 G 722 G 728 Fix Video H 261 Auto Video frame rate 7 5 10 15 fps video enc...

Страница 75: ...1 67 PCS 1500 1500P Sony Corporation Printed in Japan ...

Страница 76: ......

Страница 77: ...e PCS P150 P150P Compact processor PCS C150 C150P Camera PCS R150 Remote commander PCS AC15 AC adapter PCS I150 2BRI board PCS I151 V 35 board PCS I152 LAN board PCS UC150 Upgrade kit PCS DS150 DS150P Document stand PCS V150EK Video adapter kit PCS A300 Microphone PCS K32 V 35 cable PCS K60 S video cable Options ...

Страница 78: ...F1 8 MB memory card Part No 1 772 369 11 S BNC video cable Part No J 6381 380 A RS 232C cross cable _ ISDN cable _ V 35 cable PCS K32 IBM is a trademark of IBM Corporation 2 3 Board Layout Diagram 2 2 List of Required Measuring Equipment and Tools 2 3 Board Layout Diagram Board Configuration Board Name Main function 1 MA 97 board MAIN board 2 DE 54 board Demodulator board 3 IPM 92 board IR receive...

Страница 79: ...mera block in the direction of the arrow while raising up it and remove it from the hook of the upper cabinet 2 Remove the six screws and remove the upper cabinet 3 Remove the three connectors from the MA 97 board CN601 CN602 CN901 n Standard tightening torque 80 x 10_2 N m 8 kgf cm 2 4 Removing the Cabinets Main power switch Jack AC adapter Camera block Holes Screws Hooks Upper cabinet B3 x 10 CN...

Страница 80: ...5 Replacing the Main Parts Precaution for installation of the speaker Be careful of the followings when fixing the harness using the harness retainer as shown 1 Be cause the built in microphone is a high sensitivity microphone the microphone can pick up vibrations of the PCS 1500 1500P via microphone harness Be sure to give a small amount of play to the micro phone harness when fixing the harness ...

Страница 81: ...harness retainer n Place a sheet under the cabinet to protect it 3 Remove the two screws and remove the cushion 2 5 Replacing the Main Parts 4 Turn the upper cabinet so that it faces upwards Remove the microphone assembly and remove the harness from the hole n If the microphone assembly cannot be removed easily push up it with a flat tip screwdriver PSW3 x 6 Cushion Harness retainer Harness Sheet ...

Страница 82: ...icrophone is a high sensitivity microphone the microphone can pick up vibrations of the PCS 1500 1500P via microphone harness Be sure to give a small amount of play to the micro phone harness when fixing the harness with the harness retainer 2 The camera connection connector as shown is fixed with some play in order that the connector can be easily connected to the camera block Adjust the harness ...

Страница 83: ...S I151 V 35 board Replacement Procedure 1 Remove the upper cabinet Refer to Section 2 4 Removing the Cabinets 2 Remove the two screws and remove the plate 3 Connect the optional board to the connector CN750 on the MA 97 board 4 Fix the plate on the connector panel with the two screws that were removed in step 2 n Attach the IF 744 board and the IF 745 board in the same way B3 x 5 Plate CN750 B3 x ...

Страница 84: ... 2 Remove the screws fixing the RX 47 board that is connected to the MA 97 board 3 Remove the shield B 4 Remove the RX 47 board that is connected to the CN790 of the MA 97 board 2 5 Replacing the Main Parts 5 Attach the new RX 47 board by reversing the disas sembling procedure of steps 1 to 3 n Standard tightening torque 80 x 10_2 N m 8 kgf cm PSW3 x 6 CN790 RX 47 board MA 97 board Shield B ...

Страница 85: ...82 A Replacement Procedure 1 Remove the upper cabinet Refer to Section 2 4 Removing the Cabinets 2 Remove the flexible card wire from the connector CN701 of the IPM 92 board and remove the IPM 92 board 3 Attach the new IPM 92 board by reversing the disas sembling procedure of steps 1 and 2 CN701 IPM 92 board Flexible card wire ...

Страница 86: ... Remove the upper cabinet Refer to Section 2 4 Removing the Cabinets 2 Remove the flexible card wire from the connector CN801 of the IPM 93 board and remove the IPM 93 board 2 5 Replacing the Main Parts 3 Attach the new IPM 93 board by reversing the disas sembling procedure of steps 1 and 2 CN801 IPM 93 board Flexible card wire ...

Страница 87: ...three connec tors CN101 CN402 CN403 of the DE 54 board 3 Remove the three screws and remove the DE 54 board in the direction of the arrow 4 Remove the shield A 5 Attach the new DE 54 board by reversing the disas sembling procedure of steps 1 to 4 n Standard tightening torque 80 x 10_2 N m 8 kgf cm n When the board is removed be careful not to damage the chassis or other parts CN101 CN402 CN403 PSW...

Страница 88: ...ng screw and the two screws B3 x 5 and remove the screw support in the direction of the arrow 8 Remove the two hexagon screws B3 x 6 and remove the connector panel 9 Remove the two hexagon screws PSW3 x 6 and remove the connector side panel 10 Attach the new MA 97 board by reversing the disas sembling procedure of steps 1 to 9 n The shield S is attached to the connector CN400 of the MA 97 board Be...

Страница 89: ...e the lock and remove the flexible card wire n Be careful not to bend the flexible card wire 2 Insert the flexible card wire into the connector while being careful about the direction of the contact surface 3 After inserting it completely push the portion marked in the direction of the arrow to fix the flexible card wire n Be sure to hold both sides of the portion marked Contact surface ...

Страница 90: ...part presolder the area in which the new chip is to be placed with a thin layer of solder 4 Place new chip part in position and solder both ends n Once a chip part has been removed never use it again Transistors and Diodes Replacement 1 Cut the terminals of the chip part with nippers 2 Remove the cut leads as above 3 Make sure that there is no pattern peeling damage and or bridging around the deso...

Страница 91: ...ing Function is contained by the camera PCS C150 C150P itself the compact processor PCS P150 P150P sends the setup command only SIRCS signal The IR receiver of the camera PCS C150 C150P receives the SIRCS signal that is then sent to the compact processor PCS P150 P150P after the carrier component is removed n Whether the IR receiver of the camera PCS C150 C150P or that of the compact processor PCS...

Страница 92: ...ving and decoding of the SIRCS signal from the remote commander PCS R150 Generation and output of the menu display Input and selection of video signals Receiving and demodulation of infrared video signals AV Link Output of the video signals Input and selection of audio signals Pick up of sound by the built in microphone Output of the audio signals Generation and output of the ringer and other soun...

Страница 93: ...he SIRCS signal that is supplied from the remote commander PCS R150 IF 744 board PCS I150 option or IF 745 board PCS I150 option Controls the line ISDN 4 B expansion or V 35 and data transmitting receiving MA 97 board All other functions Block diagram of the compact processor PCS P150 P150P is shown in Fig 3 1 Frame diagram of the compact processor PCS P150 P150P is shown in Fig 3 2 3 1 Overall Fu...

Страница 94: ...iver Serial Controller Driver Receiver Serial Controller Data Alignment I Interface Controller SIRCS Dec Enc IR Receiver I Interface Controller I Interface Controller CPU Power Supply Block IR Receiver AV Link AV Link AUX1 2 MONITOR OUT AUX OUT CAMERA LINE OUT T 120 SIRCS IR OUT 12V ISDN A ISDN B ISDN C to CAMERA Internal Speaker Buffer PCMCIA DIAG PORT Driver Receiver SWITCH 5V 9V 5V 27V 5V 12V 5...

Страница 95: ...2 53 54 55 56 57 58 59 60 D GND 5V D GND D GND 5V 5V D GND A5 RESET TxD_CAM Y_CAM 1 2 3 4 5 6 7 8 Video GND Video Audio Audio GND 9V Analog 5V 1 2 3 4 5 6 7 8 Speaker A Speaker B 1 2 DIR A GND Y_CAM GND C_CAM C_CAM GND Power GND Power GND RxD_CAM MIC_PWR MIC_IN 1 2 A GND 3 Video GND 27V Dem Video Power GND Analog 5V 1 2 3 4 5 6 Analog GND 1 2 3 4 5 6 7 8 9 10 5V 5V 5V 5V SIRCS SIRCS D GND D GND CN...

Страница 96: ...rcuit of the PCS 1500 1500P system Refer to Fig 3 4 1 PCMCIA block The PCMCIA block consists of the PCMCIA interface buffers and power supply control IC The PCMCIA block is the interface for the memory card Refer to Fig 3 4 2 UART block The UART block consists of the universal asynchronous receiver transmitters and the line driver receivers The UART block is the VISCA interface for the camera PCS ...

Страница 97: ...ideo selectors buffers and inductors and capacitors anti alias filter It performs termination of the input video signal and buffering and selecting of the YC video signal Refer to Fig 3 4 VIDOUT block The VIDOUT block consists of a low pass filters and video drivers It performs elimination of high frequency signals level setting and driving the video signal in 75 Z Refer to Fig 3 4 AC block The AC...

Страница 98: ...nc Data Sync Sync Data Sync Data Clock 3 3 5V Y C Y C Comp PCMCIA Comp Comp DE 54 board Y C Y C Internal Mic External Mic LINE LINE OSC 54MHz OSC 40MHz OSC 7 5MHz OSC 40MHz OSC 7 5MHz BRI 2B Clock 12 288 MHz Clock Timing Data Timing Data V 35 Optional BRI 4B Optional Camera SIRCS in Camera RX 47 board SIRCS out IR Repeater 5 3 3V Clock Timing Data Data Clock Timing XR16C850 Buffer 3 6864 MHz Buffe...

Страница 99: ...MHz OSC 7 5MHz OSC 40MHz OSC 7 5MHz BRI 2B Clock 12 288 MHz Clock Timing Data Timing Data V 35 Optional BRI 4B Optional Camera SIRCS in Camera RX 47 board SIRCS out IR Repeater 5 3 3V Clock Timing Data Data Clock Timing XR16C850 Buffer 3 6864 MHz Buffer Buffer 3 3 5V Vcc 5V Vcc 10V ST16C550 Buffer Buffer T 120 Camera Ctrl Diag Port Clock Timing Data 12V 5V 3 3V Vcc 5V 2 3 3V BUS Clock 27MHz 32 768...

Страница 100: ... is generated by IC901 step down converter the 3 3 V 2 power and the 5 V 2 power are generated by IC902 step down converter and their peripheral FETs inductors and capacitors by switching and smoothing out the respective powers 10 V power is generated by IC904 regulator and 9 V power is generated by IC908 regulator The 3 3 V 2 power and the 5 V 2 power are turned on and off by controlling IC902 st...

Страница 101: ...2 C927 Q902 Q903 R902 L902 C926 DH3 DL3 LX3 CS3 FB3 Step Down Converter IC902 MAX786CAI ON3 ON5 5V 2 3 3V 2 12V 12V STANDBY Voltage Regulator IC904 NJM2370U10 VIN VOUT 12V C917 10V CTL Voltage Regulator IC908 L88MS09T VOUT VIN STB 12V C910 9V to DE 54 board SLEEP 5V Blanking Generator Control Logic POWER D907 5V Blankig Generator STANDBY D908 StbyLED from Output Port of IC750 NETIF BLOCK SHDN 12V ...

Страница 102: ... driver receiver to the serial controller input output At the same time because the PCMCIA interface bus cycle can be generated the PCMCIA interface can be realized by adding buffers and some I O ports only Fig 3 6 shows the connection between the CPU memories and the PCMCIA buffers As the memory two IC103 IC104 32 Mbit 2 M x 16 bit flash memories and two IC101 IC102 64 Mbit 1M x 16 bit x 4 banks ...

Страница 103: ...IC130 LVC245 or LCX245 CS6 CE1B MD4 CE2B A2 A22 D0 D15 D16 D31 WAIT IRL3 0 G DIR G 3 from I O Port from Bus Controller Buffer IC134 LVC244 or LCX244 RY BY CE A0 A20 DQ0 DQ15 BYTE WE OE RESET POR from PCMCIA Power Controller 3 7 MD3 MD5 CLK CKE CS RAS CAS WE A0 A11 A12 A13 LDQM DQ0 DQ15 UDQM D16 D31 D0 D15 Supply Voltage Supervisor IC115 TLC7733 from IC115 Delay RESET POR to Flash Memory Bus Contro...

Страница 104: ...he buffer control signals that are suited to the bus cycle generated by the CPU Generation of the device access control signals Bus wait control for the CPU Encoding of the interrupt priority levels and interrupt control such as masking some interrupts A part of the PCMCIA interface control The optimum setup for the bus cycle of each block which the CPU has generated is performed by the register i...

Страница 105: ...D0 D7 WE1 WE1 HD0 15 HA1 5 HWR HRD Buffer IC109 LVC244 or LCX244 G D0 D15 G DIR DEN5 DEN3 STANDBY HCS_x HRD_VCP HWR_VCP IRQ_x RES_x WAIT_PCM RES_PCM DEN_PCM 5V Bus 3 3V Bus DEN_OP CPU IC100 HD6417708S Transceiver IC105 LVC245 or LCX245 Transceiver IC108 LVC245 or LCX245 Vcc 3 3V 2 Vcc 3 3V 2 Vcc 3 3V Vcc 3 3V BS BS HWR_GOA 7 SLEEP PWD_AK WAIT_OP PWR_PCM RD_PCM Vcc 3 3V Vcc 3 3V Some of these are c...

Страница 106: ...sked by the bus control PLD IC110 of the CPU block Fig 3 8 Power Ccontrol of PCMCIA Block Fig 3 8 shows the power supply control block for the PCMCIA interface VPP and VCC of the PCMCIA are switched by controlling the switch IC IC135 in accordance with the card being used detected by the VS1 and VS2 signals However VPP is fixed to 5 V Both VCC and VPP are turned on only when the card is detected b...

Страница 107: ...ooped back The general purpose output ports of IC202 are used for the A25 and REQ REG signal of the PCMCIA interface IC201 and IC202 are reset by the RES_ALL signal that is supplied from the CPU block Interrupt signals are output from IC201 and IC202 respectively It operates on the 5 V power supply voltage UART IC201 XR16C850 TXD CS RESET CD A0 2 IOR CTS 8 3 RXD DTR DSR RI RTS IOW D0 7 HCS_USR HA1...

Страница 108: ... The interrupt signal is latched inside IC110 CPU block so that the level triggered interrupt are realized The operating clock 4 MHz of the microcontroller IC780 is generated by the crystal oscillator X780 The SIRCS block is reset by the RES_ALL signal that is supplied from the CPU block It operates on the 5 V power supply voltage HD7 0 HA3 0 HCS HRD HWE Port A7 0 Port D Port C7 0 Port B Port F P0...

Страница 109: ...g the SRAM address into the latches IC808 IC809 and writing the program code into the SRAM The interrupt signal to the CPU from the I Interface control IC IC800 is created when the I Interface control IC IC800 writes into the latch circuit IC806 IC805 IC803 using the SRAM interface This interrupt signal is once input into IC750 of the NETIF block and is multiplexed with the other interrupts then i...

Страница 110: ...6 805 803 EXTAL RESET DIR G Transceiver IC810 Buffer IC811 Latch IC808 809 WDT SDET INT CHK 2 CLK_L H OE DOE RAM 81504 SDETCLR STAT HA4 5 MODESET DOWNLOAD 2 MODE_SET HDEN DIR from CPU BLOCK from NETIF BLOCK IC750 from CPU BLOCK CK12M RES_BRI from CPU BLOCK Host Bus Decoder Block IC804 803 807 812 G NTSC PAL CAM_LOCK from CN910 HD0 HD2 HD4 HD7 T202 T201 from CN800 to CN800 FL800 8 8 from NETIF BLOC...

Страница 111: ...BRI block and the IF 744 board and detection of the line speed including generation of interrupt when the line speed changes for the V 35 interface The TDM_ASIC IC750 is partly used for the input output port that controls and detects the respective blocks of SIRCS BRI AUANA and PWR The operating clock signal 12 288 MHz of the TDM_ASIC IC750 is generated by the crystal oscillator X750 The interface...

Страница 112: ... 35 RT_V 35 RD_V 35 SD_V 35 INT_BRI CK12M from to BRI BLOCK from BRI BLOCK to BRI BLOCK 8 OE2 DIR Transceiver IC755 G OE1 8 D0 7 LAN_EN 5 A1 5 2 RD WR 2 RESET CS DEN Buffer IC754 758 Buffer IC756 Buffer IC751 752 Buffer IC752 Buffer IC753 Buffer IC753 Buffer IC753 Buffer IC752 Buffer IC703 LV_NET8K VCP_TDMFS VCP_TDMCK VCP_TDMDR VCP_TDMDX from to VCP BLOCK to AC BLOCK IC500 Vcc 3 3V 2 HD0 7 HD8 15 ...

Страница 113: ... signal that generates the frame sync signal is output from the AUX6 AUX7 output of the VCPex IC300 The input video data is supplied from the VIDAD block The output video data is sent to the VIDDA block Fig 3 14 shows the video input output signal interface of VCPex IC300 The fundamental clock signal of video data input output is the 27 MHz clock that is supplied from the Graphic Overlay ASIC IC35...

Страница 114: ... HWRREQ HRDREQ HIRQ N C N C RAS LCAS UCAS WE DQ0 DQ15 A0 A9 OE RAS LCAS UCAS WE DQ0 DQ15 A0 A9 OE RAS1 from to CPU BLOCK 16 3 LVHA1 3 HRD_VCP LVHD0 15 HWR_VCP IRQ_VCP 18 18 18 16 16 32 10 10 10 32 32 32 VCP_TDMFS VCP_TDMCK VCP_TDMDR VCP_TDMDX from to NETIF BLOCK ATFS_VCP ARFS_VCP AOUT_VCP AIN_VCP TDMFS TDMCK TDMDR TDMDX ATFS ARFS ADT ADR ACLK_VCP ACLK1 from to AC BLOCK AUX7 AUX6 AUX7_VCP AUX6_VCP ...

Страница 115: ... VSYNCIN HSYNCIN FIDIN PDOUT 0 7 VSYNCIN HSYNCIN FIELDIN PIN0 7 BLANKIN AUX4 Video Decoder IC400 HMP8117 VSYNC FIELD HSYNC P8 15 DVALIDIN DVALID VSYNC FID HSYNC PD0 7 Video Encoder IC402 CXD1913AQ SCL SDA SCL SDA CLK2 SYSCLK SCL SDA CLK 54MHz 27MHz 3 3V 5V 3 3V 5V PARAM0 1 2 3 CLKIN BYPASS AUX0 1 2 AUX3 Low Even High Odd Low Blank 8 8 8 8 8 8 F F 8 F F IC356 357 F F F F IC358 Field Memory IC351 MS...

Страница 116: ...PU using the I2 C bus SCL SDA termi nals via the Graphics Overlay ASIC IC352 The Video Decoder IC400 is reset by the output port of the Graphics Overlay ASIC IC352 or by setting the register inside the Video Decoder IC400 At the same time the Video Decoder IC400 can output the interrupt signal IRQ_VDEC The operating clock signal 27 MHz of the Video Decoder IC400 is created by buffering the output ...

Страница 117: ...F 10V 75Z LPF 10V 75Z AMP AMP AMP Video Selector IC401 NJM2285 Video Driver IC403 NJM2268 FL402 FL403 FL404 Video Driver IC403 NJM2268 Video Driver IC404 NJM2268 Monitor S Video Y AUX Composite Video Monitor S Video C to CN400 to CN401 Vcc 5V 4 5V 2 Vcc 5V 4 5V 2 Vcc 5V 4 5V 2 AVcc 5V 4 5V 2 AVcc 5V 3 5V 2 Vcc 5V 3 5V 2 Graphics Overlay ASIC IC352 uPD65946GJ 056 SCL SDA A0 A6 RD D0 D15 INTREQ from...

Страница 118: ...led by the output port of the Graphics Overlay ASIC IC352 Refer to Fig 3 15 Power to the video output analog circuit is the 5 V 4 power that is obtained from the 5 V 2 power supply via an LC filter It operates on the 3 3 V 2 and the 5 V 2 power supply voltage VIDIN block The VIDIN block is the analog video circuit up to the Video Decoder IC400 that consists of 75 Z terminating resistors the Video ...

Страница 119: ...ansmission audio data to the VCPex IC300 and receiving the before decompressed decoded receiving audio data from the VCPex IC350 The clock signal and the frame sync signals for the serial signals are generated by the Serial Timing Generator IC501 The frame sync signals that connect the AC block and the EC block are synchronized with the line s 8 kHz rate The frame sync signals that connect the AC ...

Страница 120: ... 8x83606AK Serial Timing Generator IC501 M4LV 64 32 12VC RAP00 INT3 INT4 8KHz 8KHz 16KHz IRQD RXD 16KHz ADR_V ARFS_V ATFS_V SCK1_C AUD8K AUD8K SIEN1_C SOEN1_C 2 SOEN1_C 1 SO1_C 2 4 096MHz SEN2_C 2 SEN2_C 1 SC02_N SC02_E AUD16K SCK1_E SC12_E SC11_E SCK_A LRCK_A 8 192MHz from VCO PLL IC500 SO1_C 1 4 096MHz AUX7 AUX6 FST_EN FSR_EN P3 INT2 P2 INT1 FST_EN Low 196 FSR_EN Low 196 FST_EN Low 196 FSR_EN Lo...

Страница 121: ...AC block side of Echo Canceller DSP1 IC570 performs transmission of the before compressed coded transmission after echo is removed audio data to the Audio Codec DSPs IC520 IC530 and receiving the decompressed decoded receiving audio data and the other audio data such as ringer tone etc Between the Echo Canceller DSP1 IC570 and Echo Canceller DSP2 IC540 the data that is required to share the proces...

Страница 122: ...io signal is output from the left channel of the D A converter IC600 amplified by the operational amplifier consisting of the operational amplifier IC603 and feeds the AUDIO OUT connec tor AUDIO OUT can be muted by the MUTE circuit that is controlled by the port output OUT_MUTE of the NETIF block IC750 The audio output signal for the built in speaker is output from the right channel of the D A con...

Страница 123: ...r IC121 MC10M107MEL the signal whose phase is delayed by the two stage delay elements consisting of resistor and capacitor and the direct signal that is input after a simple buffer are logic EXNORed DEMODULATOR The output signal TP121 of the EXNOR gate is the demodulated signal that still includes the high frequency component Only the video signal bandwidth is separated and the video signal is obt...

Страница 124: ...rared IR Receiver Board IPM 93 Infrared IR Receiver Board DE 54 FM Demodulator Board 6 6 1 1 3 CN101 CN402 CN403 CN701 CN801 TP401 TP421 TP402 TP422 TP403 TP423 TP404 TP424 TP101 TP102 TP121 TP141 TP142 TP143 3 5 5 3 STEP UP IC301 ANALOG_9V ANALOG_27V ANALOG_9V ANALOG_5V ANALOG_5V ANALOG_5V ANALOG_5 9V Q901 5 7 ANALOG_5V ANALOG_9V 2 4 2 4 R801 R701 L491 L492 L193 L194 L192 L302 ANALOG_27V ANALOG_5...

Страница 125: ...ock consists of the I Interface LSI HD81504 IC100 IC200 and the two SRAMs The ISDN call control firmware is stored in one of the two SRAMs IC101 IC201 and the other SRAM IC102 IC202 is used as the RAM area of the I Interface LSI HD81504 The firmware is downloaded from the host flash memory to the RAM that the I Interface LSI HD81504 IC100 IC200 uses as a ROM area 3 Receive call detection and memor...

Страница 126: ...aded 256Kbit SRAM T202 FL200 T201 CN200 IC200 IC202 IC201 Data Address Set Block IC312 2D0 7 2A0 14 Buffer OP_HD0 7 OP_HA1 3 IC106 107 109 IC206 207 209 CN300 Buffer TBA_BRI2 TBB_BRI2 RBA_BRI2 RBB_BRI2 CK8K_BRI2 CK64K_BRI2 TBA_BRI3 TBB_BRI3 RBA_BRI3 RBB_BRI3 CK8K_BRI3 CK64K_BRI3 OHA4 5 OP_HD0 7 OP_HD0 7 2D0 7 2D0 7 2D0 7 2A0 14 2A0 13 IC301 IC304 IC300 IC301 HOST I F Control Receive Call Detection...

Страница 127: ...e form of a balanced signal in which the signal amplitude must swing both in the positive and negative directions It requires 5V power supply voltage for the V 35 transceiver IC101 On the other hand all of the call control signals are unbalanced transmission signals conforming to the V 28 electrical characteristics that can be directly interfaced with the EIA 232C electrical characteristics Theref...

Страница 128: ...uffer CN100 Buffer V 35SD OHA4 5 OHD0 7 IC103 IC104 V 35 Transceiver V 28 Transceiver IC101 V 35RD V 35RT V 35ST V 35TT V 35CS V 35DR V 35RI V 35ER V 35RS 366CRQ 366DPR 366NB 1 2 4 8 366ACR 366PND 366DLO IC102 Receive Call Detection Block OPSDET 366DLO V 35RI NETOPINT IC204 205 206 Voltage Converter 5V 5V IC100 3 2 Circuit Description of the Respective Boards ...

Страница 129: ...k 3 3 5V Y C Y C Comp PCMCIA Comp Comp DE 54 board Y C Y C Internal Mic External Mic LINE LINE OSC 54MHz OSC 40MHz OSC 7 5MHz OSC 40MHz OSC 7 5MHz BRI 2B Clock 12 288 MHz Clock Timing Data Timing Data V 35 Optional BRI 4B Optional Camera SIRCS in Camera RX 47 board SIRCS out IR Repeater 5 3 3V Clock Timing Data Data Clock Timing XR16C850 Buffer 3 6864 MHz Buffer Buffer 3 3 5V Vcc 5V Vcc 10V ST16C5...

Страница 130: ......

Страница 131: ...d on SS 04 5 When the main power is turned on the logotype SONY appears but the picture from SS 05 camera does not appears 6 The PCS 1500 1500P system cannot be controled by remote commander SS 06 7 Camera control cannot be operated SS 07 8 Cannot connect to line ISDN SS 08 9 Cannot connect to the circuit V 35 SS 09 10 After line is connected picture from a remote side cannot be displayed normally...

Страница 132: ...not be turned on even the POWER button of remote commander is pressed NO YES NO NO YES YES SS 01 0 0 0 0 POWER or STANDBY LED indicator turns on Power supply cable is correctly connected The system works correctly when the AC adapter is replaced Replace the AC adapter Connect it correctly YES NO SS 02 SS 06 SS 01 The logotype SONY appears when starting up the system if the main power is turned off...

Страница 133: ...ive call of the line that is connected to the port A can be performed successfully IF 744 board is used Automatic receive call of the line can be performed successfully when the IF 744 board is replaced Replace the IF 744 board Turn on the main power There is no problem YES YES NO NO NO YES NO YES SS 04 0 0 The types of monitor are supported by PCS 1500 1500P Monitor setting System Configuration 3...

Страница 134: ...otype SONY appears when starting up the system Camera is connected Menu operation can be performed after turning on the main power Select CAMERA as the input to camera using remote commander Camera picture is displayed There is no problem Connect a camera Remove the camera and turn on the main power again Menu operation can be performed after turning on the main power Replace the camera Menu opera...

Страница 135: ...O YES SS 06 0 0 RC 1 S 1 The logotype SONY appears when starting up the system Camera is connected Menu operation can be performed after turning on the main power Connect a camera Menu operation can be performed after turning on the main power There is no problem Remove the camera Menu operation can be performed by replacing remote commander Replace the remote commander ...

Страница 136: ... operated YES YES NO NO SS 07 S 1 Camera is securely attached to the PCS 1500 1500P Camera can be controlled when the camera is replaced Replace the camera Attach the camera securely to the PCS 1500 1500P 4 1 Check Items Before Starting Self diagnostics ...

Страница 137: ...d sound of the local station are output from the 6B loop back The remote station is defective Set it correctly Connect it correctly The system operates normally when the IF 744 board is replaced Replace the IF 744 board Replace the IF 744 board 2B loop back Press the START button after the system has started up normally input 1L to A1 and A2 and make a dial 6B loop back Press the START button afte...

Страница 138: ...etup and NCU setup are correct When the loop back number of Telecommunication Company is dialed up the line is connected The loop back number of Telecommunication Company can be called by manual dialing The system operates normally when the IF 745 board is replaced Replace the IF 745 board Set them correctly Connect and set them correctly Remote station is defective or their setup is incorrect Lin...

Страница 139: ...nnot be sent to a remote side NO YES NO YES YES NO NO YES SS 10 0 0 0 0 Inputs are set correctly When the loop back number of Telecommuni cation Company is dialed up the self view picture is displayed IF 744 board is used Set it correctly The remote station is defective The PCS 1500 1500P system works correctly when the IF 744 board is replaced Replace the IF 744 board ...

Страница 140: ...ly Video signal is output from the connected equipment Set them correctly The connected equipment is defective NO YES NO YES NO YES SS 12 AD 00 Audio Inputs are set correctly Microphone muting of the remote station is released Audio output is connected to monitor and sound volume is adequate Set them correctly Release microphone muting of the remote station Connect it correctly and increase the so...

Страница 141: ...ning the volume control of the remote station sound can be heard Voice of the local station itself can be heard from the 2B loop back There is no problem There is no problem Release the microphone muting Sound is output when the built in microphone is replaced Replace the built in microphone Connected equipment is normal Connected equipment is defective CN601 1 3 is in range of 4 6 V to 6 1 V Q601...

Страница 142: ...NO YES YES NO NO SS 15 AD 00 PCS A300 is used as the external microphone External microphone works when it is replaced by a normal external microphone External microphone is defective It cannot be used CN600 1 3 and CN600 4 5 are in range of 2 3 V to 3 5 V Q601 and its peripheral 4 1 Check Items Before Starting Self diagnostics ...

Страница 143: ...NO NO NO YES NO YES S 1 A 5 Harness and connector are connected correctly PCS 1500 1500P works when the camera is replaced F901 has correct conduction PCS 1500 1500P works when the camera is replaced Replace the camera Replace the camera Connect it correctly Replace F901 NO YES YES NO S 2 RC 1 Replace the battery Remaining power of the battery is sufficient PCS 1500 1500P works when the remote con...

Страница 144: ... of the local station appear from the 2B Telecommunication Company loop back Picture and sound of the local station appear from the 6B Telecommunication Company loop back Picture and sound of the local station appear from the 6B loop back Replace the IF 744 board Replace the IF 744 board There is no problem PCS 1500 1500P works when IF 744 board is replaced 1 Refer to 1 TDM loop back of BRI 2 2 Pr...

Страница 145: ...Locating the trouble whether it is in IF 745 board or in the PCS 1500 1500P system YES YES NO NO S 11 BRI 2 PCS 1500 1500P works when the IF 745 board is replaced Replace the IF 745 board The LINE I F menu of the dial setup contains V 35 IC755 IC754 and their peripheral ...

Страница 146: ...en the power is supplied correctly pin 5 of CN402 and CN403 27 3 V pin 3 of CN402 and CN403 5 0 5 V When the power is found not supplied correctly refer to the next paragraph 3 When the DE 54 board is suspected to be defective c Check that the 5 V power supply ANALOG_5 V and reverse bias to photodiode ANALOG_27 V are supplied correctly by measuring the voltage difference between pins 2 and 4 of CN...

Страница 147: ...ring in the circuit block of Ref 400 to Ref 409 Replace the transistor as needed c Check DC voltage at L492 and check the signal flow from TP421 to TP424 RF amplifier When the circuit is normal the waveforms No 1 to No 5 that are shown on page 4 20 can be obtained with no input signal fed to the infrared transmitter When the circuit is found abnormal Locate the poor soldering in the circuit block ...

Страница 148: ...ases that the main power of the infrared transmitter is not turned on some output signals are generated because the system noise or external disturbances due to natural light is amplified by the limiter When color bar signal is input to the infrared transmitter j Check the output waveform at TP141 Low pass filter integrator When the circuit is normal the waveform No 10 that is shown on page 4 21 c...

Страница 149: ...lace D161 Q161 to Q164 one after another and find out the location of error by confirming the waveform The composite horizontal and vertical sync signal is separated from the video signal at the circuit before the D161 anode The sync signal is rectified at the D161 cathode then video signal detection is performed at Q163 and Q902 When the video signal is not detected mute control is driven at the ...

Страница 150: ...1 2 1 2 1 2 1 2 No 2 1 TP401 2 TP421 HSA IF1 Adjust the transmitting angle of the transmitter until the angular amplitude becomes 400 mVp p No 3 1 TP402 2 TP422 No 1 1 TP401 2 TP421 HSA IF1 distance 50 cm Input signal None No 4 1 TP403 2 TP423 No 5 1 TP404 2 TP424 No 6 TP101 ...

Страница 151: ...4 21 PCS 1500 1500P 4 1 Check Items Before Starting Self diagnostics 11 8 MHz 0 9 Vp p 11 8 MHz 1 06 Vp p No 12 TP143 No 7 TP102 No 8 TP121 No 9 TP141 No 10 TP141 No 11 TP142 ...

Страница 152: ...ordance with the following notes Because there can be cases that the built in flash memories are cleared it is recommended to install the newest software before starting repair work The reference numbers and pin numbers are indicated as Ref No pin No Voltage between pins is indicated as Ref No pin No pin No Set the communication conditions of the terminal that is connected to the DIAG port as foll...

Страница 153: ...ted When the instructions such as the 2B 6B connection or loop back instruction in the middle of a flow chart confirm that the actual communication is 2B 6B using the communication status indication after completion of connection or loop back If flash memories IC103 IC104 are replaced inputting the following entry is required diag diagCompletionMark If the above described entry is not performed ap...

Страница 154: ...ng 4 2 Self diagnostics Function 0 0 YES YES YES YES YES install 7a0000 diag setVCPDRAMSize 4 diag auto NO NO MEMORY TEST PASSED ALL TEST PASSED NO NO YES NO NO P 01 C 01 The POWER LED indicator turns on when the POWER switch of processor is pressed Connect a terminal to the DIAG port and start up the DIAG mode The DIAG startup message appears Diagnostics on each block Replace IC101 and IC102 When...

Страница 155: ...O YES 0 0 0 0 YES 0 0 YES The system does not always start up Within 10 seconds after the main power is turned on data is present at the output of IC200 13 Within 10 seconds after the main power is turned on the signal level at IC200 11 changes Replace IC100 IC115 and its peripheral IC200 and its peripheral Cable connector or their peripheral X100 and its peripheral IC114 IC115 or their peripheral...

Страница 156: ...h the result There is no problem return to the original flow chart and continue its diagnosing P 01 Output voltage of AC adaptor 12 V YES YES YES CN900 1 2 12 V C940 12 V C918 12 V NO NO NO NO YES YES NO C900 3 3 V YES NO C901 5 V There is no problem Replace AC adaptor Replace CN900 Replace S900 Replace F901 IC900 Q900 D900 or their peripheral IC901 Q901 D901 or their peripheral ...

Страница 157: ...Replace IC902 Replace IC110 There is no problem Q902 Q903 or their peripheral Q906 Q907 or their peripheral There is no problem n When you have entered from other diagnostics flow chart to this flow chart P 01 and when you have ended the flow chart P 01 with the result There is no problem return to the original flow chart and continue its diagnosing ...

Страница 158: ...gnostics Function 4 2 2 Diagnostics on Each Block BRI when the line is unable to connect BRI 2 Audio AD 00 IF 744 board IF 7441 IF 745 board IF 745 SIRCS transmitter block IR 1 SIRCS receiver block RC 1 PCMCIA MC 1 USER DATA PORT UD 1 ...

Страница 159: ...cture of the local station is displayed on monitor and voice of the local station can be heard from your local station Picture of the local station is displayed on monitor and voice of the local station can be heard from your local station IC750 and its peripheral TDM IC800 and its peripheral 81504 Start up the service mode 2 Press the ALPHA button and move down joy stick to let the message CALL 6...

Страница 160: ... and its peripheral aprcnt CODEC1 internal data memory OK IC520 and its peripheral aprcnt CODEC1 external data memory OK IC521 and its peripheral aprcnt CODEC1 interrupt 3 OK AUD8K aprcnt CODEC1 interrupt SIO2 OK IC501 and its peripheral aprcnt aprcnt CODEC2 register OK IC530 and its peripheral aprcnt CODEC2 internal data memory OK IC530 and its peripheral aprcnt CODEC2 external data memory OK IC5...

Страница 161: ...IC500 of the audio block and its peripheral may have a trouble AD 1 IC520 3 8 kHz YES NO AD 3 IC570 134 16 kHz YES NO AD 2 IC530 3 8 kHz YES NO AD 4 IC540 134 16 kHz YES NO Replace IC520 IC501 and its peripheral IC501 and its peripheral IC570 and its peripheral Replace IC530 IC540 and its peripheral IC501 and its peripheral IC501 and its peripheral ...

Страница 162: ... the application by entering reboot and enter set 1470001c 8e mail 42 380d0007018080 Output of IC600 26 is returned to IC600 3 4 and is output from IC600 27 by this setting 1 Sine wave is present at IC600 26 Sine wave is present at IC600 3 4 Sine wave is present at CN602 1 2 Replace speaker Muting is NG Q602 Q603 Q604 or their peripheral IC600 and its peripheral Circuit between IC600 27 and IC602 ...

Страница 163: ...heral Replace speaker Fig 1 MIC IN AUX OUT 100 kZ 1 Waveform at IC600 5 6 IC604 1 3 CN600 4 and CN601 2 when the application is started and the command is inputted as follows under this state are shown at the end of this section set 1470001c 8e mail 42 380d0007018080 This enables to check the waveforms and voltage level n Before starting performing this diagnostics the digital check of the video b...

Страница 164: ...or and perform 1 diag audio analog 4 The PCS 1500 1500P works satisfactorily with the build in microphone Trouble is suspected in between CN601 to IC600 5 6 Diagnostics of audio block is complete Replace the built in microphone Q601 and its peripheral 1 Waveforms are shown as pictures CN601 2 IC604 1 3 when the application is started up and the following commands are inputted under this connection...

Страница 165: ...311 IC312 or their peripheral 3 Download BRI firmware done 4 Set normal mode done 5a Testing SRAM for firmware work area BRI 2 PASSED IC100 and its peripheral 5b Testing SRAM for firmware work area BRI 3 PASSED IC200 and its peripheral 6a Checking initialize message from BRI 2 PASSED IC100 and its peripheral 6b Checking initialize message from BRI 3 PASSED IC200 and its peripheral 7 BRI Firmware v...

Страница 166: ...nd voice of the local station can be heard from your local station Picture of the local station is displayed on monitor and voice of the local station can be heard from your local station IC750 and its peripheral TDM IC100 IC200 or their peripheral 81504 Loop back at telephone office Press START button enter the loop back number of telephone office to A1 A2 B1 B2 C1 C2 and dial up FL100 T101 T102 ...

Страница 167: ...e is 1E HEX Connect the V 35 cable to the IF 745 board and the network tool 1 Start up the application Enter 1 to A1 of dial list Select V 35 without RS 366 as the I F and make a transmission Picture of the local station is displayed on monitor and voice of the local station is heard Host interface block is defective Replace IC103 IC104 IC105 4 2 Self diagnostics Function ...

Страница 168: ...t RS 366 as I F and send it Picture of the local station is displayed on monitor and voice of the local station is also heard Repair of the data and timing systems is complete EMI filter is defective Replace the FL200 to FL209 Or IC101 and its peripheral V 35 3 NO YES V 35 1 V 35 3 Voltage at IC100 5 is _5 V Transceiver block V 35 is defective Replace IC101 and IC102 Voltage converter block is def...

Страница 169: ...e writable replace IC105 ow 14900010 FF Next check the LED indicator on the front panel using the network tool 1 V 35 1 NO V 35 1 V 35 4 YES YES 1 Sony Part Number J 6387 400 B LED indicators of ER and RS turn on LED indicators of CRQ and DPR turn on Transceiver block is defective Replace IC200 and C210 to C214 Replace FL210 and FL211 Transceiver block is defective Replace IC201 and C215 to C219 R...

Страница 170: ...number of the telephone office to A1 of dial list select V 35 with RS 366 as I F and make a transmission Picture of the local station is displayed on monitor and voice of the local station is heard at the local station Repair of the control signal system is complete Transceiver block is defective Replace IC202 and C220 to C224 Replace IC203 and C225 to C229 Replace FL219 and FL220 to FL223 ...

Страница 171: ...ostics Let the prompt display on the monitor diag sircs send When the IR repeater is directed toward the camera emission can be checked The remote control unit turns on when the IR repeater is replaced IC780 and its peripheral IC780 and its peripheral IR 1 NO YES YES YES NO NO TV can be controlled IR repeater has no problem ...

Страница 172: ...e PCS 1500 1500P Input from camera PASSED There is no problem Signal level changes at IC781 11 when the system receives the remote control signal IC780 and its peripheral Signal level changes at IC781 1 when the system receives the remote control signal RX 47 CN790 or their peripheral IC700 its peripheral or camera is abnormal IC780 and its peripheral ...

Страница 173: ...wing commands with the PCS 1500 1500P that is known to be working correctly diag pcmciaif_testcardmarker Insert the diagnostics card and enter diag pcmciaif There is no problem Card detection PASSED Read write error Write Confirm that the card is write protected If not IC135 and its peripheral is defective CN101 IC134 or their peripheral Read Card connector CN101 and its peripheral Power supply IC...

Страница 174: ...4 6 2 3 7 8 9 UART detection DETECTED NO NO YES Internal data path loop back test PASSED YES External loop back test PASSED YES NO After connecting the loop back tool 1 start up the system using the diagnostics mode diag userdata There is no problem Check connection and software Replace IC201 Replace IC203 4 2 Self diagnostics Function ...

Страница 175: ...UART Camera Control A 5 BRI A 6 VCP SRAM A 7 VIDEO A 8 LED A 9 Interrupt A 10 SIRCS A 11 m When self diagnostics results in FAIL input the following commands again after repair is complete diag setVCPDRAMSize 4 diag auto Then confirm that the system passes all the diagnostics items To diagnose A x of this list individually refer to the subsequent page ...

Страница 176: ...ker Make the diagnostics card for PCMCIA I F Make diagnostics card for PCMCIA I F using the PCS P150 P150P that is known to be working correctly pcmciaif Diagnostics of PCMCIA I F if 744 Diagnostics of the BRI control and the memory of the IF 744 board iicwrite 3 Writing into the device on the I2 C bus iicread 3 Reading from the device on the I2 C bus 1 The commands of this column execute continuo...

Страница 177: ...4 47 PCS 1500 1500P 4 2 Self diagnostics Function Example of using the command install 7a0000 diag setVCPDRAMSize 4 diag video diag iicwrite 88 1D 12 diag iicread 88 1D diag auto ...

Страница 178: ...ll devices that are connected to the 5 V bus are abnormal All devices that are connected to the 3 3 V 2 bus are abnormal Diagnose the individual device that have resulted in error IC108 IC109 or their peripheral IC105 IC106 IC107 or their peripheral 4 2 Self diagnostics Function ...

Страница 179: ...4 49 PCS 1500 1500P 4 2 Self diagnostics Function A 4 X101 32 768 kHz YES P 01 P 02 0 0 A 3 NO X100 7 5 MHz YES NO IC100 and its peripheral Replace X101 Replace X100 ...

Страница 180: ...O NO YES Internal loop back OK YES YES YES NO NO The system passes the test when the camera is replaced Replace the camera IC202 and its peripheral A change is observed at IC204 13 when diag cameracontrol is performed IC204 C223 to C226 or their peripheral IC202 and its peripheral ...

Страница 181: ...S NO NO NO YES BRI 2 The system has passed all the tests Replace IC801 The same error occurs when diagnostics is performed again IC803 to IC812 or their peripheral Re start from the beginning Re start from the beginning Replace IC802 Perform the workarea SRAM this Diag again Passed IC800 IC758 or their peripheral IC750 X750 or their peripheral ...

Страница 182: ...tware When the BRI block is diagnosed confirm that the diagnostics of each line has not ended in FAIL This bug occurs when the following commands are used but the bug does not occur in the new version diag bri diag auto BRI diagnostics 1 Set download mode 2 Testing SRAM for BRI firmware PASSED 3 Download BRI firmware done 4 Set normal mode done 5 Testing SRAM for firmware work area PASSED 6 Checki...

Страница 183: ...MEOUT Replace IC301 and IC302 IC300 and its peripheral Replace X300 LED indicator that does not turn on or flash is the following LED Does not turn on Does not flash Does not turn on Does not flash There is no problem There is no problem D908 Q908 or their peripheral IC905 Q909 IC750 or their peripheral D907 Q910 IC906 or their peripheral IC905 Q911 or their peripheral ...

Страница 184: ...gnostics The input video signal NTSC PAL including the camera signal has no error IC303 IC304 IC305 IC306 or their peripheral Check the input signal IC354 IC352 or their peripheral Replace X300 m When an error occurs during the DRAM test of VCP the DRAM may be defective or the clock 27 MHz V Sync of the video system may be not input correctly When the application does not work even though the syst...

Страница 185: ...ead 88 1D IIC Data FF Video encoder color bar is OK The GOA test pattern is OK Either AUX or MONITOR is outputted at least I2C control is effective for the video decoder 1 IC402 and its peripheral IC353 X350 IC402 or their peripheral IC352 X350 IC402 or their peripheral MONITOR is not output IC403 Q400 Q401 Q402 Q403 or their peripheral AUX is not outputted IC404 Q404 Q405 or their peripheral This...

Страница 186: ...arness connector IC400 or their peripheral Connect a camera Connector harness IC400 IC401 or their peripheral IC405 IC354 or their peripheral Connector IC400 or their peripheral Connector IC400 IC401 or their peripheral Color bar is output IC350 IC356 IC357 IC358 IC400 or their peripheral IC300 and its peripheral Connector IC400 or their peripheral Waveform pictures at the input terminals AUX1 AUX...

Страница 187: ...ere is no problem IC350 IC351 or their peripheral Board is connected to FFC correctly in the PCS 1500 1500P The PCS 1500 1500P works when the IPM board is replaced Replace the IPM board Connect them again The PCS 1500 1500P works when the DE 54 board is replaced Replace DE 54 board CN902 and its peripheral 4 2 Self diagnostics Function ...

Страница 188: ...IC300 IC111 or their peripheral IC202 and its peripheral IC201 and its peripheral n When the input signal arrives at the respective interrupt input pin of PLD IC110 and the above describe tests have resulted in FAIL the PLD IC110 may be defective When same symptom occurs even after replacing the PLD IC110 the CPU IC100 may be defective 4 2 Self diagnostics Function ...

Страница 189: ... the built in receptor of the PCS 1500 1500P is OK The input signal that is received by the camera receptor is OK The test No 4 is regarded OK in case when SIRCS receiving tool is not available There is no problem Check harness and replace the camera 4 2 Self diagnostics Function ...

Страница 190: ... 2 Self diagnostics Function WAVE FORM NTSC Video Input AUX1 AUX2 IC400 75 color bars CN400 3 4 3 4 5 19 IC400 7 CN400 4 IC400 5 19 PAL Video Input AUX1 AUX2 IC400 75 color bars CN400 3 4 IC400 7 CN400 4 IC400 5 19 3 4 5 19 ...

Страница 191: ...4 61 PCS 1500 1500P 4 2 Self diagnostics Function 29 32 Q401 Q403 FL405 FL406 FL407 2 Q405 E IC402 24 FL405 406 2 Q401 403 E NTSC Video output IC402 100 color bars IC402 29 32 ...

Страница 192: ...4 62 PCS 1500 1500P PAL Video output IC402 100 color bars IC402 29 32 4 2 Self diagnostics Function 29 32 Q401 Q403 FL405 FL406 FL407 2 Q405 E IC402 24 FL405 406 2 Q401 403 E ...

Страница 193: ...4 63 PCS 1500 1500P 4 2 Self diagnostics Function 3 4 1 2 IC600 27 A 4 CN602 1 2 A 5 IC600 3 4 A 3 CN401 3 A 2 AUDIO IC600 26 A 1 ...

Страница 194: ...4 64 PCS 1500 1500P 4 2 Self diagnostics Function 5 7 CN600 4 A 9 IC604 1 A 7 IC600 5 7 A 10 IC604 3 A 8 CN601 2 A 6 ...

Страница 195: ...34 41 44 47 Network not available Please try again later 50 Not Subscribed Please check the remote party s facility subscription 57 58 Bearer capability not authorized Check if the line rate is set correctly 70 Line Rate Error Please check if the line rate is set to correctly 88 Incompatible equipment on remote site Please check if remote party has compatible system 91 95 102 111 Local system out ...

Страница 196: ...age Meaning MEETING STARTS Connection with the remote party has been completed the meeting can now begin AUTO RECEIVE CALL IN PROGRESS The system while in auto answer mode has received an incoming all and is connecting to the remote party MEETING ENDS Operations for ending the meeting have been completed PLEASE WAIT FOR SAVING Wait for a while the data saving is completed ...

Страница 197: ...m the slot 5 Attach the serial number label that was supplied with the PCS UC150 to the flat blank space on the bottom panel of the compact conference package n A memory card that is marketed as a merchandise can only be used once for installation 6 2 Upgrading the PCS UC150 When Commissioning into Service If a serial number label is already stuck to the bottom panel of the PCS 1500 1500P it indic...

Страница 198: ......
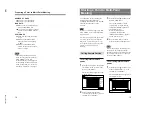
Отзывы: