

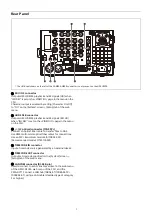


12
Connecting a USB drive
Connect the USB drive to the USB connector on the front
panel of the unit. The USB drive is mounted automatically
when it is accessed from the PWA-RCT1 or web menu.
When removing the USB drive, first unmount it from the
PWA-RCT1 or web menu.
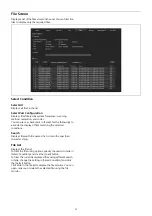
USB drive information display
Information relating to the USB drive is displayed on the
[Storage] screen > [External] tab
of the web
menu.
Formatting a USB drive
1
Select [FS Format] in [USB Storage Settings] on the
[Storage] screen > [External] tab of the web menu.
2
Click the [Start] button.
The format process begins and a “Please wait.”
message appears.
The message window closes automatically when the
process ends.
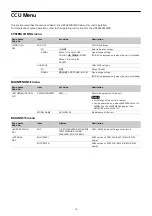
NAS
A recorded file of the video signal from the camera can be
transferred to a NAS connected to the unit via a 10 Gigabit
network.
Connecting a NAS
Connect the NAS to a 10 Gigabit network that is connected
to the LC optical connector on the rear panel of the unit.
The NAS must be registered using the web menu before
use. Up to three NAS units can be registered.
Registering a NAS
1
Click the [Edit] button in [Network Server List] on the
[Storage] screen > [External] tab of the web menu.
A NAS registration dialog appears.
2
Configure the following items.
• NAS server name
• IP address
• Transfer destination folder
• NAS user name and password
3
Click the [Submit] button.
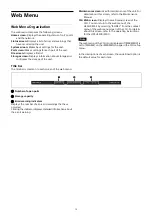
Recording, Playback, and
File Operations
This section describes the recording, playback, and file
operations for video and audio using the unit.
Each operation is controlled from PWA-RCT1. For details
about operation, refer to the PWA-RCT1 Help.
Recording
You can record video and audio in the internal storage of
the unit.
While recording to internal storage, you can also
simultaneously record (chasing transfer) to external storage
(USB drive or NAS).
Direct recording to external storage only is not supported.
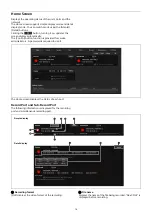
Preparation for recording
Configure the following settings before starting to record.
Recording format selection: [System] screen > [Board] tab
of the web menu
Video input signal selection: [System Parameter] on the
[System] screen > [Setup] tab of the web menu
Audio settings: [Port] screen > [Record] tab of the web
menu
Timecode and user bits settings: [System] screen > [Setup]
tab and [Port] screen > [Record] tab of the web menu
Displayed timecode settings: [Character] on the [System]
screen > [Setup] tab of the web menu
Simultaneous recording
You can simultaneously record in 4K (QFHD) and HD to
internal storage.
Configure the settings on the [System] screen > [Board] tab
of the web menu.
The following table shows the supported formats for
simultaneous 4K+HD recording.
Playback
You can play files that are stored in the internal storage of
the unit. Files that are stored in external storage cannot be
played.
In addition to normal playback, single file repeat playback
is supported.
Main recording
Sub recording
XAVC-I Class480
3840×2160
59.94p
XAVC-I Class100
1920×1080
59.94p, 59.94i
50p
50p, 50i
29.97p
29.97p
25p
25p
23.98p
23.98p
XAVC-I Class300
3840×2160
59.94p
XAVC-I Class100
1920×1080
59.94p, 59.94i
50p
50p, 50i
29.97p
29.97p
25p
25p
23.98p
23.98p


