4-4 CUE Menu
4-28
Chapter 4
Menu Settings
Chapter 4 Menu Settings
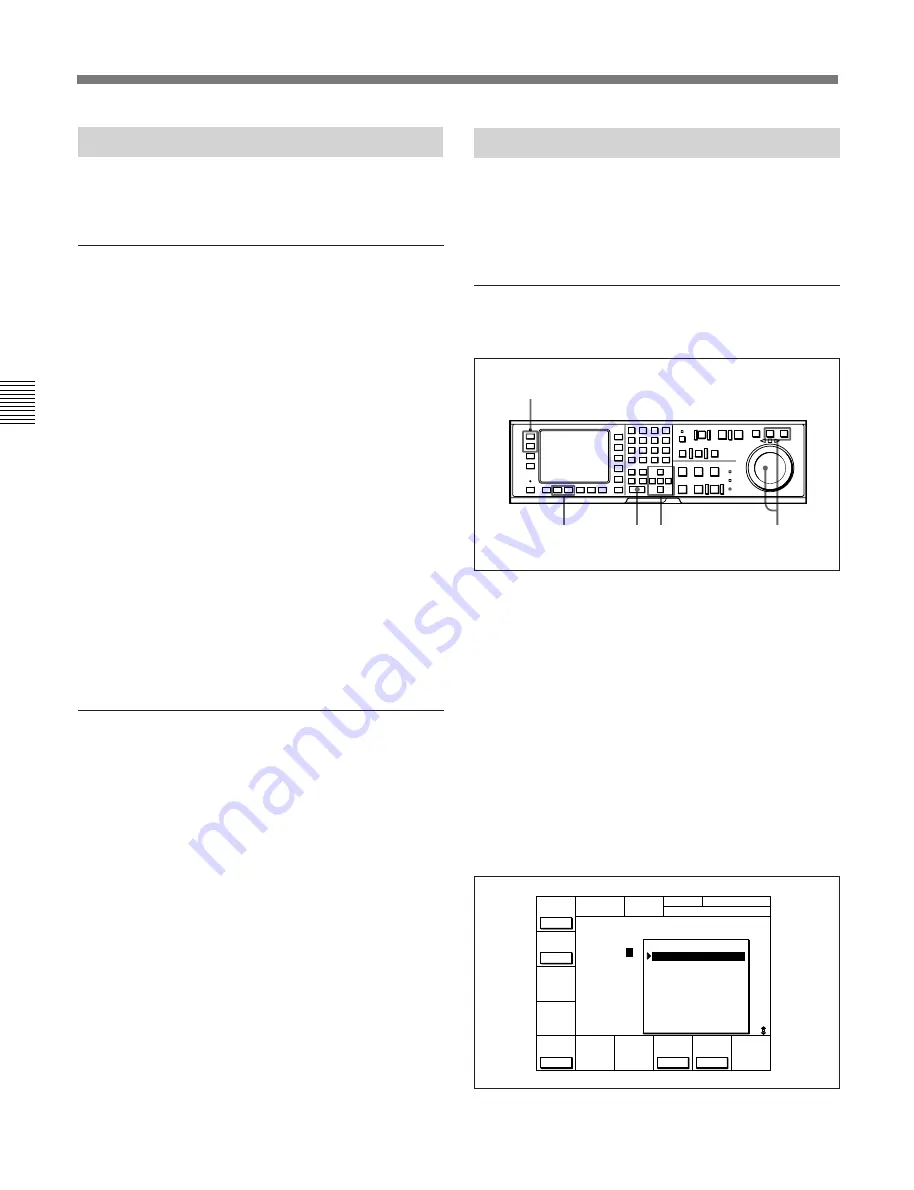
4-4-2 Registering Cue Points
There are two ways to register cue points: (1) by direct
registration of the tape address where the ENTRY
button is pressed, and (2) by the entry of cue point data
with the numeric buttons.
Registering cue points by pressing the
ENTRY button
Registering cue points by pressing the ENTRY button
1
Press the ALT button, then the
[F8]
(PAGE
MODE) button or the
[F9]
(EXTEND MODE)
button.
2
If you selected PAGE mode, press the ALT button,
then the
[F1]
(PREV PAGE) button or
[F2]
(NEXT
PAGE) button (or use the numeric buttons to enter
the page number in the data entry window, then
press the ALT button again, then the
[F8]
(PAGE
SET) button).
3
Press the
G
or
g
button to move the cursor (
z
) to
the cue number to be registered.
4-4-1 Selecting a Multi-Cue Mode
The BKDW-515 has the following two multi-cue
modes.
PAGE mode
Press the ALT button, then the
[F8]
(PAGE MODE)
button.
In PAGE mode, cue point data can be accessed by
page number, thus speeding up cue point registration
and cuing operations.
Display
Cue points are displayed in groups of 10, number 0 to
9, 10 to 19, etc. Each display is a page.
Selecting a page
There are the three following ways to select a page:
• Press the
[F1]
(PREV PAGE) button.
The previous page is shown.
• Press the
[F2]
(NEXT PAGE) button.
The next page is shown.
• Enter the desired page number with the numeric
button, then press the
[F8]
(PAGE SET) button.
If you enter 1, for example, page one appears,
containing cue point numbers 10 to 19.
EXTEND mode
Press the ALT button, then the
[F9]
(EXTEND
MODE) button.
In EXTEND mode, you can do operations that cannot
be done in page units, such as the consecutive
registration of more than 10 cue points.
Display
The screen displays a list of 100 consecutive cue
points which can be scrolled. Press the
G
or
g
button
to scroll the list. Page columns are not displayed.
To quickly scroll a list
Press the
G
or
g
button while holding down the SFT
button.
1
3
2
4
5
C U E
T C R 0 0 : 0 0 : 0 0 : 0 0
[ I Å M C U E T I T L E ]
P Å G E : 0
1
1 0 0 0 : 0 0 : 0 0 : 0 0
1 1 0 0 : 0 0 : 0 0 : 0 0
1 2 0 0 : 0 0 : 0 0 : 0 0
1 3 0 0 : 0 0 : 0 0 : 0 0
1 4 0 0 : 0 0 : 0 0 : 0 0
1 5 0 0 : 0 0 : 0 0 : 0 0
1 6 0 0 : 0 0 : 0 0 : 0 0
1 7 0 0 : 0 0 : 0 0 : 0 0
1 8 0 0 : 0 0 : 0 0 : 0 0
1 9 0 0 : 0 0 : 0 0 : 0 0
2
3
4
5
6
7
8
9
N E X T
P Å G E
P R E V
P Å G E
C U E
P - R O L L
P Å G E
S E T
C U E N U M
S E T
Содержание DVW-500/1
Страница 18: ...1 1 Features Chapter 1 Overview 1 6 Chapter 1 Overview ...
Страница 86: ...4 7 SET UP Menu 4 44 Chapter 4 Menu Settings Chapter 4 Menu Settings ...
Страница 100: ...5 14 Chapter 5 Recording Playback 5 4 Playback Chapter 5 Recording Playback ...
Страница 120: ...6 2 Advanced Automatic Editing 6 20 Chapter 6 Editing Chapter 6 Editing ...


