Chapter 4
Menu Settings
4-23
Chapter 4 Menu Settings
T C R
.
2 3
:
5 9
.
4 0
.
1 8
*
S
R
H U T T L E
S T
I
L L
4-3-6 Recording VITC (VITC)
Press the
[F10]
(VITC) button to specify the recording
of VITC.
on: Records VITC generated by the internal time
code generator.
off: Does not record VITC. However, records VITC
inserted in the video input signal.
For details on the VITC insertion line, refer to “4-3-10
Setting the VITC Insertion Line (VITC POS-1/POS-2)” on
page 4-26.
4-3-7 Selecting CTL Display
Mode (TAPE TIMER)
Press the ALT button, then the
[F1]
(TAPE TIMER)
button to select a 12-hour or 24-hour clock for the
CTL display.
+/–12H: 12-hour clock
24H: 24-hour clock
4-3-8 ID Preset (ID PRESET)
The presetting of the ID code in non-volatile memory
as user bits data allows you to recall and record it
during later recording sessions.
Press the ALT button, then the
[F2]
(ID PRESET)
button to select the ID code recording mode.
on: Records the preset ID code as user bits data.
off: Records the user bits set through the control
panel.
To preset ID code, reset 603. ID CODE PRESET in
the VTR SETUP menu.
3
Drop frame mark of the time
code generator (DVW-A500/1
and 500/1 only)
2
Drop frame mark of the time
code reader (DVW-A500/1
and 500/1 only)
1
Types of time data
Time data
4
Field mark of the
VITC data
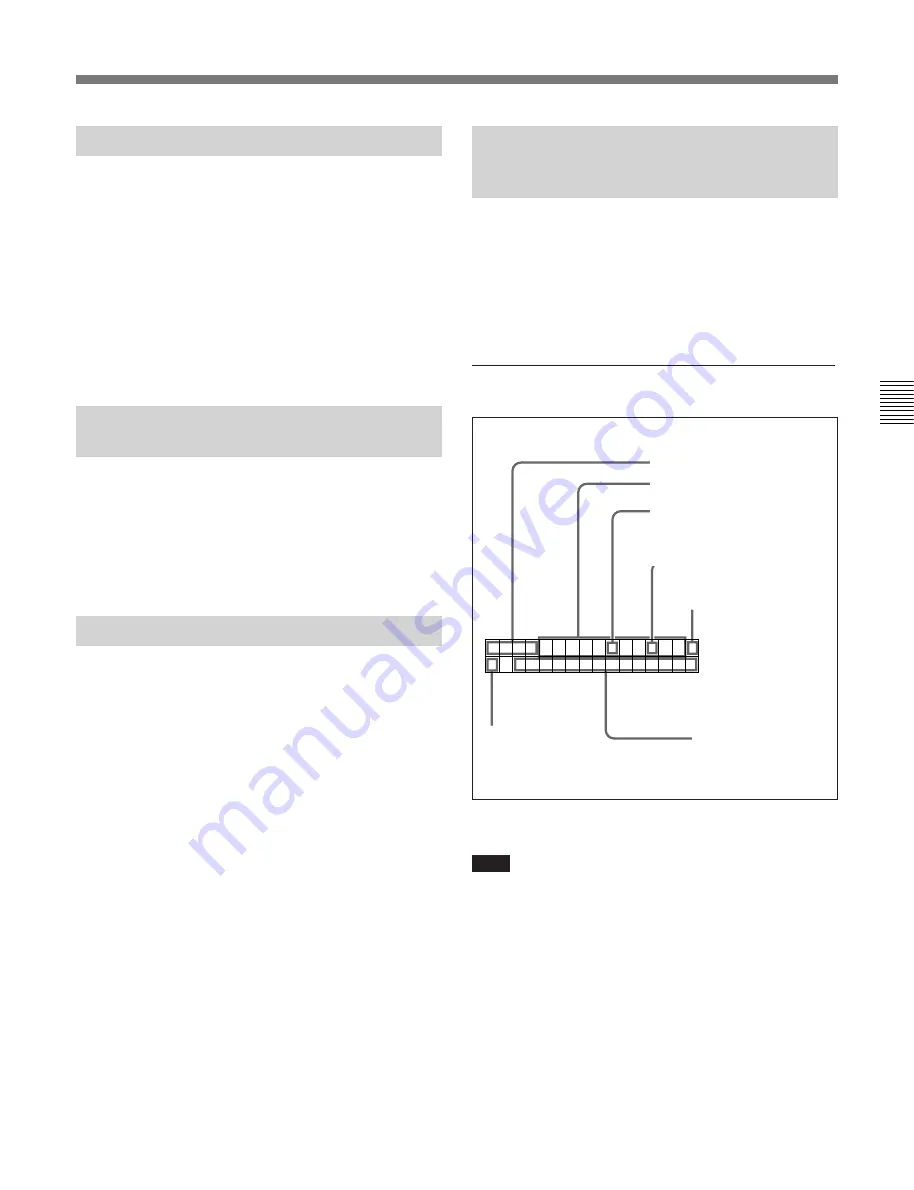
4-3-9 Superimposition of
Character Information (CHARA
SUPER/H-POS/V-POS)
When you select on by pressing the ALT button and
then the
[F6]
(CHARA SUPER) button, time data and
operation mode are indicated as character data
superimposed onto the signals output from the
SERIAL V/A OUTPUT 4(SUPER) and VIDEO
OUTPUT COMPOSITE 3(SUPER) connectors.
Contents of superimposed data
Contents of superimposed data
Note
The example above shows the factory-set contents of
data.
You can display different time data on the second line
by changing the setting of 005. DISPLAY
INFORMATION SELECT in the VTR SETUP menu.
5
Control VTR
indication
6
Operation mode
Содержание DVW-500/1
Страница 18: ...1 1 Features Chapter 1 Overview 1 6 Chapter 1 Overview ...
Страница 86: ...4 7 SET UP Menu 4 44 Chapter 4 Menu Settings Chapter 4 Menu Settings ...
Страница 100: ...5 14 Chapter 5 Recording Playback 5 4 Playback Chapter 5 Recording Playback ...
Страница 120: ...6 2 Advanced Automatic Editing 6 20 Chapter 6 Editing Chapter 6 Editing ...


