background image

8. 

Il tempo di cottura è terminato


Appena il tempo di cottura è terminato, viene emesso un segnale acustico, 

sul display appare “END“ e il dispositivo si spegne. Aprire nuovamente il 

coperchio come descritto sopra e rimuovere mediante una pinza da cucina i 

sacchetti da sottovuoto con gli alimenti.  Per un breve spostamento è possibile 

posare i sacchetti sul coperchio capovolto.


Tagliare accuratamente i sacchetti e rimuovere il cibo cotto.

9. 

Spegnere il dispositivo e staccare la spina


Appena il processo di cottura è terminato, spegnere il dispositivo con il tasto 

ON / OFF (toccare per 1 secondo) e scollegare il cavo di alimentazione. Dopo il 

termine di un tempo di cottura programmato, è necessario toccare due volte 

il tasto ON/OFF. Rimuovere sempre anche l’adattatore dalla presa del disposi-

tivo, in modo che il cavo elettrico non è collegato all‘apparecchio.


Lasciar raffreddare completamente l’apparecchio e l’acqua prima di scolare 

l’acqua e pulire il dispositivo.

NOTE:

Per spegnere completamente l’unità, toccare il tasto ON / OFF per 1 secondo.

È possibile mettere in pausa il conto alla rovescia in qualsiasi momento toccando il 

tasto  Start / Pausa 


(ciò, però, è possibile solo se è impostato un tempo di cot-

tura e la temperatura dell’acqua impostata è stata raggiunta). Durante la messa in 

pausa, lampeggia sia l’icona sul tasto Start / Pausa 


che il testo sul display. Toc-

cando nuovamente il tasto Start / Pausa 

, si avvia il conto alla rovescia del tempo 

di cottura rimanente e l’icona del tasto Start / Pausa 


si illumina costantemente. 

È possibile modificare in qualsiasi momento sia l’impostazione del tempo di cottura 

che quello della temperatura dell’acqua procedendo come descritto al punto 3 e 4.

Per controllare le impostazioni durante il processo di cottura, toccare brevemente 

(per 1/2 secondo) il tasto del timer o il tasto della temperatura.

5. 

Avviare ora il processo di cottura:


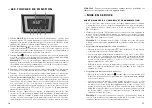
Toccare il tasto Start / Pausa 

, viene emesso un segnale acustico, il quale 

indica che il processo di riscaldamento è avviato. Il simbolo sul tasto s’illumina 

di blu ininterrottamente, sul display è possibile leggere in qualsiasi momento 

la temperatura corrente dell’acqua.

6. 

La temperatura impostata è raggiunta – 


Porre gli alimenti nel bagno d’acqua:


Appena la temperatura desiderata è raggiunta, viene emesso un altro segnale 

acustico, il display e il simbolo 


sul tasto Start / Pausa lampeggiano blu per 

ricordare di porre gli alimenti messi a sottovuoto e la grata nel bagno d’acqua.


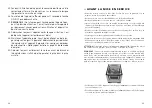
Aprire con cautela il coperchio con guanti o presine da cucina, usare entram-

be le mani e le due maniglie del coperchio.


Far attenzione al vapore d’acqua caldo e alle gocce d’acqua calde, le quali si 

sono accumulate sotto il coperchio, e ribaltare il coperchio in direzione oppo-

sta dal corpo, per evitare che il vapore salga in faccia.


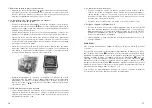
Posizionare i sacchetti per sottovuoto nella grata e metterli delicatamente 

nell’acqua calda (Non toccare l’acqua calda con le mani – Rischio di scottatu-

ra!). Controllare che il cibo nei sacchetti per sottovuoto si trovi completamen-

te sotto il livello dell’acqua. Versare un po’ di acqua calda nel serbatoio, se il 

cibo non è completamente coperto di acqua.


Collocare il coperchio delicatamente sul dispositivo e toccare con le mani 

asciutte il tasto Start / Pausa. L’apparecchio ora tiene la temperatura dell’ac-

qua per il tempo di cottura programmato. Il display e il simbolo 


sul tasto 

Start / Pausa s’illuminano costantemente di blu.

7. 

Controllare il tempo di cottura restante


Se è stato impostato il tempo di cottura, è possibile in qualsiasi momento toc-

care il tasto del timer 

 e sul display appare brevemente il tempo di cottura 

restante. Quindi il display torna alla temperatura corrente dell’acqua.

60

61

Содержание Sous-Vide Cooker Pro

Страница 1: ...SOUS VIDE COOKER PRO Typ Type Tipo 8201 S I N C E 1 9 0 8 Bedienungsanleitung Mode d emploi Istruzioni per l uso User Manual Gebruiksaanwijzing ...

Страница 2: ...ollen werden die Beutel dank des Gitters gleichmässig in der Mitte des Wasserbeckens verteilt damit das heisse Wasser optimal um die Lebensmittel Beutel zirkulieren kann Aus diesem Grund dürfen der Wasserauslass und einlass nicht von Lebens mittel Beuteln abgedeckt werden Das Gitter kann die Beutel horizontal und vertikal anordnen Wichtig ist dass die Lebensmittel im Beutel komplett unter der Wass...

Страница 3: ...ser oder einer anderen Flüssigkeit in Berührung kommen könnte z B in oder neben einem Spül becken s WICHTIGE SICHERHEITSHINWEISE Bitte lesen Sie vor Gebrauch Ihres Solis Sous Vide Cookers Pro diese Bedienungsanleitung aufmerksam durch damit Sie Ihr Gerät kennenlernen und sicher bedienen können Wir empfehlen diese Anleitung sorgfältig aufzubewahren und gegebenenfalls bei Weitergabe des Gerätes auch...

Страница 4: ... befindliche Wasser komplett abkühlen bevor Sie das Wasser ausgiessen bzw das Gerät reinigen oder verstellen 17 Gerät oder Teile des Geräts wie Netzkabel oder Netzste cker Anschlussadapter niemals ins Wasser tauchen oder mit Wasser bzw anderen Flüssigkeiten in Kontakt bringen 18 Gerät so platzieren dass es keiner direkten Sonneneinstrahlung ausgesetzt ist 19 Niemals scharfe oder spitze Gegenstände...

Страница 5: ...el immer komplett abrollen bevor Sie den Anschluss adapter in die Gerätebuchse stecken bzw den Netzstecker an der Steckdose anschliessen 9 8 s VOR DER INBETRIEBNAHME Bevor Sie Ihren Solis Sous Vide Cooker Pro das erste Mal benutzen entfernen Sie bitte alle eventuell vorhandenen Werbe Aufkleber Reinigen Sie das Edelstahl Wasserbecken mit einem feuchten weichen Tuch Wischen Sie den Deckel ebenfalls ...

Страница 6: ...r im Display erscheint stoppen Sie die Berührung der Taste Im Display erscheint nach 5 Sekunden wieder die momentane Wasser temperatur im Wasserbecken HINWEIS Es ist nicht dringend notwendig die Kochdauer einzustellen Wenn Sie den Timer auf 00 00 einstellen arbeitet der Sous Vide Cooker Pro so lange bis Sie ihn manuell wieder ausschalten s DIE FUNKTIONSTASTEN 1 1 3 6 7 2 4 5 ON OFF Taste Berühren ...

Страница 7: ... des Kochvorgangs zu überprüfen berühren Sie kurz für 1 2 Sekunde die Timer oder Temperatur Taste 5 Starten Sie nun den Kochprozess Drücken Sie die Start Pause Taste ein Signalton ertönt und zeigt an dass der Aufheiz Prozess gestartet wird Das Symbol in der Taste leuchtet kon stant blau im Display können Sie die momentane Wassertemperatur jederzeit ablesen 6 Die eingestellte Wassertemperatur ist e...

Страница 8: ...te generell ein Rindfleisch Steak oder Filet oder Entrecôte das im Sous Vide Cooker Pro zubereitet wird nicht dicker als 70 mm sein KOCHTABELLE Folgende Tabelle soll Ihnen helfen sich mit Ihrem neuen Gerät vertraut zu machen und Ihnen Hilfestellung geben welches Lebensmittel wie lange und bei welcher Temperatur gekocht werden kann Natürlich können Sie auch Ihre eigenen Vorlie ben umsetzen Sie könn...

Страница 9: ...rschlag 2 Brühe mit Kräutern zubereiten und einfrieren Bereiten Sie mit Kräutern Gewürzen Salz und Pfeffer und evtl Gemüse und Fleisch eine Gemüse Rinder oder Hühnerbrühe zu Lassen Sie die Brühe abkühlen giessen Sie die Brühe in eine Eiswürfelform und gefrieren Sie die Brühe im Gefrier schrank Bei Bedarf können Sie einen Brühe Eiswürfel in den Vakuumbeutel zu dem Lebensmittel geben während des Koc...

Страница 10: ...abel komplett vom Gerät damit es nicht mit Wasser in Kontakt kommt Warten Sie bis das Gerät und das Wasser abgekühlt sind bevor Sie das Wasser in den Ausguss giessen Reinigen Sie das Wasserbecken mit einem Tuch und wenn nötig etwas warmem Spülwasser Das Sieb am Wasserauslass sollten Sie mit einer weichen Bürste und etwas Wasser reinigen Anschliessend spülen Sie das Wasserbecken sorgfältig und troc...

Страница 11: ...e Das System erkennt nicht dass Wasser im Becken ist Geben Sie etwas Speisesalz in das Wasser und rühren Sie um Elektronik Fehler Bringen Sie das Gerät zu Ihrer Solis Servicestelle E002 Der Filter ist verschmutzt Reinigen Sie die Filter mit einer weichen Bürste und etwas Wasser Der Vakuumbeutel blockiert den Wassereinlass oder Wasser auslass Platzieren Sie den Vakuumbeutel neu benützen Sie dazu da...

Страница 12: ...fessional Art Nr Artikel 922 52 Vakuumierfolien Solis 2 Rollen 15 x 600 cm 922 51 Vakuumierfolien Solis 2 Rollen 20 x 600 cm 922 50 Vakuumierfolien Solis 2 Rollen 30 x 600 cm 922 61 Vakuumierbeutel Solis 50 Stück 20 x 30 cm 922 64 Vakuumierbeutel Solis 50 Stück 30 x 40 cm 703 01 SOLIPOL forte Entkalkungsmittel Faltflasche à1000 ml Sie erhalten das Zubehör für Ihren Solis Sous Vide Cooker Pro im gu...

Страница 13: ...rs gekennzeichnet Solis of Switzerland AG behält sich das Recht vor jederzeit technische und optische Veränderungen sowie der Produktverbesserung dienliche Modifikationen vorzu nehmen SOLIS HELPLINE 091 802 90 10 Nur für Kundinnen und Kunden in der Schweiz Dieser Artikel zeichnet sich durch Langlebigkeit und Zuverlässigkeit aus Sollte aber trotzdem einmal eine Funktionsstörung auftreten rufen Sie ...

Страница 14: ...ceux ci seront répartis de manière régulière au milieu de la cuve grâce à la grille de manière à ce que l eau chaude puisse cir culer régulièrement autour des sachets C est pourquoi il ne faut jamais recouvrir l entrée et la sortie d eau avec des sachets alimentaires La grille peut disposer les sachets de manière horizontale ou verticale Il est important que les aliments contenus dans les sachets ...

Страница 15: ...ptateur dans l eau Evitez tout contact avec l eau ou autre liquide 18 N exposez pas l appareil directement au soleil s CONSEILS DE SÉCURITÉ IMPORTANTS Merci de lire ce mode d emploi attentivement avant la pre mière utilisation afin de vous familiariser avec votre appareil et de l utiliser en toute sécurité Nous vous conseillons de conserver ce mode d emploi En cas de vente de l appareil merci de t...

Страница 16: ...e à nouveau la grille avec les sachets alimentaires et procédez comme décrit dans le chapitre Mise en service 19 Ne jamais introduire d objets aigus ou pointus dans les ouver tures de l appareil Risque d endommagement de l appareil ou d électrocution 20 Ne jamais secouer ou déplacer l appareil pendant son utilisa tion Ne déplacer jamais l appareil lorsqu il est rempli d eau et en marche L eau chau...

Страница 17: ...e Placez le Sous Vide Cooker Pro sur un plan de travail plat sec et insensible à la chaleur et à l humidité et prenez soin qu il y ait une circulation de l air suffisante autour de l appareil Mettez sous vide les aliments que vous désirez cuire dans des sachets Solis en utilisant un appareil à emballer sous vide Vérifiez que le sachet est parfaitement souder et bien sous vide Remplissez la cuve av...

Страница 18: ...ent nécessaire de sélectionner une durée de cuisson Si la minuterie est programmée sur 00 00 le Sous Vide Cooker Pro fonctionne tant que vous ne l éteignez pas manuellement s LES TOUCHES DE FONCTION 1 1 3 6 7 2 4 5 Touche ON OFF Effleurez la touche ON OFF pendant 1 seconde pour mettre en marche ou éteindre l appareil Le témoin sur l écran s allume dès que l appareil est en marche Le témoin rouge s...

Страница 19: ...nuterie ou de la température 5 Démarrez ensuite le processus de cuisson Appuyez sur la touche Start Pause Un signal sonore retentit pour indi quer que le processus de chauffage se met en place Le témoin situé sur la touche s affiche de manière constante en bleu Vous pouvez vérifier à tout moment la température actuelle de l eau sur l écran 6 La température de l eau programmée est atteinte Placez l...

Страница 20: ...érature indiquée Toutefois un steak de bœuf ou du filet ou une entrecôte qui est préparé sous vide ne doit pas avoir une épaisseur supérieure à 70 mm TABLEAU DE CUISSON Le tableau suivant est destiné à vous aider à prendre connaissance avec votre nouvel appareil et à sélectionner la durée et la température de cuisson selon les aliments Vous n êtes bien sûr pas obligé de respecter les consignes ind...

Страница 21: ...e manière hermétique Proposition no 2 Préparer un bouillon avec des herbes et le congeler Préparez un bouillon de volaille de bœuf ou de légumes avec des herbes épices sel et poivre et selon les cas des légumes ou de la viande Laissez le bouillon refroidir versez le bouillon dans des bacs à glaçons et congelez les Si vous le souhaitez vous pouvez ajouter un glaçon de bouillon aux aliments dans le ...

Страница 22: ...Retirez le cordon de l appareil afin qu il n entre pas en contact avec de l eau Patientez jusqu à ce que l appareil et l eau soient refroidis avant de vider l eau Nettoyez la cuve d eau avec un chiffon et si nécessaire un peu d eau de vaisselle chaude Nettoyez le tamis situé à la sortie d eau avec une brosse douce et un peu d eau Rincez ensuite la cuve soigneusement et séchez la Nettoyez le couver...

Страница 23: ...z l appareil sur un plan de travail plat Le système ne détecte pas l eau dans la cuve Ajoutez un peu de sel dans l eau et mélangez Erreur électronique Rapportez l appareil à votre service après vente Solis E002 Le filtre est sale Nettoyez le filtre avec une brosse douce et un peu d eau Le sachet sous vide bloque l en trée ou la sortie d eau Replacez le sachet Utilisez pour cela la grille fournie L...

Страница 24: ...ide Solis Vac Professional No d article Article 922 52 film plastique sous vide Solis 2 rouleaux 15x600 cm 922 51 film plastique sous vide Solis 2 rouleaux 20x600 cm 922 50 film plastique sous vide Solis 2 rouleaux 30x600 cm 922 61 sachet sous vide Solis 50 sachets 20x30 cm 922 64 sachet sous vide Solis 50 sachets 30x40 cm 703 01 détartrant SOLIPOL forte bouteille pliable de 1 000 ml Les accessoir...

Страница 25: ...utilisation et le recyclage des composants ainsi que des économies d énergie et de matières premières significatives Afin d attirer clairement l attention sur l obligation d élimination réglementaire de l appareil celui ci porte un symbole représentant un conteneur à ordures barré Solis of Switzerland SA se réserve le droit d apporter à tout moment des modifica tions techniques et de présentation ...

Страница 26: ...te la grata distribuisce i sacchetti uniformemente al centro del serbatoio dell acqua in modo che l acqua calda possa circolare in modo ottimale intorno ai sacchetti di cibo Per questo motivo l entrata e l uscita dell acqua non devono essere coperte da sacchetti di cibo La grata può disporre i sacchetti sia verticalmente che orizzontalmente È importante che il cibo nel sacchetto si trovi completam...

Страница 27: ...nto nell acqua o portarlo a contatto con l acqua o altri liquidi s NORME DI SICUREZZA IMPORTANTI Prima di utilizzare il Solis Sous Vide Cooker Pro si prega di leggere attentamente le istruzioni per l uso e le indica zioni di sicurezza in modo da conoscere e saper utilizzare in modo sicuro il dispositivo Consigliamo di conservare il presente manuale e in caso di cessione dell apparecchio ad altre p...

Страница 28: ... in anticipo la quantità d acqua immergendo i sacchetti di sottovuoto con cibo assieme alla grata nell acqua prima di mettere in funzione 18 Posizionare l apparecchio in modo che non sia esposto ai raggi diretti del sole 19 Non infilare mai oggetti o attrezzi appuntiti o affilati nelle aperture dell apparecchio L apparecchio potrebbe essere dan neggiato e vige pericolo di scossa elettrica 20 Non s...

Страница 29: ...anno umido e morbido Pulire anche il coperchio con un panno umido e morbido Appoggiare il Sous Vide Cooker Pro su una superficie di lavoro piana asciutta e insensibile al calore e all umidità e assicurare un adeguata circolazione d aria intorno al dispositivo Mettere sottovuoto gli alimenti da cucinare in un sacchetto Solis usando un dispositivo di sottovuoto Controllare che il sacchetto sia perfe...

Страница 30: ...e il tempo di cottura Se si imposta il timer a 00 00 il Sous Vide Cooker Pro lavora fino a quando viene spento manualmente s I TASTI DI FUNZIONE 1 1 3 6 7 2 4 5 Tasto ON OFF Toccare per 1 secondo il tasto ON OFF per accendere o spe gnere il dispositivo Il display si illumina appena il dispositivo si è acceso Anche il simbolo rosso sul tasto ON OFF s illumina costantemente appena il dispositivo è a...

Страница 31: ...o di cottura toccare brevemente per 1 2 secondo il tasto del timer o il tasto della temperatura 5 Avviare ora il processo di cottura Toccare il tasto Start Pausa viene emesso un segnale acustico il quale indica che il processo di riscaldamento è avviato Il simbolo sul tasto s illumina di blu ininterrottamente sul display è possibile leggere in qualsiasi momento la temperatura corrente dell acqua 6...

Страница 32: ...cata Tuttavia una bistecca di manzo o un filetto o una costata preparata nel Sous Vide Cooker Pro non deve essere più spessa di 70 mm TABELLA DI COTTURA La seguente tabella aiuta a familiarizzare con il nuovo dispositivo e a dare un punto d appoggio sui tempi e sulle temperature di cottura dei vari alimenti Naturalmente è anche possibile mettere in pratica le proprie preferenze È possibile regolar...

Страница 33: ...rro in modo da poterlo sigillare Suggerimento 2 Preparare e congelare del brodo con le erbe Preparare con erbe spezie sale e pepe ed eventualmente con verdure e carne un brodo vegetale di manzo o di pollo Lasciar raffreddare il brodo versarlo in una vaschetta per il ghiaccio e congelare il brodo nel freezer Se desiderato è possibile aggiungere un cubetto di ghiaccio di brodo nel sacchetto per sott...

Страница 34: ...l cavo di alimenta zione dal dispositivo per evitare che entri in contatto con l acqua Attendere che l apparecchio e l acqua si siano raffreddati prima di scolare l acqua nel lavandino Pulire il serbatoio dell acqua con un panno e se necessario un po di acqua tiepida e sapone Il filtro all uscita dell acqua si dovrebbe pulire con una spazzola morbida e un po d acqua Risciacquare accuratamente il s...

Страница 35: ...o su una superficie di lavoro piana Il sistema non riconosce che c è acqua nel serbatoio Aggiungere del sale da tavolo nell acqua e mescolare Errore elettronico Portare il dispositivo al vostro centro di assistenza Solis E002 Il filtro è sporco Pulire il filtro con una spazzola morbida e un po d acqua Il sacchetto sottovuoto blocca l entrata o l uscita dell acqua Riposizionare il sacchetto sotto v...

Страница 36: ...sional Art No Articolo 922 52 Pellicola per sottovuoto Solis 2 rotoli 15 x 600 cm 922 51 Pellicola per sottovuoto Solis 2 rotoli 20 x 600 cm 922 50 Pellicola per sottovuoto Solis 2 rotoli 30 x 600 cm 922 61 Sacchetti per sottovuoto Solis 50 pezzi 20 x 30 cm 922 64 Sacchetti per sottovuoto Solis 50 pezzi 30 x 40 cm 703 01 SOLIPOL forte decalcificante bottiglia pieghevole da1 000ml È possibile otten...

Страница 37: ...tesso è contrassegnato con un simbolo di un contenitore di rifiuti barrato Solis of Switzerland SA si riserva il diritto di apportare in qualsiasi momento modifiche tecniche ed estetiche nonché modifiche atte a migliorare il prodotto SOLIS HELPLINE Solo per i clienti in Svizzera Questo articolo si contraddistingue per la sua lunga durata ed affidabilità Se dovessero presentarsi dei problemi di fun...

Страница 38: ...s simultaneously the grid will ensure that the bags are evenly spread out in the center of the water basin This allows optimal hot water circulation around the food bags Therefore the water outlet and inlet must not be obstructed by food bags The grid can arrange the bags either horizontally or vertically It is important that the food in the bags is completely submerged in water In the water basin...

Страница 39: ...osed to direct sunlight 19 Never put sharp or pointed objects and tools into the appliance openings The appliance may become damaged danger of electric shock s IMPORTANT SAFETY PRECAUTIONS Please read through this user manual thoroughly before using your Solis Sous Vide Cooker Pro so that you become familiar with your appliance and can use it safely We thor oughly recommend that you keep these ins...

Страница 40: ...e appliance for the first time a little bit of smoke might develop This is normal for appliances that heat up during use and will stop after a short period of time 20 Do not shake or relocate the appliance while it is in operation Never move the appliance if it is filled with water and switched on The hot water might escape and cause scaldings 21 Only use the appliance as described in this manual ...

Страница 41: ... the food you wish to cook in Solis bags with a vacuum sealer Check the bag for a perfect seal to ensure the vacuum is kept Fill the water basin at least to the MIN marking with fresh tap water Use a water jug to do that never place the Sous Vide Cooker Pro in a sink and never hold it under the water faucet CAUTION The appliance will not start if the water level does not reach the MIN marking The ...

Страница 42: ...rature in the water basin NOTE It is not urgently required that the cooking time is set When you set the timer to 00 00 the Sous Vide Cooker Pro will work until you manually switch it off again s THE FUNCTION BUTTONS 1 1 3 6 7 2 4 5 ON OFF button Touch the ON OFF button for 1 second to switch the appliance on or off The display will light up once the appliance is switched on Also the red symbol on...

Страница 43: ...and 4 To check the settings during the cooking process briefly 1 2 second touch the Timer or Temperature buttons 5 Now start the cooking process Press the Start Pause button A signal sounds to indicate that the heating process is being started The symbol in the button constantly lights up blue the current water temperature can constantly be told from the display 6 The set water temperature is reac...

Страница 44: ...5 hours at the stated temperature However a beef steak or filet or entrecôte being prepared in the Sous Vide Cooker Pro should not be thicker than 70 mm COOKING CHART The following chart is intended to help you with getting used to your new appliance and give you directions as to which food should be cooked for what time at what temperature Of course you can implement your own preferences With the...

Страница 45: ...the bag can be sealed air tightly Recommendation 2 Making and freezing broth with herbs Prepare vegetable beef or chicken broth with herbs spices salt and pepper and maybe vegetables and meat Let the broth cool down pour the broth into an ice cube tray and freeze the broth in the refrigerator If desired you can add an ice cube of broth to the food in the vacuum bag During cooking the ice cube will...

Страница 46: ...second and pull the power plug from the socket Completely remove the power cord from the appliance to prevent it from coming into contact with water Wait for the appliance and the water to cool down before pouring the water into the sink Clean the water basin with a cloth and if necessary some warm dish water The sieve on the water outlet should be cleaned with a soft brush and some water After th...

Страница 47: ...liance on an even worktop The system does not detect the water in the water basin Stir some table salt into the water Electronic disfunction Bring the appliance to your Solis service center E002 Filter is dirty Clean the filters with a soft brush and some water The vacuum bag obstructs the water inlet or water outlet Reposition the vacuum bag using the included grid The vacuum bag has ruptured and...

Страница 48: ...rticle 922 52 Vacuum bagging film Solis 2 rolls 15 x 600 cm 922 51 Vacuum bagging film Solis 2 rolls 20 x 600 cm 922 50 Vacuum bagging film Solis 2 rolls 30 x 600 cm 922 61 Vacuum bags Solis 50 bags 20 x 30 cm 922 64 Vacuum bags Solis 50 bags 30 x 40 cm 703 01 SOLIPOL forte descaling agent folding bottle containing 1 000 ml The accessories for your Solis Sous Vide Cooker Pro are available from goo...

Страница 49: ...uct is marked with a crossed out dustbin Solis of Switzerland Ltd reserves the right to carry out technical and visual changes and modifications to improve the product at any time SOLIS HELPLINE Only for customers in Switzerland This item stands out due to its long life cycle and reliability Despite this though if a malfunction ever occurs simply give us a call Often a breakdown can be easily and ...

Страница 50: ...orden de zakjes dankzij het rooster gelijkmatig over het midden van de waterbak verdeeld zodat het warme water optimaal rond de zakjes met levensmiddelen kan circu leren Om deze reden mogen de watertoevoer en afvoer niet worden afgedekt door de zakjes met levensmiddelen De zakjes kunnen horizontaal en verticaal in het rooster worden geplaatst Het is belangrijk dat de levensmiddelen in de zakjes vo...

Страница 51: ... of onderdelen van het apparaat zoals de stekker de adapter nooit onder in water en laat het geen contact maken met water of andere vloeistoffen s BELANGRIJKE VEILIGHEIDSINFORMATIE Lees voor gebruik van uw Solis Sous Vide Cooker Pro zorg vuldig deze instructies zodat u het apparaat leert kennen en veilig kunt bedienen Wij raden u aan deze handleiding zorgvuldig te bewaren en te overhandigend aan e...

Страница 52: ...nop worden uit geschakeld en de stekker en de adapter uit het stopcontact worden gehaald Laat het apparaat en het water daarin vol ledig afkoelen voordat u het water weggiet of het apparaat schoonmaakt of verplaatst 18 Plaats het apparaat zo dat het niet wordt blootgesteld aan direct zonlicht 19 Steek nooit scherpe of puntige voorwerpen en gereedschap in de openingen van het apparaat Het apparaat ...

Страница 53: ...ting worden gehaald Zie daarvoor de aanwijzingen in het hoofdstuk Reiniging en onderhoud op pagina 114 van deze handleiding 40 Wikkel het netsnoer altijd volledig af voordat u de adapter in de aansluiting steekt of de stekker in het stopcontact steekt 105 104 s VOOR DE INGEBRUIKNAME Voordat u uw Solis Sous Vide Cooker Pro voor de eerste keer gebruikt moet u alle reclamestickers verwijderen Maak de...

Страница 54: ...ooktijd in te stellen Als u de timer op 00 00 instelt werkt de Sous Vide Cooker Pro net zo lang tot u het apparaat handmatig uitschakelt s DE FUNCTIETOETSEN 1 1 3 6 7 2 4 5 ON OFF knop Raak de ON OFF knop 1 seconde aan om het apparaat aan of uit te zetten Het display licht op zodra het apparaat wordt ingeschakeld Ook het rode symbool op de ON OFF knop brandt constant als het apparaat wordt ingesch...

Страница 55: ...ns het kookproces te controleren drukt u even 1 2 seconde op de timer of temperatuurknop 5 Start nu het kookproces Druk op de Start Pauze knop u hoort een pieptoon om aan te geven dat het opwarmproces wordt gestart Het symbool op de knop brandt continu blauw op het display kunt u de huidige temperatuur van het water op elk moment aflezen 6 De ingestelde watertemperatuur is bereikt Plaats de levens...

Страница 56: ...mperatuur Over het algemeen moet een biefstuk of filet of entrecôte die wordt bereid in de Sous Vide Cooker Pro niet dikker zijn dan 70 mm KOOKTABEL De volgende tabel helpt u vertrouwd te raken met uw nieuwe apparaat en geeft advies over welk levensmiddel hoe lang en bij welke temperatuur kan worden gekookt Natuurlijk kunt u ook uw eigen voorkeuren gebruiken U kunt de temperatuurknop tot op 0 1 C ...

Страница 57: ...tdicht wordt afgesloten Voorstel 2 Bouillon met kruiden maken en invriezen Bereid met kruiden specerijen zout en peper en eventueel groenten en vlees een groente rundvlees of kippenbouillon Laat de bouillon afkoelen en giet de bouil lon in een ijsblokjeshouder en vries de bouillon in Eventueel kunt u dan een bouil lon ijsblokje in de vacuümzak doen bij de levensmiddelen tijdens het kookproces smel...

Страница 58: ...opcontact Haal de stekker volledig uit het apparaat zodat het niet met water in aanraking komt Wacht tot het apparaat en het water zijn afgekoeld voordat u het water in de gootsteen giet Reinig de waterbak met een doek en indien nodig een beetje warm water en zeep De zeef bij de waterafvoer moet u met een zachte borstel en wat water reinigen De waterbak vervolgens grondig afspoelen en afdrogen Rei...

Страница 59: ... een vlak werkoppervlak Het systeem merkt niet dat er water in de waterbak zit Doe wat zout in het water en roer het door Elektronicafout Breng het apparaat naar uw Solis servicecenter E002 Het filter is vuil Reinig het filter met een zachte borstel en wat water De vacuümzak blokkeert de wateraanvoer of waterafvoer Plaats de vacuümzak opnieuw gebruik het meegeleverde rooster De vacuümzak is kapot ...

Страница 60: ...r Solis Vac Professional Artikelnr Artikel 922 52 Vacuümfolie Solis 2 rollen 15 x 600 cm 922 51 Vacuümfolie Solis 2 rollen 20 x 600 cm 922 50 Vacuümfolie Solis 2 rollen 30 x 600 cm 922 61 Vacuümzakjes Solis 50 stuks 20 x 30 cm 922 64 Vacuümzakjes Solis 50 stuks 30 x 40 cm 703 01 SOLIPOL forte ontkalker flacon à 1000 ml U krijgt de accessoires voor uw Solis Sous Vide Cooker Pro bij de betere vakhan...

Страница 61: ...bruikt resp gerecycled waardoor er veel energie en grondstoffen worden bespaard Om de verplichting om het toestel volgens de voorschriften te verwijderen duidelijk onder de aandacht te brengen is hiernaast het symbool van een doorgekruiste afvalbak afgebeeld Solis of Switzerland AG behoudt zich te allen tijde het recht voor van technische en optische wijzigingen en modificaties ter verbetering van...

Отзывы: