


61 25 665 D3437
324
D3437
.
076.01.15
.
02 06.2012
9 Repair
Sirona Dental Systems GmbH
9.8 X-ray detector
Service Manual GALILEOS
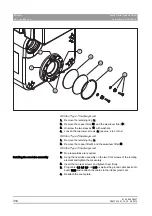
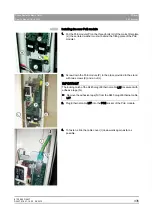
Attaching the covers
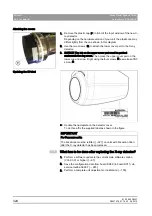
1. Remove the plastic cap (P) in front of the input window of the new X-
ray detector.
Depending on the hardware version of your unit, the plastic cap may
differ slightly from the one shown in this diagram.
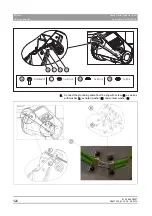
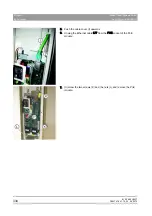
2. Use the two screws (Q) to attach the lower cover part to the X-ray
detector.
3. NOTICE! The tab on the upper cover part must be pushed
underneath the ring cover. Then place the upper cover part on the
lower one and screw it tight using the four screws (R) as well as a fifth
screw (S).
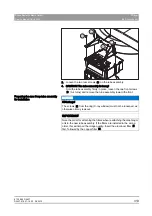
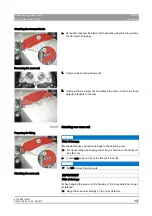
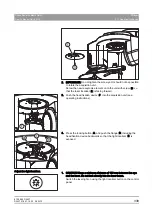
Updating the ID label
➢ Update the nameplate on the detector cover.
To do this, affix the supplied label as shown in the figure.
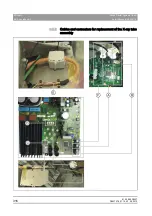
9.8.2
What has to be done after replacing the X-ray detector?
What has to be done after replacing the X-ray detector?
1. Perform a software update to the current main software version
(V03.03.01 or higher) [ → 61].
2. Save the configuration data from board DX89 (to board DX11) via
service routine S009.7 [ → 245].
3. Perform a complete unit adjustment or calibration [ → 155].
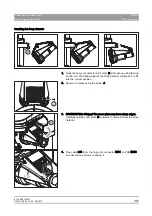
IMPORTANT
For Facescan units:
The FaceScan must be refitted [ → 327] on units with Facescan fitted
after the X-ray detector has been replaced.
Содержание galileos
Страница 1: ...MSKOMNO d ifiblp kÉï ë çÑW båÖäáëÜ pÉêîáÅÉ j åì ä GALILEOS Service Manual ...
Страница 2: ......
Страница 387: ......