4-106
1
Place the original.
Place the original face up in the document feeder tray, or face down on the document glass.
When the original is a different size than the size setting, set the original size.
☞
SPECIFYING THE SCAN SIZE AND SEND SIZE
(page 4-45)
2
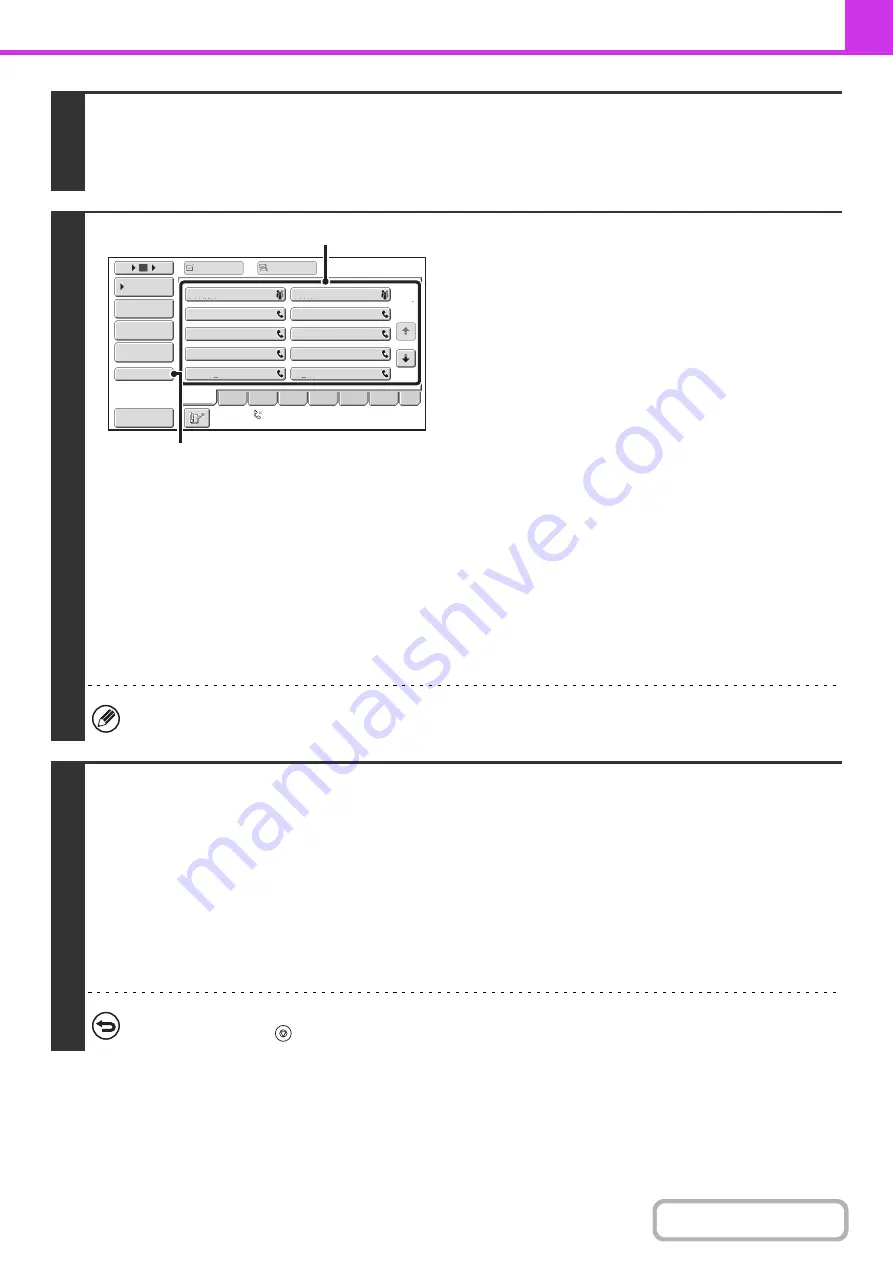
Enter the destination fax number.
(1) Touch the [Address Book] key in the base
screen.
For the [Address Book] key, see "
" (page 4-8).
(2) Touch the one-touch key of the desired
destination.
If the destination is not stored in the address book, enter
the fax number with the numeric keys.
If the sub-address and passcode are stored in the one-touch
key, the following sub-steps are not necessary. Go to step 3.
(3) Touch the [Sub Address] key.
"/" appears.
(4) Enter the sub-address with the numeric
keys.
(5) Touch the [Sub Address] key.
"/" appears.
(6) Enter the passcode with the numeric keys.
If a passcode has been omitted in the memory box of the other machine, (5) and (6) are not necessary.
3
Press the [BLACK & WHITE START] key.
Scanning begins.
• If you inserted the original pages in the document feeder tray, all pages are scanned.
A beep will sound to indicate that scanning is finished.
• If you are scanning the original on the document glass, scan each page one page at a time.
When scanning finishes, place the next original and press the [BLACK & WHITE START] key. Repeat until all pages have
been scanned and then touch the [Read-End] key.
A beep will sound to indicate that scanning is finished.
When the relay machine receives the fax, it will automatically transmit the fax to each of the end receiving machines
programmed in the memory box.
To cancel scanning...
Press the [STOP] key (
) while the original is being scanned.
1
2
10
5
15
III III
GGG GGG
EEE EEE
CCC CCC
AAA AAA
JJJ JJJ
HHH HHH
FFF FFF
DDD DDD
BBB BBB
Global
Address Search
Address Entry
Sort Address
Sub Address
Address Re
v
iew
Condition
Settings
To
Cc
ABCD
Fre
q
.
EFGH
IJKL
MNOP
QRSTU
VWXYZ
etc.
Auto Reception
Fax Memory
:
100
%
(2)
(3), (5)
Содержание DX-C311 - Color - All-in-One
Страница 4: ...Reduce copy mistakes Print one set of copies for proofing ...
Страница 6: ...Make a copy on this type of paper Envelopes and other special media Transparency film ...
Страница 8: ...Assemble output into a pamphlet Create a pamphlet Staple output Create a blank margin for punching ...
Страница 11: ...Conserve Print on both sides of the paper Print multiple pages on one side of the paper ...
Страница 34: ...Search for a file abc Search for a file using a keyword Search by checking the contents of files ...
Страница 35: ...Organize my files Delete a file Delete all files Periodically delete files Change the folder ...
Страница 214: ...3 18 PRINTER Contents 4 Click the Print button Printing begins ...


