LE/LE-HC Series DVR User Manual
V1.4 October 2006
- 31 -
Configure recording in IR Mode
Enter “
Menu
” screen (Figure 5.2 page 22) and select “
Record
Setup
” to bring up.
DVR Setup
Choose Cyclic Recording Mode (when the Hard Disk is full, the system will continue to record,
overwriting the oldest recordings first) or Auto Stop (when the Hard Disk is full, the DVR will stop
recording)
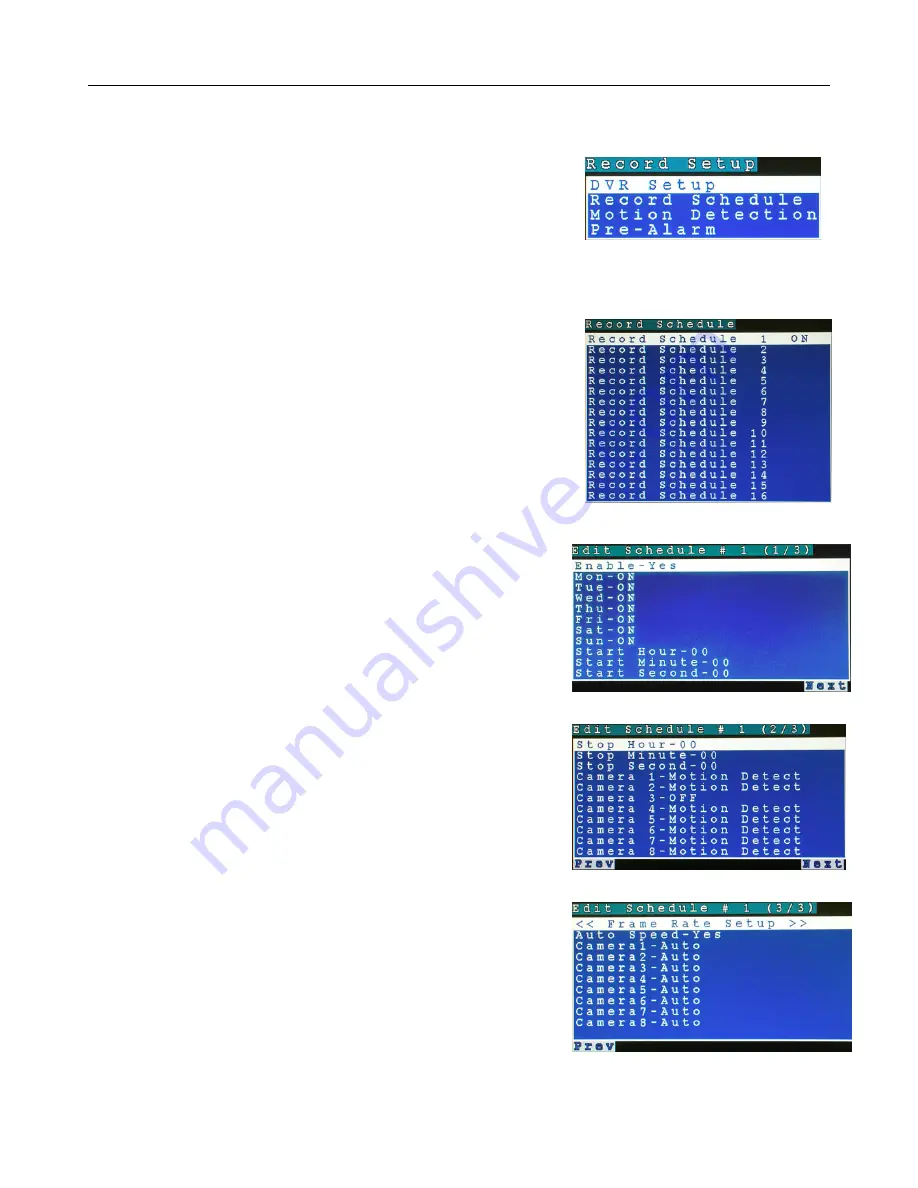
Record Schedule
A total of 16 schedules can be configured (Figure 5.21). Each
one must be enabled individually. Care should be taken to not
overlap schedules, as this will cause conflicts
Press the “
Right Arrow
” button to enable or disable a schedule.
When enabled, the LE/LE-HC Series will record based on the
settings of this schedule.
Figure 5.22 will be displayed
Select which day(s) of the week and the start time that this
particular schedule will begin recording. Press the “Next
Page” button to go to Figure 5.23.
Select the Stop time for this schedule, the cameras to record
in
this schedule, and whether Motion Detection recording or
Normal (Continuous) recording will be used for each camera
(or “Off” for no recording). In addition, if Audio is enabled in
System Setup, Audio On/Off can be selected by schedule.
Press “Next Page” to go to Figure 5.24.
Set Recording Frame Rate to Auto Speed “Yes” or “No”.
When set to Auto Speed “Yes”, the system will attempt to
maximize the recording frame rate for each camera actually
recording at any one time. When set to Auto Speed “No”, each
camera recording speed can be manually set from 1 to 30fps.
Use the up and down arrows to cycle through the different
components of the schedule editor and then use the right
button to change the setting. Press “OK” to save.
Figure 5.21
Figure 5.22
Figure 5.23
Figure 5.24
Figure 5.20


