


Menu Operation
The operating menu display is divided
into three areas (see illustration on the
right):
Status line:
The status line indicates the source of
the information displayed, in a format
similar to a directory path.
Menu lines:
These show the menu items that can be
selected. A right-arrow is shown to the
left of each item.
Touchscreen keys:
You can select a menu item by tapping
in on the display, or by tapping the
arrows buttons as needed to move the
highlight bar and pressing
to confirm.
Press the
key to return to the next
higher menu level.
Note:
Menu lines shown in gray cannot be
selected.
Input
The selection of a menu item often
opens an window for entering or editing
data, using one of two methods:
– by selecting a value from a list
– by entering letters, digits, and/or special
characters using the touchscreen keypad
Touchscreen keys and menu items
shown in gray are inactive.
Selecting a value from a list
If there are multiple values to choose
from, the symbol is shown on the far
left-hand side of the input field.
Example: defining the drying process:
§
To select the next value in the list:
– Tap the “Drying process” item, or
– Tap the touchscreen button in the lower
right-hand corner (i.e., the arrow point-
ing towards the right
)
§
To select the previous value in the list:
– Tap the second touchscreen button from
the left (the arrow pointing towards the
left
)
9
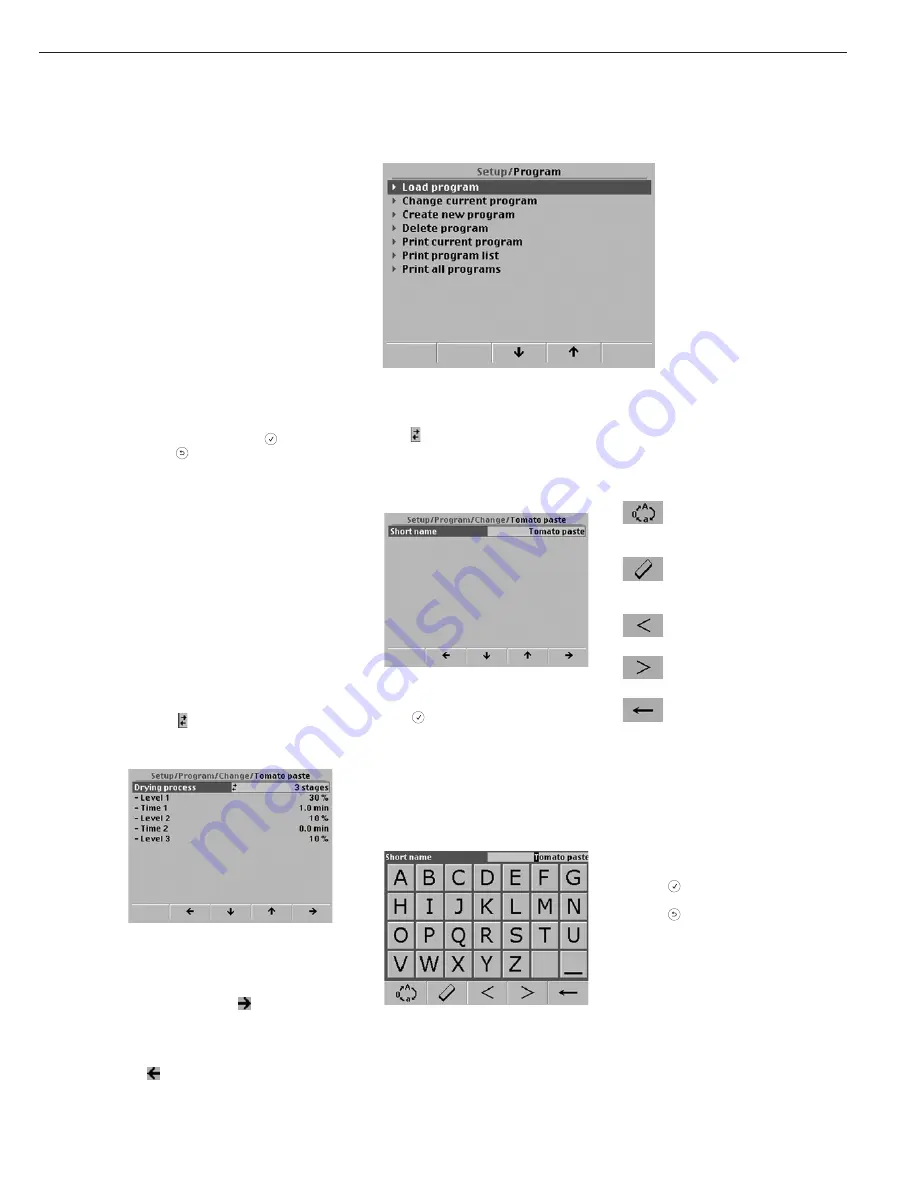
Entering data using the touchscreen
keypad
If no is shown, the value can be
entered or edited using the touchscreen
keypad.
Example: defining the short form of
a program name:
§
Select “Short name:”
– Tap the “Short name” item, or
– Press
> The touchscreen keypad is displayed
The touchscreen pad always shows
capital letters when it is first opened.
When you switch to numerical input
(see below), numbers and special
characters are shown.
The uppermost line of the display shows
the parameter (in this example: Short
name) and its value (in this example:
Tomato paste). The buttons at the bot-
tom of the display have the following
functions:
Switch input from upper-case
letters to numbers and special
characters to lower case letters
Delete the selected character
(i.e., the character in the cursor
position; inversely displayed)
Move the cursor one position to
the left
Move the cursor one position to
the right
Delete the character to the left of
the cursor
If you do not move the cursor before
beginning input, the existing value is
deleted.
The remaining characters are entered
in overwrite mode; i.e., in the cursor
position.
Once you have completed input of
characters:
$
Press
to confirm your input, or
$
Press
to cancel any changes in the
value.
Status line
Menu line 1
Menu line 2
Menu line 3
Menu line 4
Menu line 5
Menu line 6
Menu line 7
Additional menu lines (depending
on menu and status)
Touchscreen buttons


