31
English
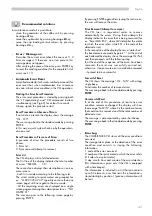
Load the cans on the last tray, until the spaces on each
spiral are filled (Fig. 84).
Fig. 84
7.7
Manual filling of the
boiler
Druing the first switching on of the vending machine it is
good practice to fill the boiler manually.
After switching on the vending machine it is possible to fill
the boiler through
one
of the following procedures:
a)
-
press key
2
(Fig. 60) to enter the maintenance
menu;
-
press key
e
(7 - Fig. 59) and subsequently the
UP
key (10 - Fig. 59) to access the WASHING
entry;
-
press key
e
(7 - Fig. 59) to carry out the
automatic cycle of complete wash.
b)
-
press key
2
(Fig. 60) to enter the maintenance
menu;
-
press key
e
(7 - Fig. 59) and subsequently the
UP
key (10 - Fig. 59) to access the WASHING
entry;
-
press keys
A, B, C,
etc. (beverage keys) to carry
out the washing cycle of each circuit.
c)
-
press key
1
(Fig. 60) to enter the programming
menu;
-
press keys
1
and
2
simultaneously (Fig. 60) on
the CPU card to carry out the washing cycle.
Important
The washing operation must be repeated until no water
flows out of the dispensing nozzles.
7.8
Use of the machine
Important
The instructions for use are shown on the plate on the front
side of the vending machine.
The selection procedures of the drinks and snacks are
shown in section 9.
7.6
First Switching on
Carry out the supply (following the instructions in the
preceeding points) and plug in the machine (see 5.10) to
the power supply.
Set the main switch (5 - Fig. 1) to the “
I
” (ON) position.
At this point the message “SAECO combi SAECO” will be
displayed and the self-configuration that controls all of
the settings previously defined begins, i.e.:
-
presence and condition of the motors;
-
layout of the trays inserted (the Programming and
Maintenance menus are adapted to the configuration
of the vending machines trays);
-
presence of the TIME KEEPER;
-
correct positioning of the bracket.
Possible anomalies, found during the self-configuration
cycle are stored so that the vending machine, out of the
autodiagnostic phase, can show them on the display.
After the vending machine is switched on, the compressor
remains inactive for some minutes.
Carry out the grinding adjusment as instructed in 7.2
Содержание D.A. COMBISNACK
Страница 67: ...67 English...
Страница 68: ...Cod 0875 971 Ed 02 10 03...


