Chapter 5: System Maintenance
Replacing a Failed PSU Module
5-11
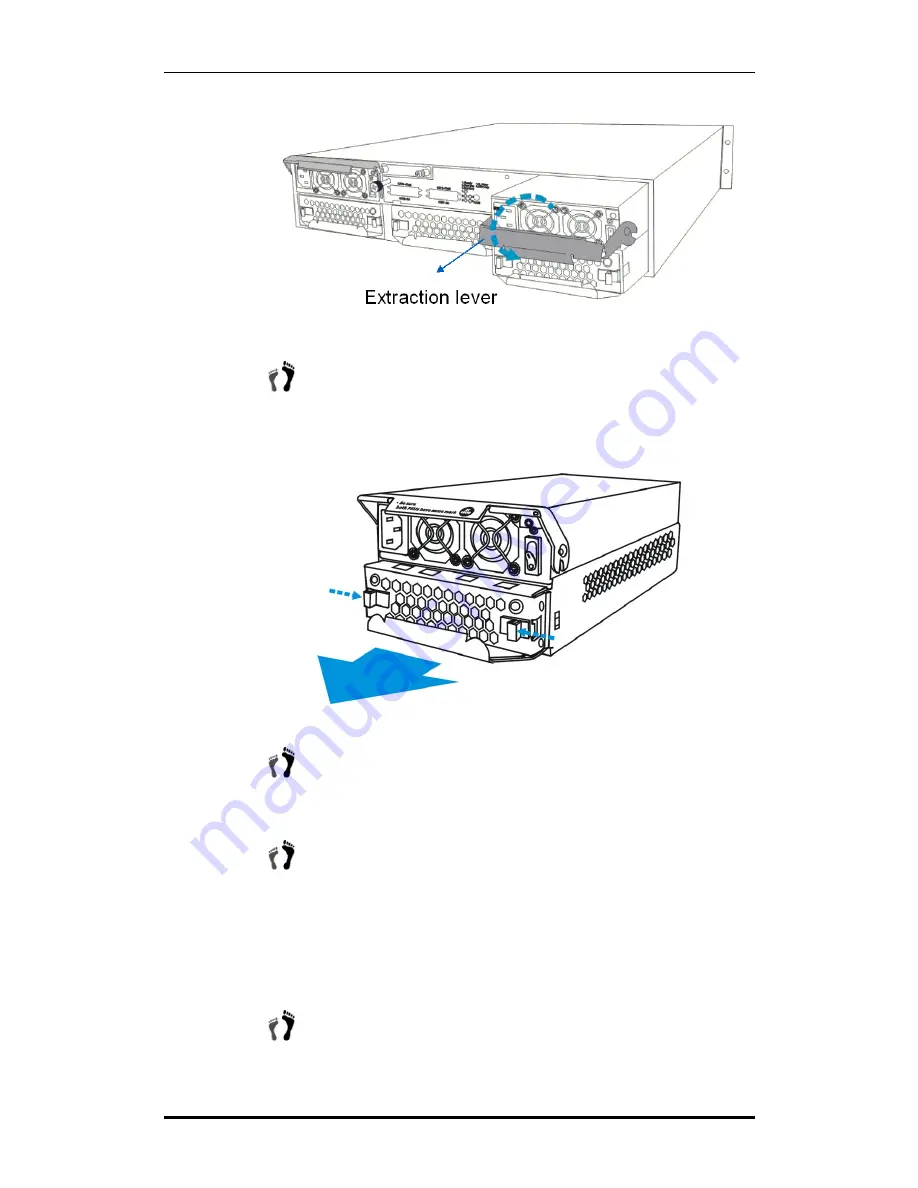
Figure 5- 8: Dislodging the PSU
Step 5.
Remove the cooling module:
To do this, push the clips on either
side of the module rear panel together. Then gently pull the cooling
module out of the lower level of the PSU bracket. (See
Figure 5-
11
)
Figure 5-9: Remove the Cooling Module
Step 6.
Reinstall the cooling module into the new PSU module:
To do
this, align the cooling module with the lower level of the PSU
bracket and gently slide the cooling module in.
Step 7.
Insert the new PSU module into the subsystem:
Once the
previously removed cooling module has been installed, insert the
new PSU module into the subsystem. Make sure the extraction lever
is in its downright position so that the saddle notches on the lower
edges of the handle can lock on to the edge metal brackets along the
chassis inner walls. Push the PSU into the slot and pull the handle
upwards to secure the module.
Step 8.
Reinsert the retention screw:
If the PSU module is properly
installed, the back end of the module should be aligned with the
Содержание Galaxy Raid GALHDX-7370S-8U4D
Страница 28: ...Galaxy RAID GALHDX 7370S 8 12U4D Installation and Hardware Reference Manual Hot Swappable Components 1 16...
Страница 43: ...Chapter 2 Installation 2 15...
Страница 65: ...Galaxy RAID GALHDX 7370S 8 12U4D Installation and Hardware Reference Manual Power Off Procedure 4 12...
Страница 91: ...Galaxy RAID GALHDX 7370S 8 12U4D Installation and Hardware Reference Manual Spare Parts and Accessories B 4...
Страница 96: ...Appendix C Pinouts Main Power C 5 Main Power...


