Chapter 2: Installation
BBU Installation
2-9
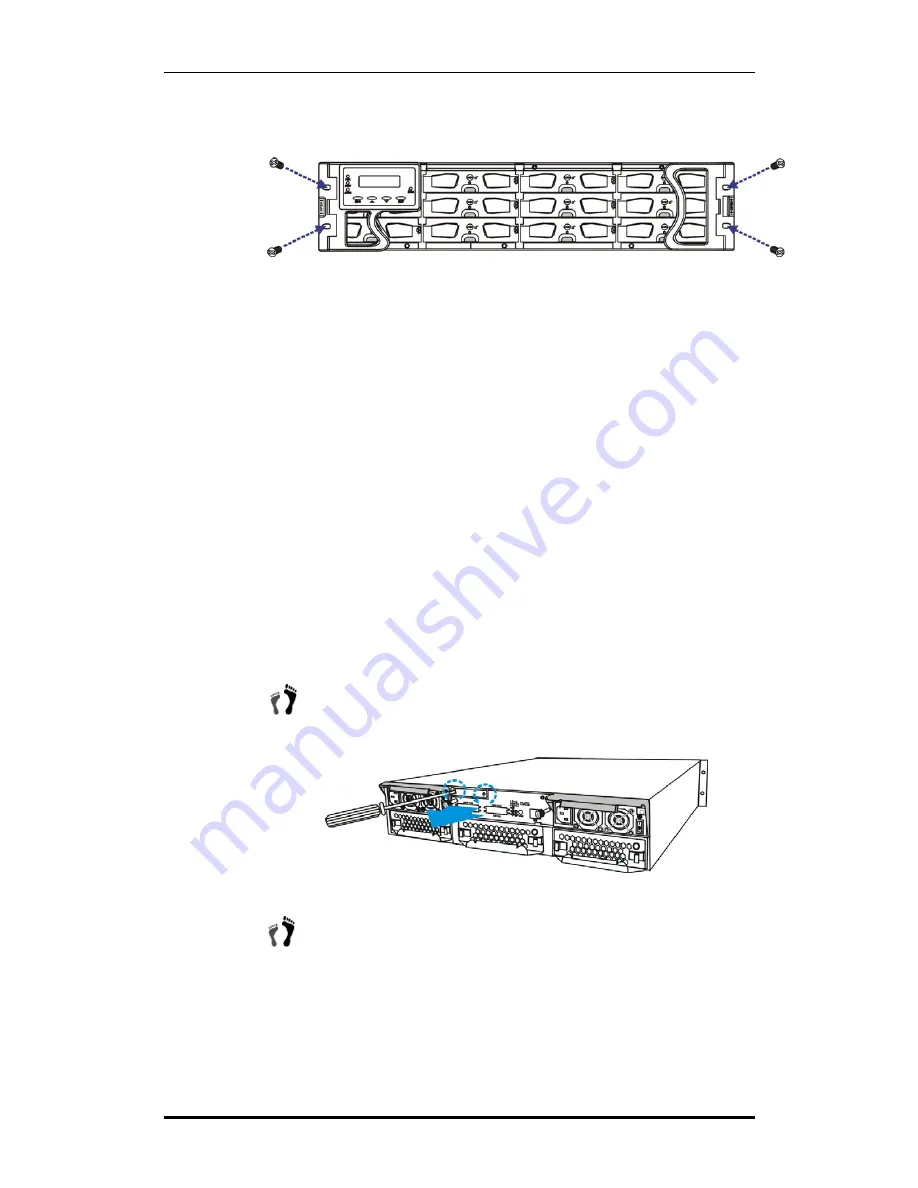
WARNING: DO NOT USE ONLY THE FRONT EAR HOLES TO MOUNT
THE GALAXY. DATA LOSS OR CORUPTION MAY OCCUR.
Figure 2-3: Front Ear Holes
2.8 BBU Installation
2.8.1 BBU Module Installation Overview
The BBU module is an optional item that can sustain cached data in the event of a
power outage or in the unlikely event that both PSUs have failed. Purchasing and
installing a BBU is highly recommended. The optional BBU provides additional data
security and helps minimize the chance of data loss during power shutdowns.
The BBU module is inserted into the subsystem in the module slot at the upper left
corner of the controller module. The BBU module is secured to the subsystem with
two (2) retention screws. When shipped, the BBU module slot in the subsystem rear
panel is covered with a metal dummy plate that must first be removed.
2.8.2 Installation
Procedure
To install a BBU into the subsystem, please follow these steps:
Step 1.
Using a screwdriver,
loosen the two (2) retention screws
located on
both sides of the dummy plate.
(See
Figure 2-2
)
Figure 2-2: Loosening the Metal Sheet Retention Screws
Step 2.
Once the retention screws are loosened, wedge a screwdriver
between the back of the dummy plate and the interior wall of the
subsystem enclosure. Gently lever the dummy plate out of the
enclosure. (See
Figure 2-3
)
Содержание Galaxy Raid GALHDX-7370S-8U4D
Страница 28: ...Galaxy RAID GALHDX 7370S 8 12U4D Installation and Hardware Reference Manual Hot Swappable Components 1 16...
Страница 43: ...Chapter 2 Installation 2 15...
Страница 65: ...Galaxy RAID GALHDX 7370S 8 12U4D Installation and Hardware Reference Manual Power Off Procedure 4 12...
Страница 91: ...Galaxy RAID GALHDX 7370S 8 12U4D Installation and Hardware Reference Manual Spare Parts and Accessories B 4...
Страница 96: ...Appendix C Pinouts Main Power C 5 Main Power...


