Chapter 5: System Maintenance
Drive Tray Maintenance
5-13
Step 1.
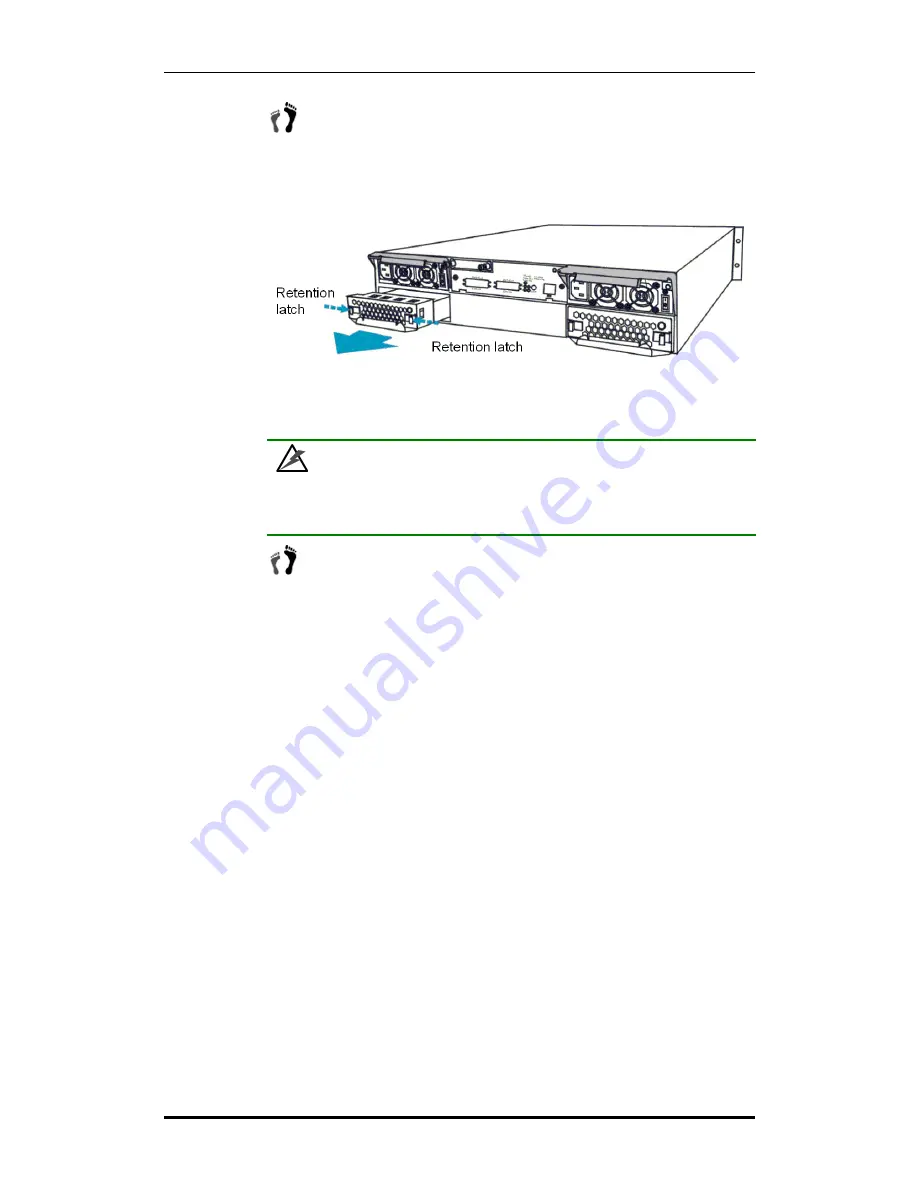
To remove the cooling fan module:
Squeeze both side latches
towards the center of the cooling fan module and gently withdraw
the cooling fan module from the subsystem by gently pulling on the
silver handle at the bottom. (See
Figure 5- 10
).
Figure 5- 10: Removing the Cooling Fan Module
WARNING!
Forcing or slamming a module into place can damage the connector pins on the
module itself or that on the subsystem backplane.
Step 2.
Install the new cooling fan module:
Line the new module up with
the slot into which it will be inserted and then gently push it into the
chassis. The latches will hold the module in place.
5.7 Drive Tray Maintenance
5.7.1 Notes on Hard Drive Maintenance
Hot-swappable drive trays:
The drive trays are all hot-swappable. If a hard drive fails, it
can be replaced while the subsystem is still running.
Forearm handles:
If the hard drive is behind either the left or right forearm handle, make
sure that the locking mechanism on the side of the handle is first released prior to
opening the handle itself. (See
Figure 5- 11
) The locking mechanism must also be
released in order to close the handle. Therefore, after the new drive has been installed, it
will be necessary to release the locking mechanism on the handle prior to closing it. For
more information, please refer to
Section 1.5
in
Chapter 1
.
Release the module
using the latches
Содержание Galaxy Raid GALHDX-7370S-8U4D
Страница 28: ...Galaxy RAID GALHDX 7370S 8 12U4D Installation and Hardware Reference Manual Hot Swappable Components 1 16...
Страница 43: ...Chapter 2 Installation 2 15...
Страница 65: ...Galaxy RAID GALHDX 7370S 8 12U4D Installation and Hardware Reference Manual Power Off Procedure 4 12...
Страница 91: ...Galaxy RAID GALHDX 7370S 8 12U4D Installation and Hardware Reference Manual Spare Parts and Accessories B 4...
Страница 96: ...Appendix C Pinouts Main Power C 5 Main Power...


