30
30
www.cel-robox.com
3.0 Getting Started
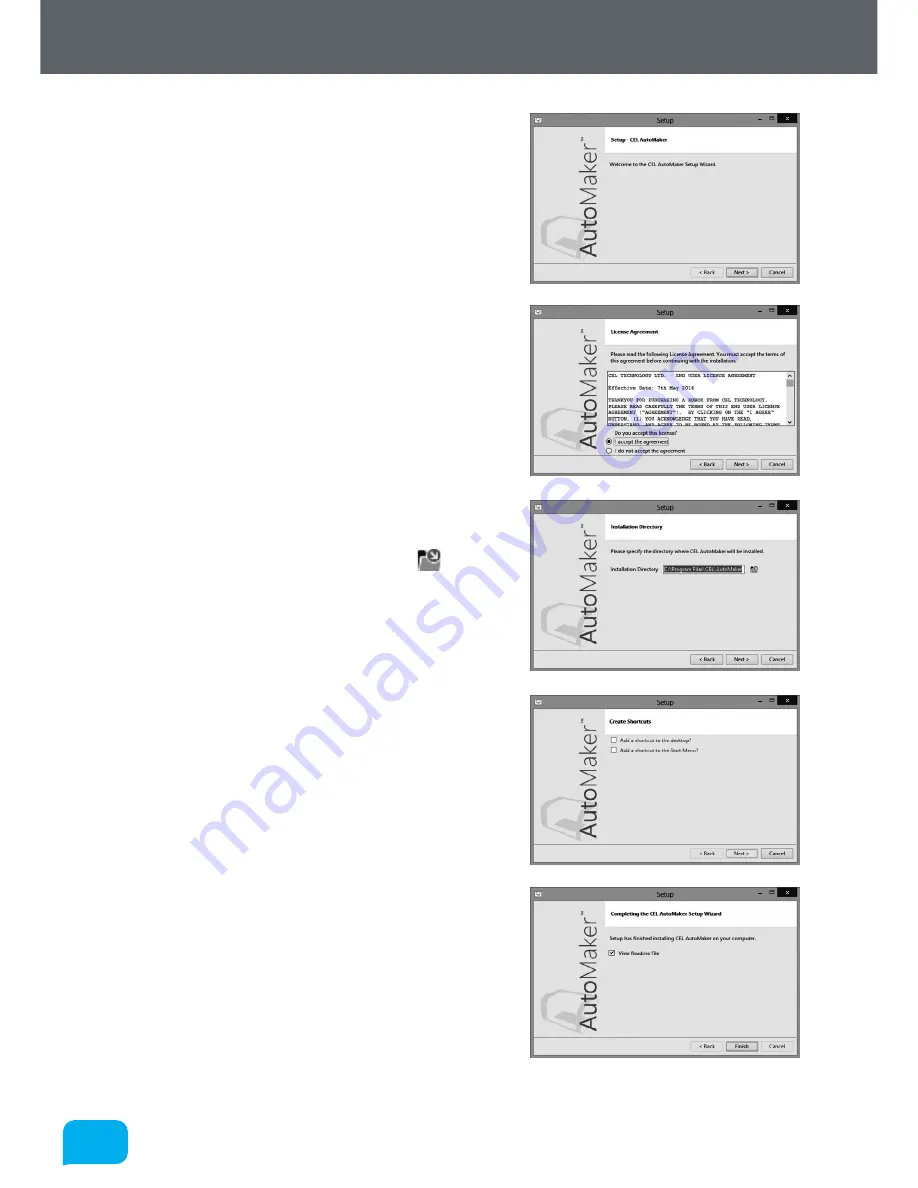
5. The installer will start, click
Next >
to
continue.
6. Please carefully read the Licence
Agreement and select
‘I accept the
agreement’,
then select
Next >
to
continue.
7. Please choose where you would like to
install AutoMaker™ either by typing the
path directly, or by clicking the button.
Click
Next >
to continue and accept the
path and begin the installation. N.B. To
facilitate future support we recommend
using the default install location.
8. Choose whether you would like to add
Shortcuts to the Start Menu or Desktop.
Then click
Next >
and wait as AutoMaker™
is installed to your hard drive.
9. Installation is complete. Tick the checkbox
if you would like to read the ‘Readme’ file
after clicking
Finish
.
Содержание 3d printer
Страница 1: ...www cel robox com UserGuide including AutoMaker Version 1 1 ...
Страница 6: ...1 0 1 0 Introduction ...
Страница 19: ...Overview 2 0 ...
Страница 25: ...Getting Started 3 0 ...
Страница 34: ...Using Robox 4 0 ...
Страница 42: ...AutoMaker Software 5 0 ...
Страница 77: ...77 77 www cel robox com 5 0 AutoMaker Software ...
Страница 78: ...Finishing Parts 6 0 ...
Страница 82: ...Calibration and Maintenance 7 0 ...
Страница 99: ...99 99 www cel robox com 7 0 Calibration and Maintenance ...
Страница 100: ...Supplementary Information 8 0 ...
Страница 122: ... 2014 CEL Technology Ltd All rights reserved RBX01 ACC UM ...


