12.
Select [Continue Wizard] or [End Wizard] on the confirmation screen, and then press the
[Enter] button.
To proceed to the wired LAN settings, select [Continue Wizard]. For details about how to configure
the wired LAN settings, see page 66 "Configuring the Wired LAN Settings".
To end the network settings, select [End Wizard].
The wireless LAN setup is complete.
To project the image from a computer, see page 72 "Projecting a Computer's Screen via a
Network".
Configuring the settings manually
Contact your network administrator for the information required for configuring network settings, such as
the SSID and the network key.
1.
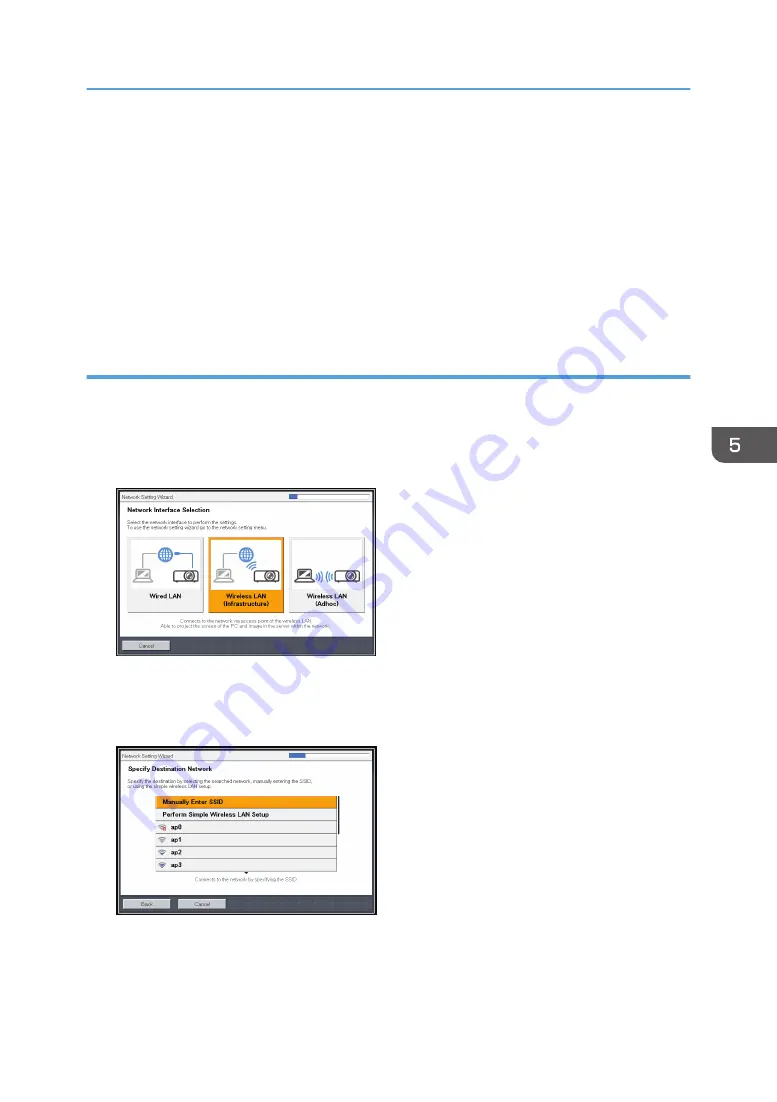
Select [Wireless LAN (Infrastructure)] on Network Setting Wizard, and then press the
[Enter] button.
The list of wireless LAN networks that can be connected is displayed.
2.
Select a wireless LAN network or [Manually Enter SSID], and then press the [Enter]
button.
3.
If you select [Manually Enter SSID] in Step 2, enter the SSID, and then press the [Enter]
button.
Connecting the Projector to a Network
69
Содержание PJ WX4153N
Страница 2: ......
Страница 36: ...1 Preparations for Using the Projector 34...
Страница 48: ...2 Projecting an Image 46...
Страница 122: ...6 Changing the Projector Settings 120...
Страница 135: ...You can search the knowledge base by product name or keyword Common Problems 133...
Страница 136: ...7 Troubleshooting 134...
Страница 170: ...9 Appendix 168...
Страница 175: ...2020 Ricoh Co Ltd...
Страница 176: ...Y0E5 7520 AU EN US EN GB EN...


