


XCell™ Lab Controller
User Guide
24 repligen.com XC-LAB-UG-V4
7.6
Screen navigation
7.6.1
Menu bar
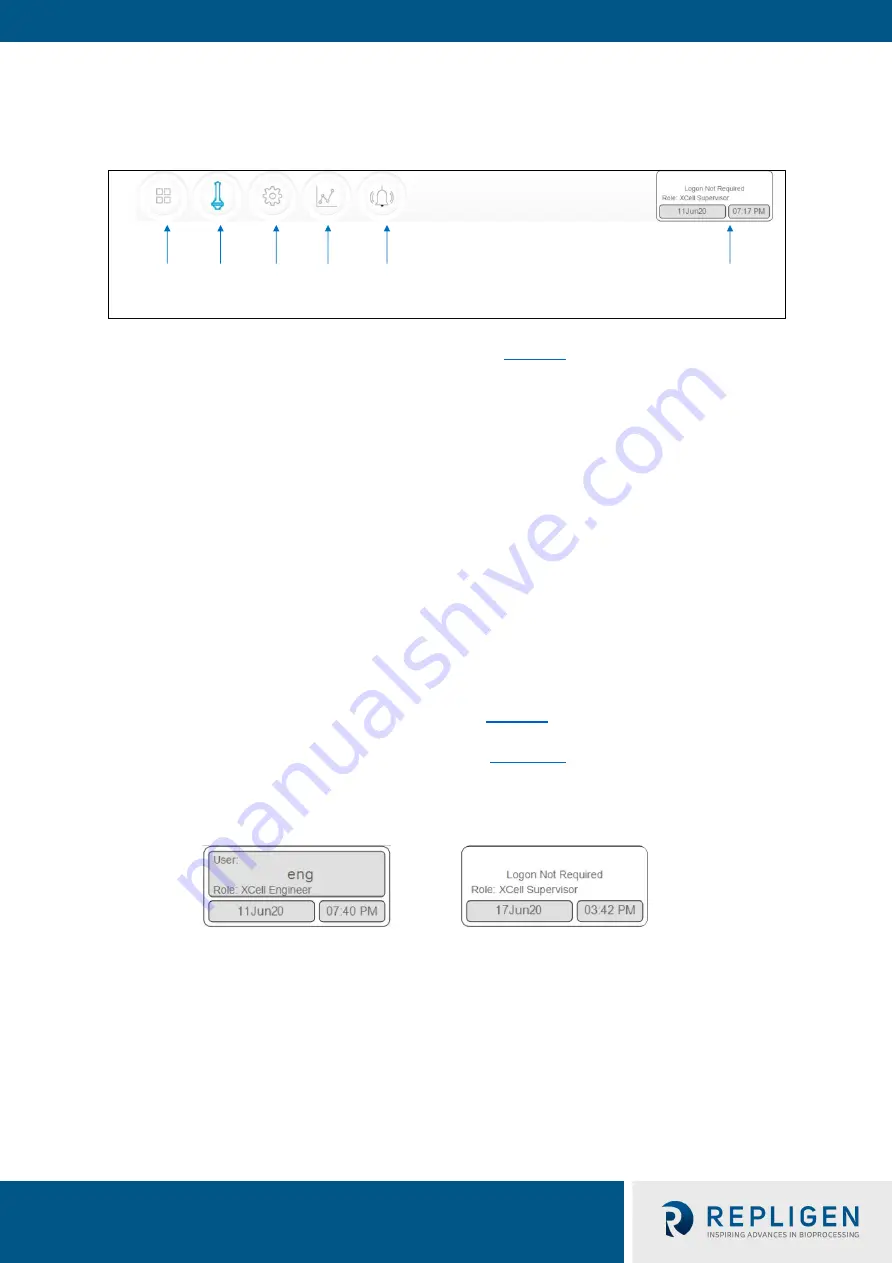
Figure 11. Menu bar example
The menu bar displays six options at the top of the screen (
). The blue highlighted button
indicates the screen currently active. To change to another screen, just press one of the other
buttons.
1.
Overview/SCADA Button
Navigates to the SCADA area that is capable of showing up to 8 connected controllers. Only
one controller is currently supported by the XCell™ Lab Software.
2.
ATF Button
Navigates to the Main Screen, also called the ATF Screen.
3.
Settings Button
Displays settings for both controller and XCell ATF® Devices. This screen enables access and
modification of ATF size and type, bioreactor settings, engineering units, run time, and service
information.
4.
Trends Button
Displays data trends and plots.
5.
Alarms Button
Displays historical alarms and settings for alarm set-up.
6.
Logon/User Button
If security is enabled, the logon sub-menu displays username and role. If security is disabled
then
Logon Not Required
message is displayed (
). The logon display also acts as a
menu, accessing the option to switch users or log out. User roles, access level and
permission rights are described in more detail in
. Date and time, the formats of
which can be changed in
Settings
, are included in this display.
Figure 12. User information
When security is enabled (left) vs disabled (right)
OR
Overview/
SCADA
ATF Settings Trends Alarms
Logon/User


