Model MMU-1600G Series Op Man - Ver 1.07.23 - Rev 20151026DL
Page 46 of 58
4.6.3.1.5 View Signal Sequence Log
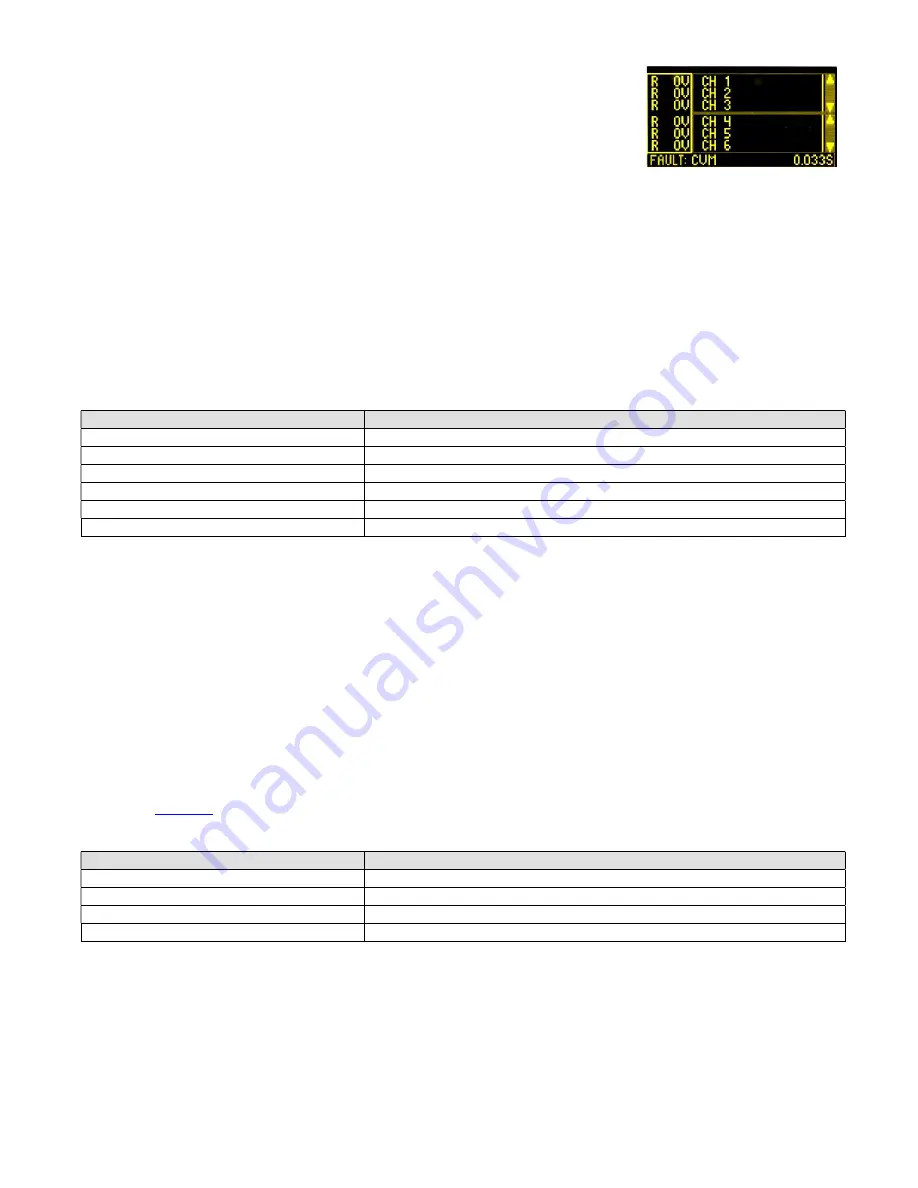
The monitor records the sixty (60) most recent events preceding a fault in the Signal
Sequence Log. The Fault Type, Date and Time, Time Prior to Fault; Status of all Greens,
Yellows, Reds, and Walks; RMS Voltages of all Greens, Yellows, Reds, and Walks; Status
of all DC inputs; Status of Red Enable; AC Line Voltage; Red Enable Voltage; and DC
Input Voltages are recorded. This display is view only.
The display consists of a voltage section, two status sections, and a single line footer showing the Fault Type and the Time
Prior to Fault. Use the
ENTER
pushbutton to toggle between the three display sections.
When the voltage section is highlighted, the up (▲) or down (▼) pushbutton will toggle the voltage display between Red,
Yellow, Green, and Walk voltages. The left (◄) or right (►) pushbutton will move the cursor bar to one of sixty (60)
positions corresponding to the Time Prior to Fault.
When the either status section is highlighted, the up (▲) or down (▼) pushbutton will toggle the status display between
Channels 1 through 16, AC Line, Red Enable, 24V-2, 24V-1, CVM, Type Select, 24V Inhibit, Local Flash, External
Watchdog, External Reset, and Port 1 Disable (if applicable). The left (◄) or right (►) pushbutton will move the cursor bar
to one of sixty (60) positions corresponding to the Time Prior to Fault.
Press the
ESCAPE
pushbutton to exit.
4.6.3.2 Clear Logs
MENU TEXT
MENU FUNCTION
CLEAR DATE & TIME LOG
Clear the Date & Time log.
CLEAR AC LINE LOG
Clear the AC Line log.
CLEAR RESETS LOG
Clear the Resets log.
CLEAR CONFIGURATIONS LOG
Clear the Configurations log.
CLEAR PRIOR FAULTS LOG
Clear the Prior Faults log.
CLEAR SIGNAL SEQUENCE LOG
Clear the Signal Sequence log.
For each of these screens, use the arrow pushbuttons to select
YES
and press the
ENTER
pushbutton to clear the selected log
of the monitor. Use the arrow pushbuttons to select
NO
and press the
ENTER
pushbutton to exit or the just press the
ESCAPE
pushbutton to exit.
NOTE: When a log is cleared, the monitor will provide an audible confirmation by sounding the buzzer (five chirps).
4.6.3.3 Clear All Logs
Use the arrow pushbuttons to select
YES
and press the
ENTER
pushbutton to clear the all of the logs for the monitor. Use
the arrow pushbuttons to select
NO
and press the
ENTER
pushbutton to exit or the just press the
ESCAPE
pushbutton to
exit.
NOTE: When the Clear All Logs function is used, the monitor will provide an audible confirmation by sounding the buzzer
(five chirps).
4.6.3.4 AC Logging Events Thresholds
See Section
4.6.2.2.1
4.6.4 Date & Time Menu
MENU TEXT
MENU FUNCTION
VIEW / SET DATE & TIME
View and/or set the Date & Time.
VIEW / SET DST AHEAD
View and/or set the Daylight Saving Ahead occurrence.
VIEW / SET DST AHEAD
View and/or set the Daylight Saving Back occurrence.
VIEW UP TIME
View the monitor up time accumulator.
4.6.4.1 View / Set Date and Time
Current Date, Time, and Daylight Saving Time settings are shown as well as a fields that can be used to set New Date, Time,
and Daylight Saving Time settings.
Use the left (◄) or right (►) pushbutton to navigate between the New Date, Time, and Daylight Saving Time fields. Use the
up (▲) or down (▼) pushbutton to change the highlighted setting. Press the
ENTER
pushbutton to accept and store the New
Date, Time, and/or Daylight Saving Time settings. Press the
ESCAPE
pushbutton to exit.


