FRONT PANEL DESCRIPTION
The front panel has a clear viewing window to view the six digit LCD
display. The front panel meets NEMA 4/IP65 requirements when properly
installed. The unit has three front panel buttons for control and data entering.
Each button’s function is described below.
BUTTON FUNCTIONS
R -
The Reset button is active when the reset enable wire (yellow) is connected
to common (black wire). In any operating mode, a manual reset action will
occur when the “R” button is pressed. For the counter/batch version a manual
reset only affects the display that is viewed.
The Reset button is used with the “E” button to initiate the self-test. Also, it
is used with the “P” button to enter the programming mode for the timed
output value.
P -
The Preset button is used to view the preset value in the normal operating
mode. After release of the button, the preset value will be displayed for about
5 seconds.
When used with the “E” button, it allows entry into programming of the
preset value. Once in the preset programming mode, the “P” button is used
to advance to the next digit to be modified.
Also, it is used with the “R” button to enter the programming mode for the
timed output value.
E -
The Enter button is used in the programming modes to increment the value
of the selected digit.
The Enter button is used with “R” button to initiate the self-test. Also, it is
used with the “P” button to enter the programming mode for the preset value.
CUB Controller Batch version units use the Enter button to toggle between
the count and batch display.
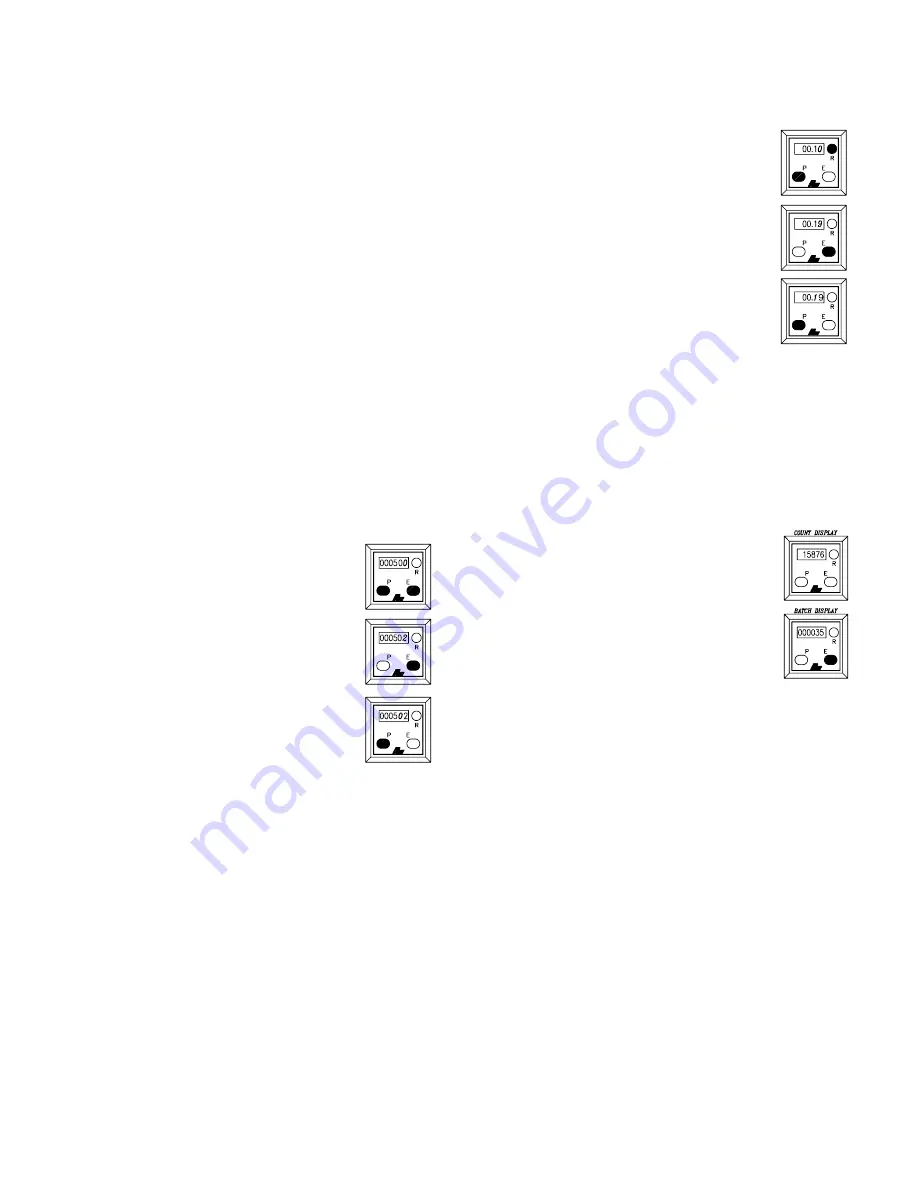
PROGRAM PRESET VALUE
The factory default Preset Value is 500, to enter a different value, the
operator must enter the Preset Value Programming Mode by performing the
following steps.
Note: In the programming mode, the unit can continue to
accumulate counts and activate the output.
1. Press and hold the “P” button and then press the “E”
button. The current preset value will be displayed with the
Least Significant Digit (LSD) flashing. Release both
buttons.
2. Press the “E” button to increment the value of the flashing
digit. Pressing and holding the “E” button will
continuously increment the digit. After nine is reached,
the digit goes to zero and starts over.
3. Press the “P” button to advance to the next digit which
will flash. Set the value of this digit by using the “E”
button. Repeat this procedure until all six digits have been
set to the desired value.
After setting the most significant digit, press the “P” button to enter the new
value. The unit automatically returns to the normal operating mode. The new
preset value is displayed and takes affect immediately.
In the Preset Value programming mode, if the “P” or “E” button is not
pressed within 15 seconds, the unit will return to the normal operating mode
with the previous value retained.
PROGRAM TIMED OUTPUT VALUE
The factory default Timed Output Value is 0.10 sec, but can be programmed
from 0.01 to 99.99 seconds. To enter a different value, the operator must enter
the Timed Output Value Programming Mode by performing the following steps.
Note: In the programming mode, the unit can continue to accumulate counts
and activate the output.
1. Press and hold the “P” button then press the “R” button.
The current time value will be displayed with the Least
Significant Digit (LSD) flashing. Release both buttons.
Note: The front panel reset button must be enabled.
2. Press the “E” button to increment the value of the flashing
digit. Pressing and holding the “E” button will
continuously increment the digit. After nine is reached, the
digit goes to zero and starts over.
3. Press the “P” button to advance to the next digit which will
flash. Set the value of this digit by using the “E” button.
Repeat this procedure until all four digits have been set to
the desired value.
After setting the most significant digit the unit automatically returns to the
normal operating mode with the preset value displayed. The new timed output
value takes affect immediately, unless the timed output has been activated.
In the Timed Output Value programming mode, if the “P” or “E” button is
not pressed within 15 seconds, the unit will return to the normal operating mode
with the previous value retained.
BATCH COUNTING OPERATION
The Cub Controller Batch version (CUBCB) has the same features as the
counter version with the additional capability of displaying a batch count.
Pressing the Enter button toggles between the count and batch display.
The batch count display will increment one count every
time the counter display reaches the preset value. Unlike the
count display, the batch display has leading zeros.
The batch display and count display are independent of
each other as far as a manual reset is concerned. The batch
count is reset to zero when a manual reset is performed, only
while the batch value is displayed.
Note: The count value and relay output are not affected.
The count value will perform an automatic reset even
when the batch count is displayed. To perform a manual reset, the count value
must be displayed.
Note: The batch value is not affected.
Содержание CUB 1
Страница 30: ...7 This page intentionally left blank...
Страница 46: ...5...
Страница 47: ...6...
Страница 48: ...7...


