OPTALIGN smart RS5 BT handbook
68
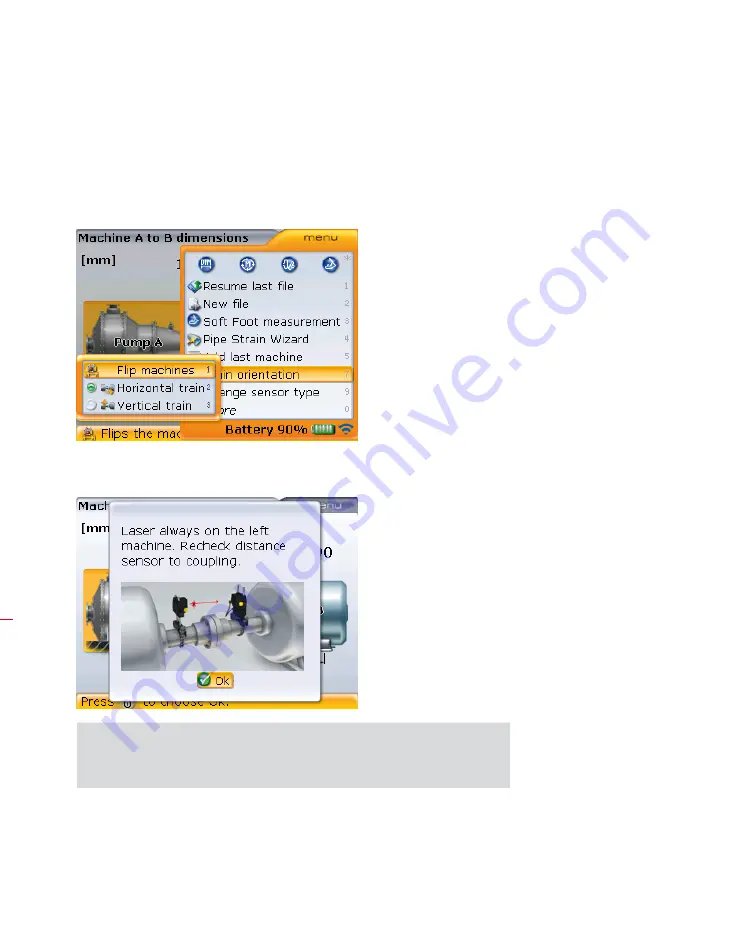
Situations where the machine positions on screen require rearranging often occur
when using predefined machine templates or during set-up (as can be seen in the
previous illustration).
1. Press
q
while in the “Dimensions” screen, then use the navigation keys and
highlight ‘Train orientation’ -> ‘Flip machines’.
2. Press
e
to confirm selection. A “Flip machines” hint screen appears.
The hint reminds the user that the laser must always be mounted on the left
machine as viewed by the user, and sensor to coupling center distance must be
checked again.
3. Press
e
or
ß
to confirm flipping machines.
Note that once a
measurement has been
taken, the “Dimensions”
screen context menu item
‘Flip machines’ disappears
and the machine positions
cannot be switched around
again.
H
Note
Содержание OPTALIGN smart RS5 BT
Страница 10: ...OPTALIGN smart RS5 BT handbook 10 Page intentionally left blank ...
Страница 16: ...OPTALIGN smart RS5 BT handbook 16 This page intentionally left blank ...
Страница 28: ...OPTALIGN smart RS5 BT handbook 28 Page intentionally left blank ...
Страница 38: ...OPTALIGN smart RS5 BT handbook 38 This page intentionally left blank ...
Страница 112: ...OPTALIGN smart RS5 BT handbook 112 This page intentionally left blank ...
Страница 174: ...OPTALIGN smart RS5 BT handbook 174 This page intentionally left blank ...
Страница 194: ...OPTALIGN smart RS5 BT handbook 194 This page intentionally left blank ...


