137
7 .2 .4 Adjusting the RS5 laser beam to machine’s rotational axis
In this step, the laser holder assembly is adjusted on the bracket such that the laser
holder rotational axis is colinear with the rotational axis of machine to be aligned
(which could be a motor or a gearbox).
During this procedure, DO NOT touch the yellow laser beam position
thumbwheels.
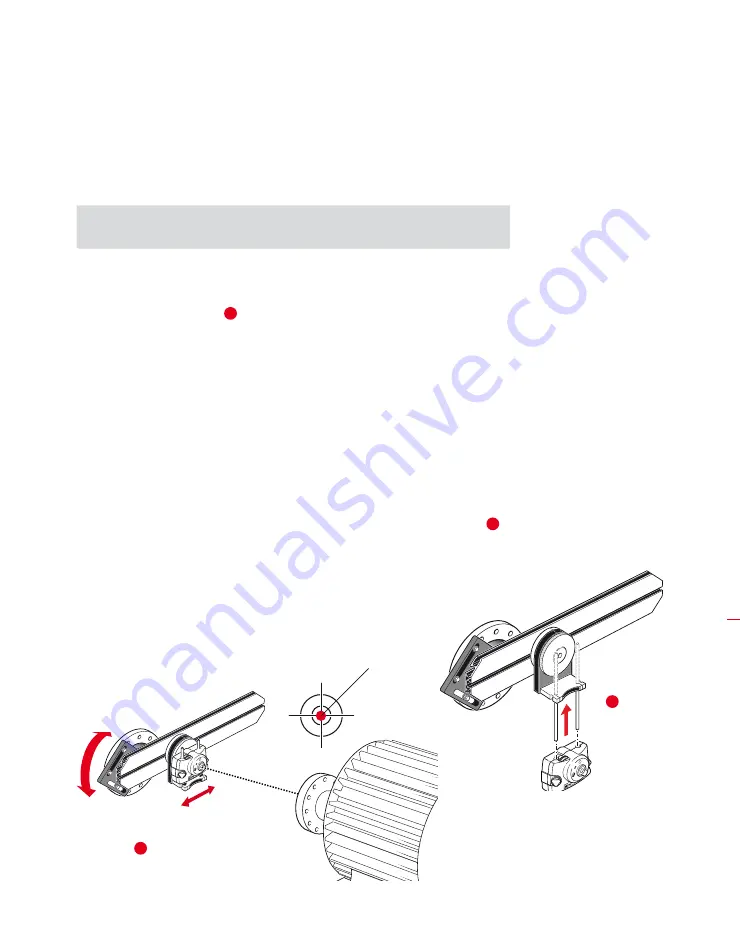
1. Carry out the vertical and horizontal adjustment of the laser holder assembly
by sliding it horizontally through the bracket rails and positioning it vertically by
rotating the bracket (see
1
below).
2. Repeat the above procedure until the laser beam strikes the center of the target
placed on the rotational axis of machine to be aligned.
3. Once the laser beam has been centered on the target, tighten the faceplate on
the coupling face using the provided hexagon socket head screws.
7 .2 .5 Positioning RS5 laser and mounting RS5 BT sensor for measurement
In this step, the RS5 laser is remounted on the underside of the laser holder while the
RS5 BT sensor is mounted on the shaft of the machine to be aligned.
1. Switch off the RS5 laser then remove it from its holder.
2. Using the provided M4 Allen key, loosen the support posts then slide them
through the laser holder base so that they protrude from the other side (see
2
below).
3. Retighten the M4 Allen screws to secure the support posts, then remount the
RS5 laser onto the support posts.
H
Note
Cardan drive machines
1
Laser dot
2
Содержание OPTALIGN smart RS5 BT
Страница 10: ...OPTALIGN smart RS5 BT handbook 10 Page intentionally left blank ...
Страница 16: ...OPTALIGN smart RS5 BT handbook 16 This page intentionally left blank ...
Страница 28: ...OPTALIGN smart RS5 BT handbook 28 Page intentionally left blank ...
Страница 38: ...OPTALIGN smart RS5 BT handbook 38 This page intentionally left blank ...
Страница 112: ...OPTALIGN smart RS5 BT handbook 112 This page intentionally left blank ...
Страница 174: ...OPTALIGN smart RS5 BT handbook 174 This page intentionally left blank ...
Страница 194: ...OPTALIGN smart RS5 BT handbook 194 This page intentionally left blank ...


