109
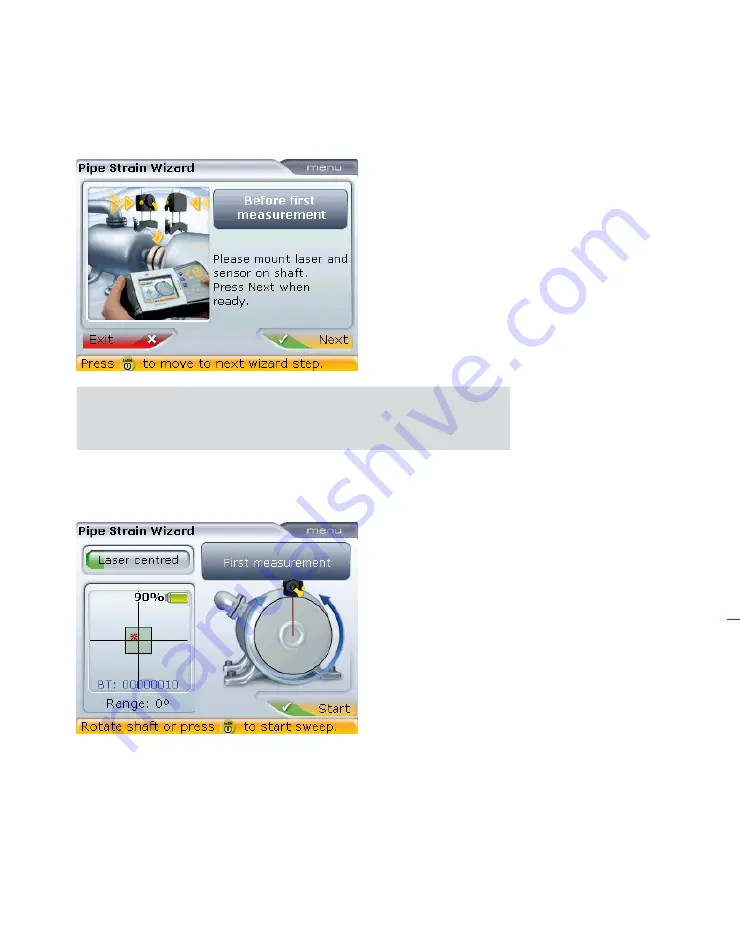
With the ‘Next’ button highlighted, press
e
to proceed.
If the components have not yet been mounted, ensure that they are properly
mounted. Make sure that both the sensor with integrated Bluetooth and the
laser are switched on. You may refer to sections 5.4.
With the ‘Next’ button highlighted, press
e
to proceed with measurement. The
measurement screen appears.
Rotate the shafts over a wide enough measurement range. When a wide enough
measurement range is attained, the ‘Stop’ button appears.
H
Note
If the laser beam is not
centered, press
q
then use
g
/
f
to highlight the context
menu item ‘Adjust laser’,
confirming selection
by pressing
e
. After
adjusting the laser
beam press
e
or
ß
to proceed with
measurement.
Pipe strain
Содержание OPTALIGN smart RS5 BT
Страница 10: ...OPTALIGN smart RS5 BT handbook 10 Page intentionally left blank ...
Страница 16: ...OPTALIGN smart RS5 BT handbook 16 This page intentionally left blank ...
Страница 28: ...OPTALIGN smart RS5 BT handbook 28 Page intentionally left blank ...
Страница 38: ...OPTALIGN smart RS5 BT handbook 38 This page intentionally left blank ...
Страница 112: ...OPTALIGN smart RS5 BT handbook 112 This page intentionally left blank ...
Страница 174: ...OPTALIGN smart RS5 BT handbook 174 This page intentionally left blank ...
Страница 194: ...OPTALIGN smart RS5 BT handbook 194 This page intentionally left blank ...


