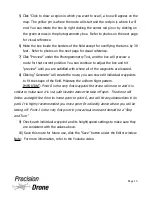
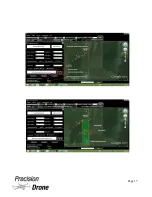

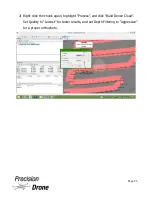
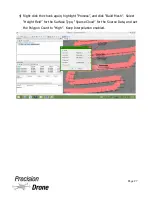
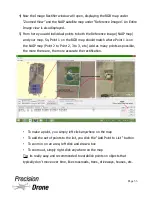
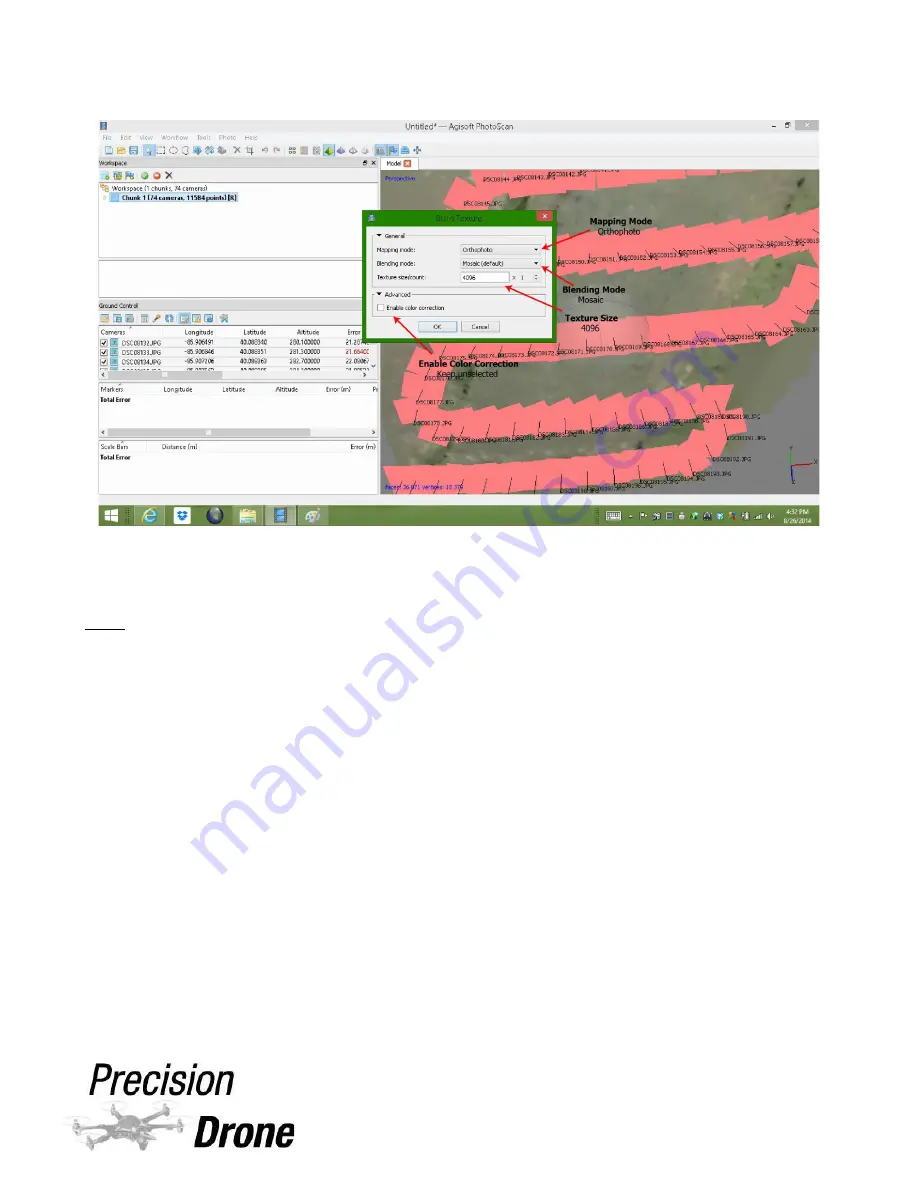
5) Right-click the chunk again, highlight “Process”, and click “Build Texture”
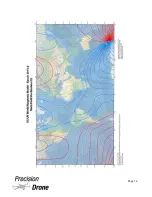
6) Once that process is complete you should see a stitched map in the 3D viewer.
Tips
:
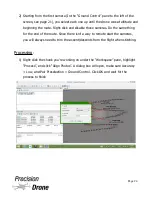
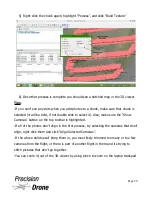
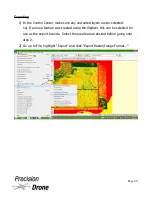
-If you can't see any dots when you add photos to a chunk, make sure that chunk is
selected (it will be bold, if not double click to select it). Also, make sure the “Show
Cameras” button on the top toolbar is highlighted.
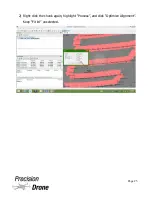
-If all of the photos don't align in the first process, try selecting the cameras that don't
align, right-click them and click “Align Selected Cameras”.
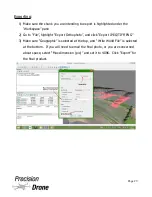
-If the above still doesn't bring them in, you most likely trimmed too many or too few
cameras from the flight, or there is part of another flight in there and its trying to
stitch pictures that don't go together.
-You can zoom in/out of the 3D viewer by using pinch to zoom on the laptop trackpad
1
29
Page 28
Содержание Pacesetter 2015
Страница 1: ...User s Manual Pacesetter Model 2015 Serial Number Version 1 12...
Страница 6: ...Components DX8 Controller 1 6 Page 5...
Страница 7: ...Battery Charger 1 7 Page 6...
Страница 8: ...Live Feed Monitor 1 8 Page 7...
Страница 10: ...Precision Vision Camera 1 10 Page 9...
Страница 15: ...1 15 Page 14...
Страница 18: ...1 18 Page 17...
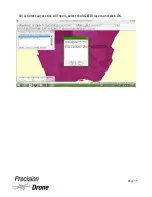
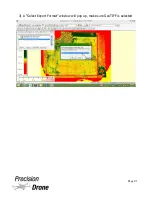
Страница 36: ...10 A Select Layers box will open select the RGB IR layers and click OK 1 36 Page 35...
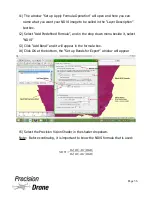
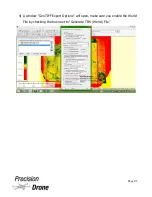
Страница 38: ...16 Click the Band 1 tab at the top and make sure the RGB layer is checked and the IR layer is not 1 38 Page 37...
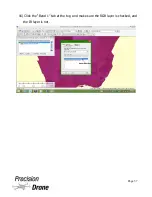
Страница 42: ...3 A Select Export Format window will pop up make sure GeoTIFF is selected 1 42 Page 41...
Страница 48: ...Blade Motor Rotation 1 48 Page 47...
Страница 49: ...1 49 Page 48...
Страница 51: ...Flight and Service Log Serial Number...


