
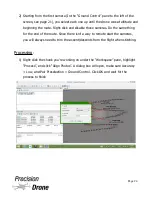
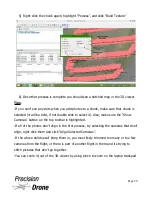
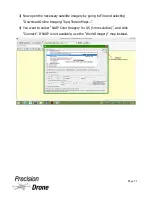
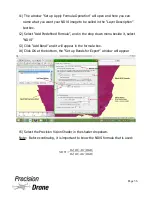
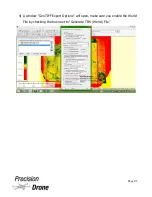
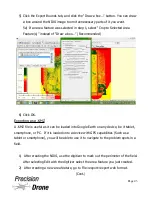

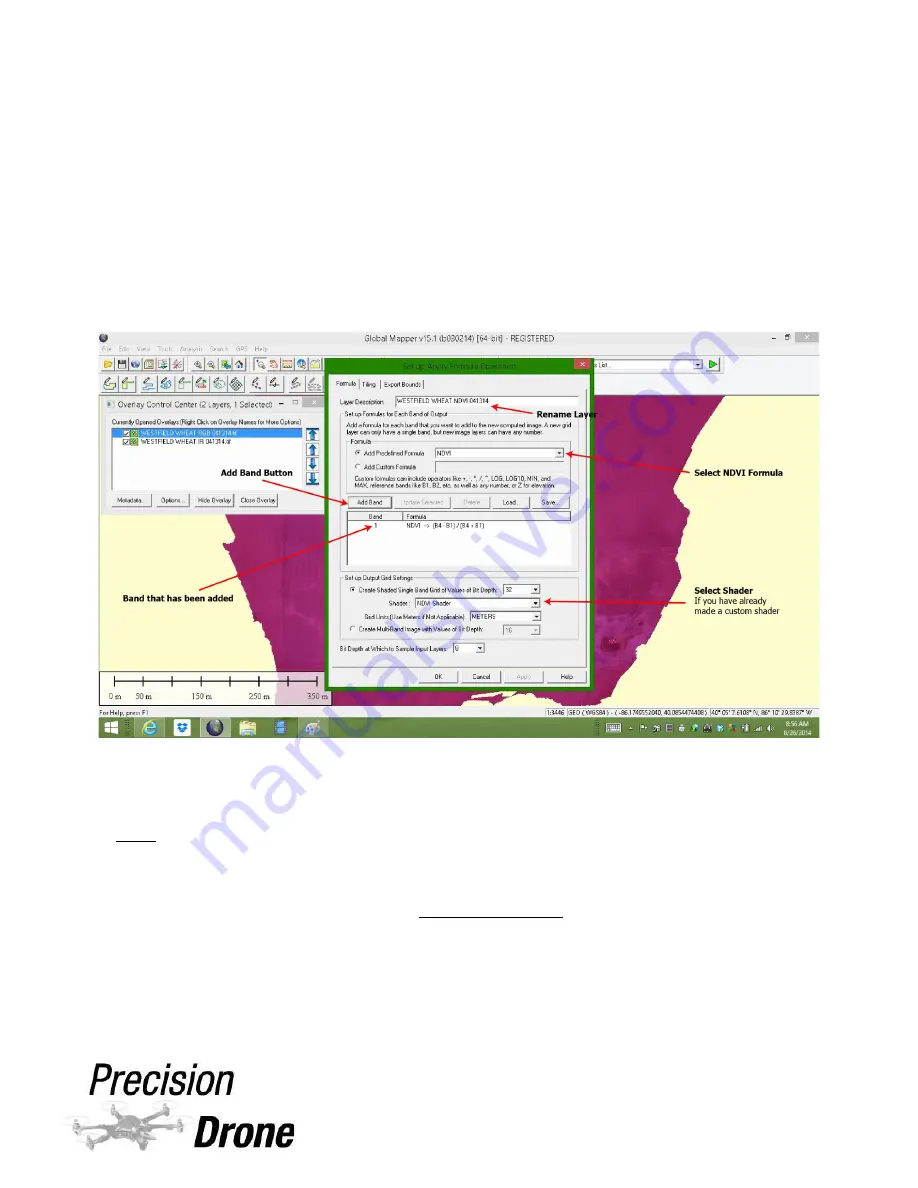
11) The window “Set up Apply Formula Operation” will open and here you can
name what you want your NDVI image to be called in the “Layer Description”
textbox.
12) Select “Add Predefined Formula”, and in the drop down menu beside it, select
“NDVI”
13) Click “Add Band” and it will appear in the formula box.
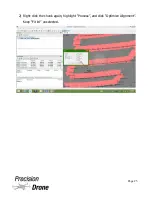
14) Click OK at the bottom, the “Set up Bands for Export” window will appear
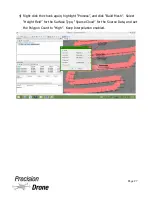
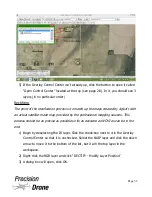
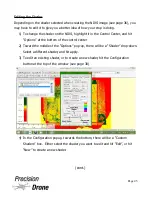
15) Select the Precision Vision Shader in the shader dropdown.
Note: Before continuing, it is important to know the NDVI formula that is used:
1
37
Page 36
NDVI
=
B4
(
IR
)−
B1
(
RGB
)
B4
(
IR
)+
B1
(
RGB
)
Содержание Pacesetter 2015
Страница 1: ...User s Manual Pacesetter Model 2015 Serial Number Version 1 12...
Страница 6: ...Components DX8 Controller 1 6 Page 5...
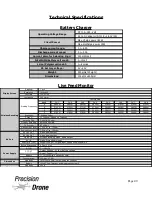
Страница 7: ...Battery Charger 1 7 Page 6...
Страница 8: ...Live Feed Monitor 1 8 Page 7...
Страница 10: ...Precision Vision Camera 1 10 Page 9...
Страница 15: ...1 15 Page 14...
Страница 18: ...1 18 Page 17...
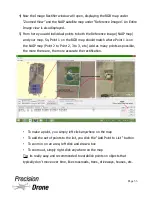
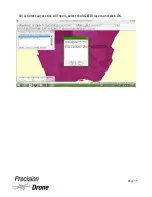
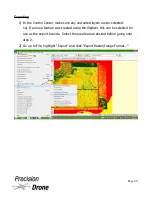
Страница 36: ...10 A Select Layers box will open select the RGB IR layers and click OK 1 36 Page 35...
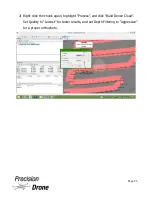
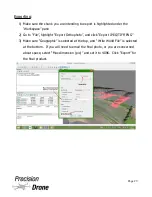
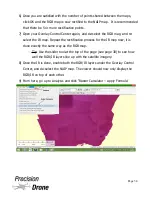
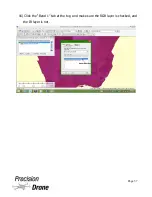
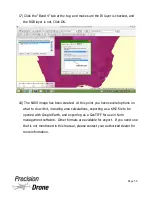
Страница 38: ...16 Click the Band 1 tab at the top and make sure the RGB layer is checked and the IR layer is not 1 38 Page 37...
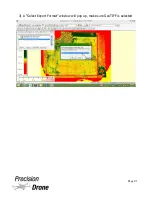
Страница 42: ...3 A Select Export Format window will pop up make sure GeoTIFF is selected 1 42 Page 41...
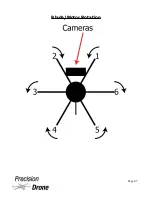
Страница 48: ...Blade Motor Rotation 1 48 Page 47...
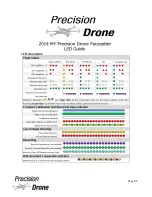
Страница 49: ...1 49 Page 48...
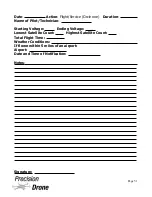
Страница 51: ...Flight and Service Log Serial Number...


