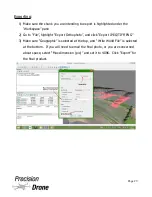
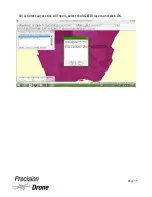
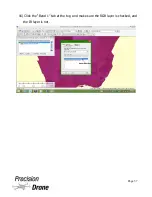
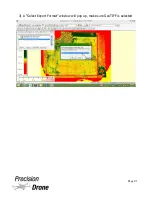
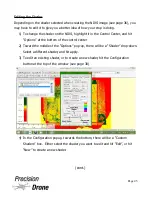


5) Click the Export Bounds tab, and click the “Draw a box...” button. You can draw
a box around the NDVI image to omit unnecessary parts of it you want.
5a) If an area feature was selected in step 1, select “Crop to Selected Area
Feature(s)” instead of “Draw a box...” (Recommended)
6) Click OK.
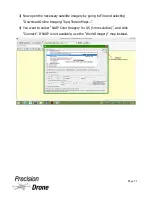
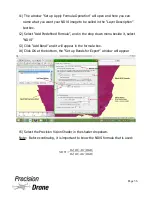
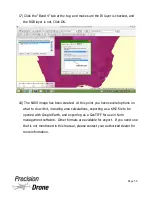
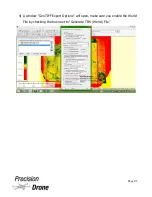
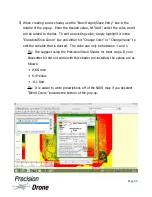
Exporting as a .KMZ
A .KMZ file is useful as it can be loaded into Google Earth on any device, be it tablet,
smartphone, or PC. If it is loaded onto a device with GPS capabilities (Such as a
tablet or smartphone), you will be able to use it to navigate to the problem spots in a
field.
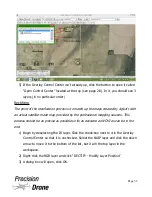
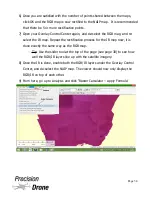
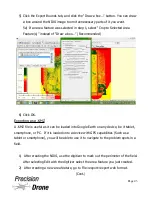
1) After creating the NDVI, use the digitizer to mark out the perimeter of the field.
After selecting Edit with the digitizer select the area feature you just created.
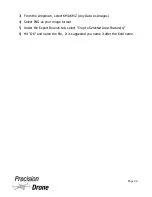
2) After creating a new area feature, go to File>export>export web format.
(Cont.)
1
44
Page 43
Содержание Pacesetter 2015
Страница 1: ...User s Manual Pacesetter Model 2015 Serial Number Version 1 12...
Страница 6: ...Components DX8 Controller 1 6 Page 5...
Страница 7: ...Battery Charger 1 7 Page 6...
Страница 8: ...Live Feed Monitor 1 8 Page 7...
Страница 10: ...Precision Vision Camera 1 10 Page 9...
Страница 15: ...1 15 Page 14...
Страница 18: ...1 18 Page 17...
Страница 36: ...10 A Select Layers box will open select the RGB IR layers and click OK 1 36 Page 35...
Страница 38: ...16 Click the Band 1 tab at the top and make sure the RGB layer is checked and the IR layer is not 1 38 Page 37...
Страница 42: ...3 A Select Export Format window will pop up make sure GeoTIFF is selected 1 42 Page 41...
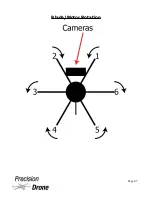
Страница 48: ...Blade Motor Rotation 1 48 Page 47...
Страница 49: ...1 49 Page 48...
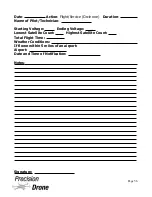
Страница 51: ...Flight and Service Log Serial Number...


