175
PDP-433CMX
1
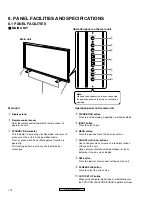
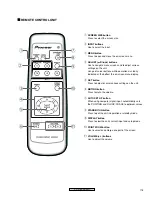
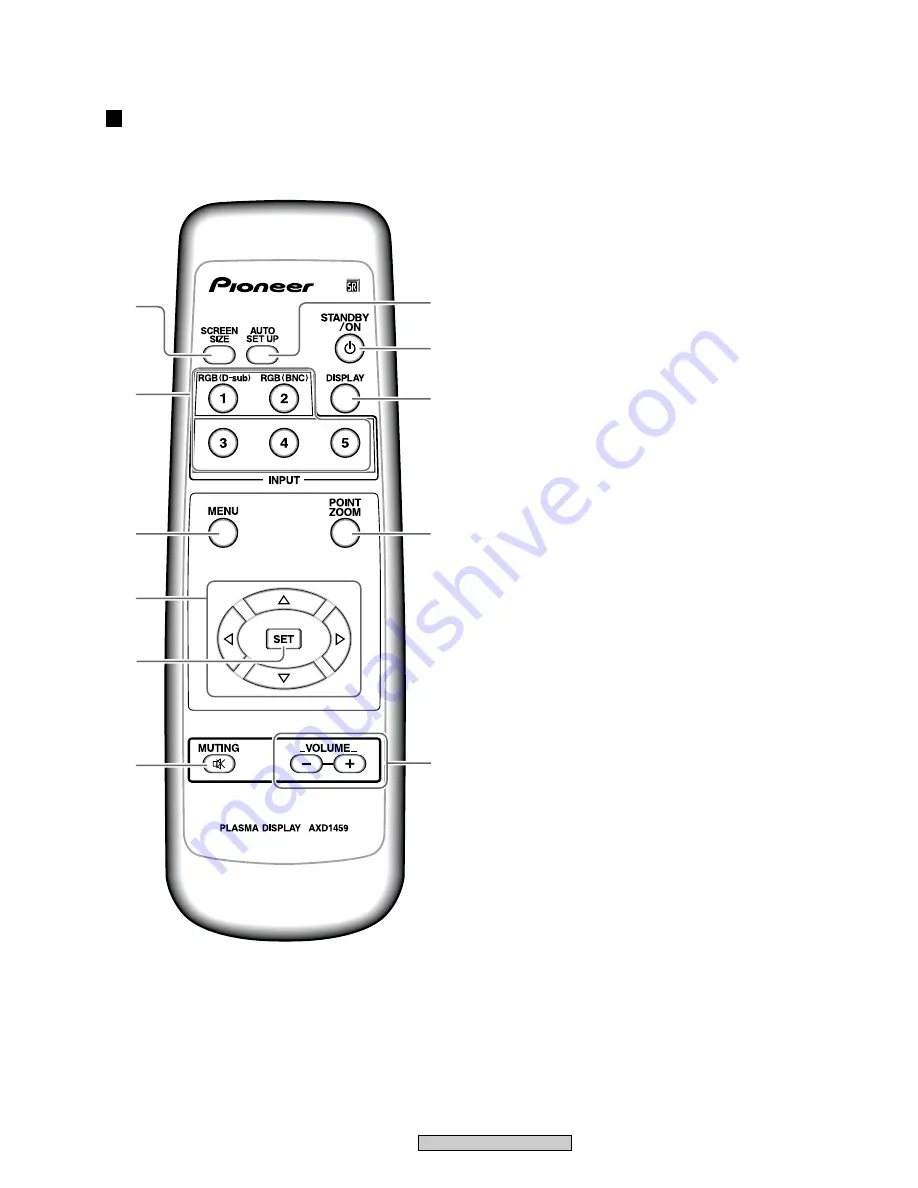
SCREEN SIZE button
Press to select the screen size.
2
INPUT buttons
Use to select the input.
3
MENU button
Press to open and close the on-screen menu.
4
ADJUST (
5
/
∞
/
3
/
2
) buttons
Use to navigate menu screens and to adjust various
settings on the unit.
Usage of cursor buttons within operations is clearly
indicated at the bottom the on-screen menu display.
5
SET button
Press to adjust or enter various settings on the unit.
6
MUTING button
Press to mute the volume.
7
AUTO SET UP button
When using computer signal input, automatically sets
the POSITION and CLOCK/ PHASE to optimum values.
8
STANDBY/ON button
Press to put the unit in operation or standby mode.
9
DISPLAY button
Press to view the unit’s current input and setup mode.
0
POINT ZOOM button
Use to select and enlarge one part of the screen.
-
VOLUME (+/–) buttons
Use to adjust the volume.
REMOTE CONTROL UNIT
8
9
7
0
-
2
3
4
5
6
1
Содержание PDP 433CMX
Страница 14: ...14 PDP 433CMX Upper side 8 9 1 Upper side Upper side 9 7 5 6 2 10 10 8 8 2 5 UNDER LAYER SECTION 4 ...
Страница 26: ...26 PDP 433CMX 2 13 UPPER LAYER SECTION 2 10 10 12 SW101 100V 200V P4 P7 P3 P5 P6 P2 P1 VM1 6 7 4 8 5 1 9 3 ...
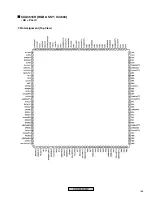
Страница 165: ...165 PDP 433CMX Pin Assignment Top View CXA3516R RGB ASSY IC4603 AD PLL IC ...
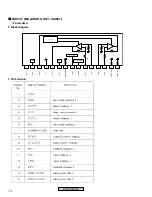
Страница 166: ...166 PDP 433CMX Block Diagram ...
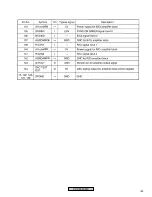
Страница 167: ...167 PDP 433CMX Pin Function ...
Страница 168: ...168 PDP 433CMX ...
Страница 169: ...169 PDP 433CMX ...


