4
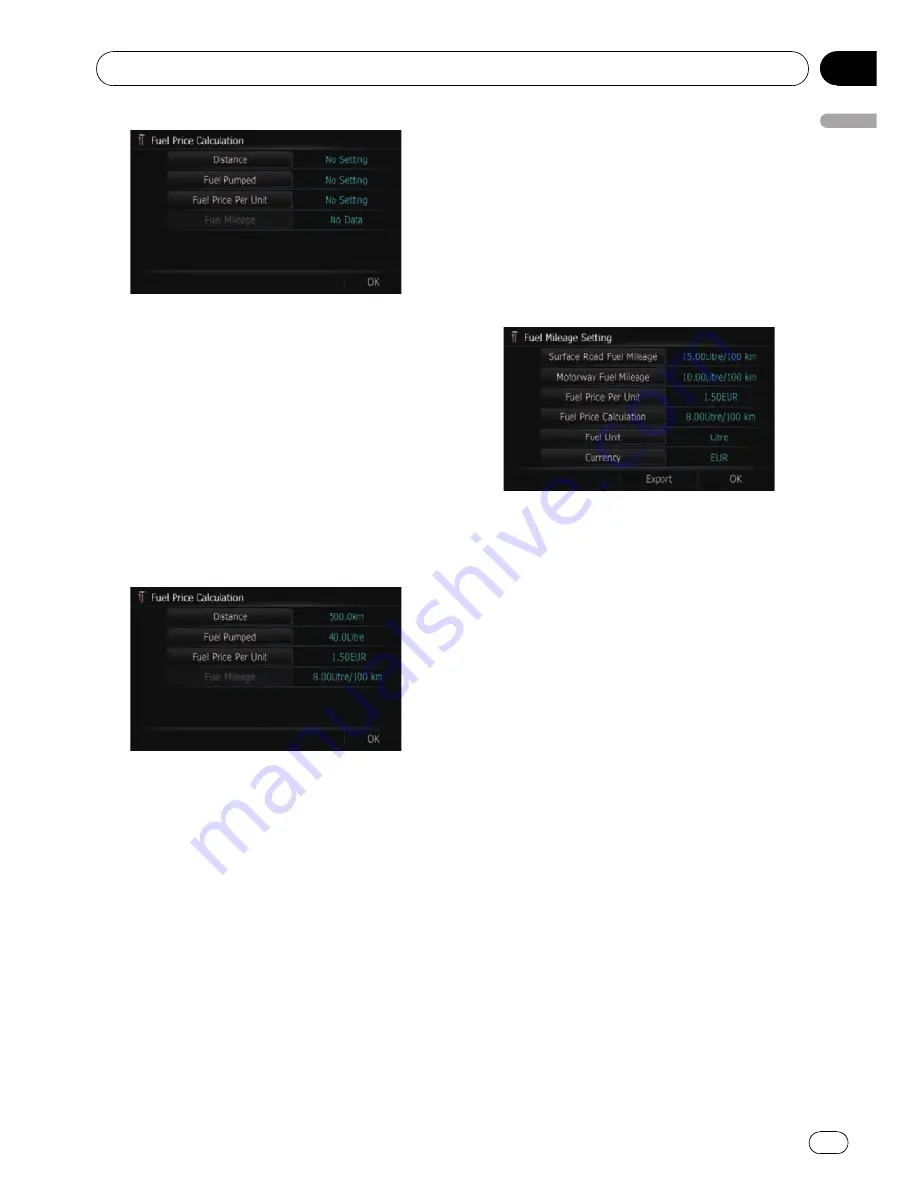
Enter the following settings:
!
[
Distance
]:
Enter the distance travelled since the pre-
vious fuelling.
p
The distance is entered automatically
only when the distance travelled since
the previous fuelling is recorded.
!
[
Fuel Pumped
]:
Enter the amount of fuel pumped.
!
[
Fuel Price Per Unit
]:
Enter the fuel unit price.
When all the items are entered, the fuel con-
sumption is displayed next to
“
Fuel Mileage
”
.
5
Touch [OK].
The
“
Fuel Mileage Setting
”
screen appears.
Exporting the data of
“
Fuel Price
Calculation
”
Exporting the
“
Fuel Price Calculation
”
data to
an SD memory card is possible.
p
The data stored in this navigation system
will be cleared as exporting it to the SD
memory card.
p
If there is a previous data in the SD mem-
ory card, the data is overwritten with new
data when current data is exported.
1
Insert an SD memory card into the SD
card slot.
=
For more details of the operation, refer to
In-
serting and ejecting an SD memory card
on
page 13.
2
Display the
“
Navi Settings
”
screen.
3
Touch [Fuel Mileage].
The
“
Fuel Mileage Setting
”
screen appears.
4
Touch [Export].
After a message confirming whether to export
the data appeared, exporting the data to the
SD memory card starts.
The
“
Fuel Mileage Setting
”
screen appears
when it is done.
Recording your travel history
Activating the track logger enables you to re-
cord your driving history (called
“
track log
”
below). You can review the travel history later.
p
If an SD memory card is inserted into the
SD card slot, the track logs will be stored in
the SD memory card.
1
Insert an SD memory card into the SD
card slot.
=
For more details of the operation, refer to
In-
serting and ejecting an SD memory card
on
page 13.
2
Display the
“
Navi Settings
”
screen.
3
Touch [Drive Log Settings].
The
“
Drive Log Settings
”
screen appears.
4
Touch [Drive Log Settings].
Each time you touch the key changes that set-
ting.
Customising preferences
Engb
71
Chapter
13
Customising
pr
eferences


