32
DIGITAL VIDEO RECORDER
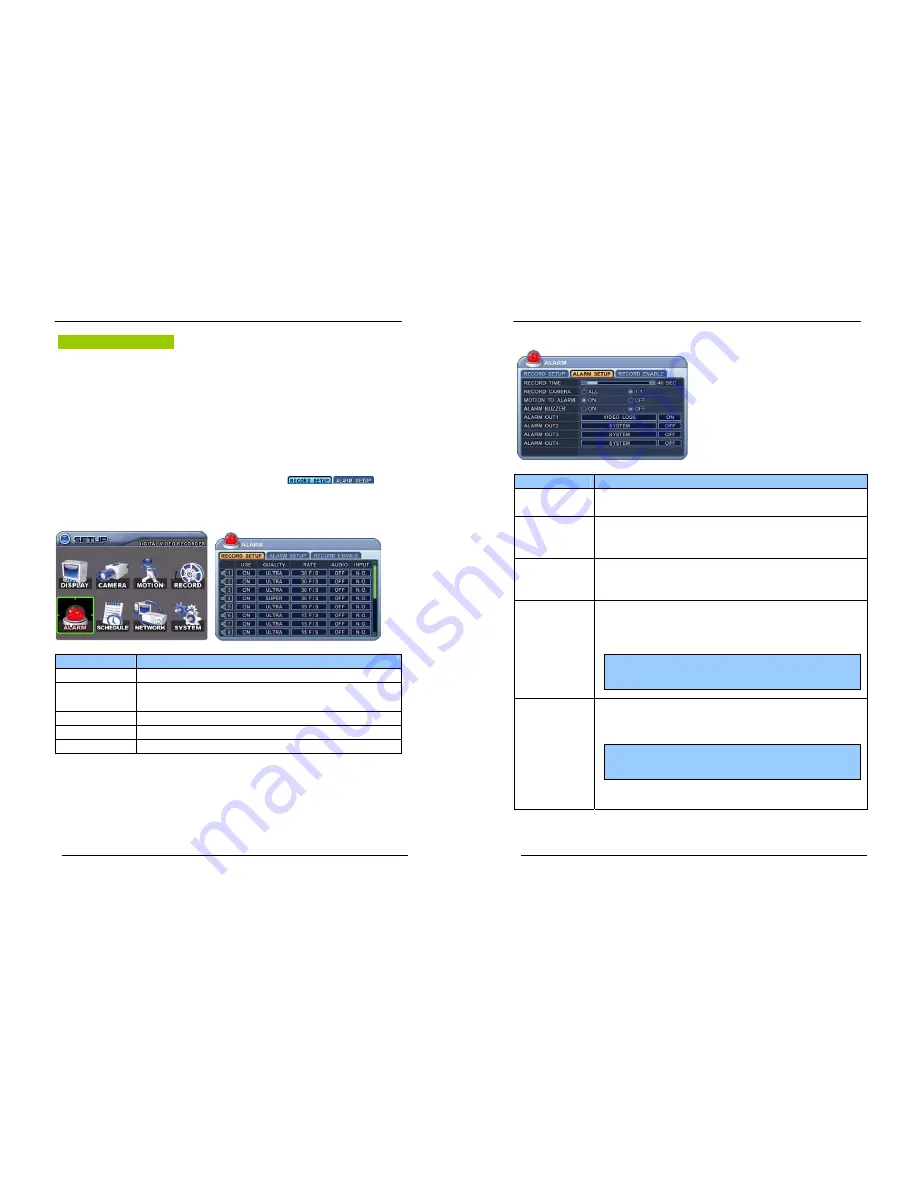
Alarm Recording
Please verify the alarm record settings prior to starting alarm recording. Please note that
alarm recording is independent of any recording modes. Alarm record starts after Alarm
Record Enable.
1. RECORD SETUP
1.
Use Direction buttons [
STWX
] to select “ALARM” menu. Then, press [ENTER]
button to display “Alarm Record Setup”.
2.
Use Left/Right buttons [
WX
] to select on TAP menu (
).
3.
Use Direction buttons [
STWX
] to select the Camera you wish to configure.
4.
Use
[-, +]
button to change the value.
ITEM
ADJUSTMENT
USE
y
Enable or Disable Alarm Recording on a per camera.
QUALITY
y
Specify the record picture quality for each camera on Alarm Recording.
ULTRA
Æ
SUPER
Æ
HIGH
Æ
MIDDLE
Æ
LOW
RATE
y
Select recording rate of each camera when Alarm is triggered
AUDIO
y
Select audio recording: ON or OFF.
INPUT
y
Specify the type of Alarm input Device.
<Note> Press [
MENU]
button on each Item at first line to apply all setting for the rest channel.
5. Save changes and exit the menu, press [ENTER] button.
Exit the menu without making changes, press [CANCEL] button.
33
DIGITAL VIDEO RECORDER
2. ALARM SETUP
ITEM
ADJUSTMENT
RECORD TIME
y
Determines the duration of recording after the alarm signal has been
activated.
[10SEC ~ 240SEC]
RECORD CAMERA
y
ALL:
Start to record All Alarm “ON” channel if there is any Alarm signal is
triggered.
y
1:1:
Start to record the channel, which Alarm is triggered.
MOTION TO ALARM
y
Select “ON” to use Motion detection like Alarm triggered
- From the LOG, it will be listed as Motion.
- The unit will not send E-mail
ALARM BUZZER
y
ON:
The buzzer Sounds if an alarm is triggered. The buzzer will sound for
the duration of the RECORD TIME. This buzzer related with Alarm
Out. Please configure Alarm Out “ON” for Alarm buzzer.
y
OFF:
Disables the ALARM BUZZER function.
ALARM OUT1~4
y
Configure which relay will be triggered when an alarm is activated per
camera. Select from four available options:
Video Loss, Motion, Alarm ALL, Each Alarm, System.
y
Press [Cancel] button to stop Alarm Out.
It will be cleared by an order: Alarm>Motion> Video Loss
6.
Save changes
and exit the menu, press
[ENTER]
button.
7.
Press [
REC]
button after setting RECORD ENABLE. Then, the red REC LED lights on
the front panel and recording starts.
<Note>
If “System” is selected, the relay will be triggered when System
has problems such as HDD FAIL,FAN LOCK etc.
<Note>
Press
[-]
button to stop the buzzer immediately. Stopping the
buzzer does not stop the alarm recording.


