CLASS NO.
A
ll
r
ights
s
tr
ic
tly
r
e
se
rv
ed
. R
epr
oduc
ti
on or
is
su
e
to
t
h
ir
d
p
ar
ties
in
an
y f
o
rm
w
h
at
ev
er
is
n
o
t
p
e
rm
it
te
d
w
ithout w
ri
tte
n a
u
thor
it
y,
fr
om
the
pr
opr
ie
tor
s
.
.
NAME
2838 100 05424
TY
CHECK
SUPERS
.
DATE
Property of
PHILIPS ELECTRONICS INDUSTRIES (TAIWAN) LTD.-C.E.
10
A4
0.9 BDL3245E/BDL4245E/BDL4645E
32”/42”/46” FHD LCD PUBLIC DISPLAY
2011-07-01 PHILIPS Page 21 of 38
MMD Confidential
z
Black
stretch
-
No
z
De-interlace -
3D MA (motion adaptive)
z
Y/C separation -
3D comb filter
z
Video artifact reduction - High quality
z
Motion
compensated
de-interlacing
z
3/2 - 2/2 motion pull down
z
Noise
reduction
4. FUNCTIONAL REQUIREMENTS
4.1 Power
When POWER ON = FORCED ON, Display goes to On state when mains is applied, secondary
user actions cannot switch off the Display.
When POWER ON = STANDBY , Display goes to STANDBY when mains is applied.
When POWER ON = ON , Display goes to On state when mains is applied.
When POWER ON = LAST STATUS, Display goes to Last status (ON or STANDBY) depending
of the previous state of Display before power off.
4.2 Picture
Picture control handles the initialization of the video parameters and the recall of the video
personal preferences.
Some video parameters can also be changed via the picture sub menu.
4.2.1 Wide Screen Signalling Bit (WSSB) picture size
CVBS input must support WSSB function.
4.2.2 Picture format
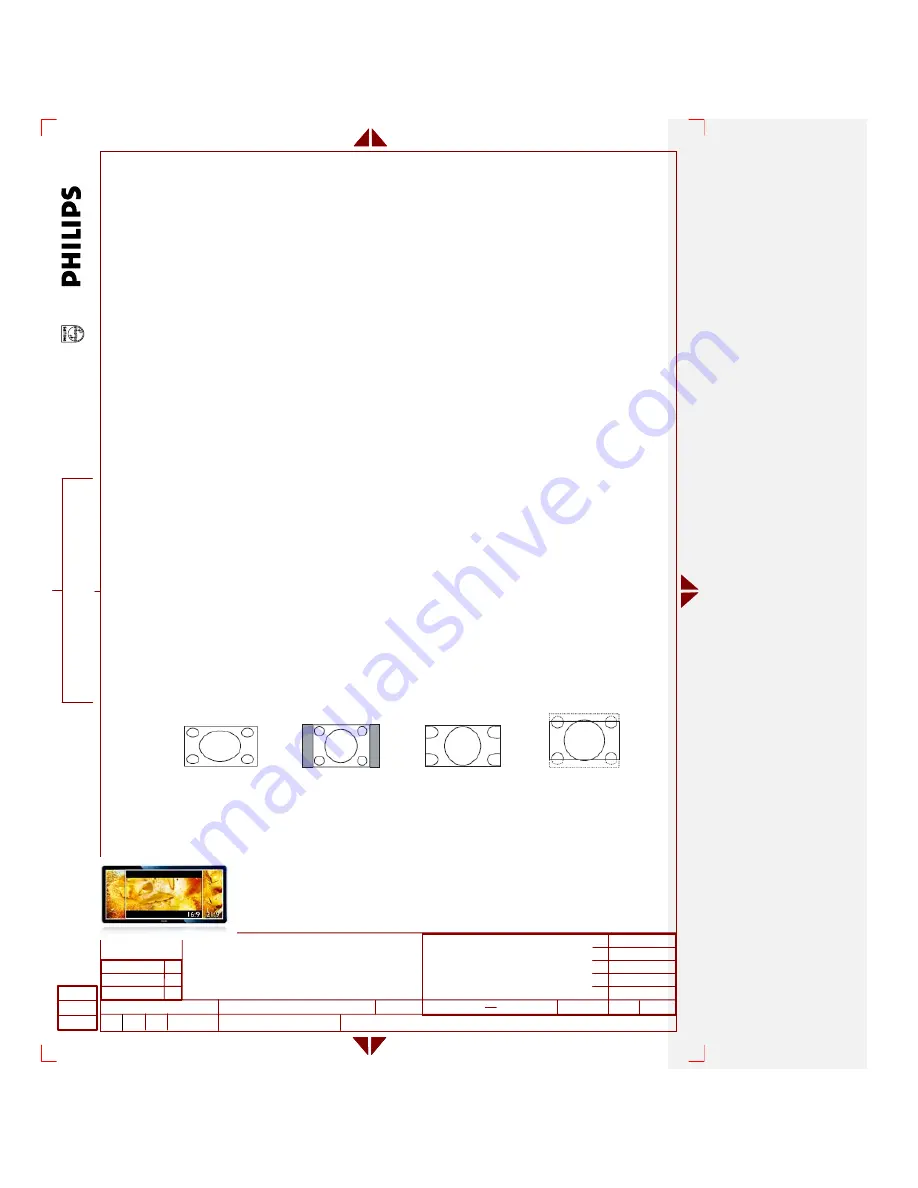
There are 6 picture formats: FULL, NORMAL, DYNAMIC, CUSTOM, REAL and 21:9.
`
FULL
NORMAL
DYNAMIC
21:9
*DYNAMIC: 480i/480P/576i/576P only.
21:9 picture format:
1. When playback the
21:9 (2.39:1 or 2.40:1) video/picture format on BDL5571V, you will see the black area at top/bottom in
FULL Zoom Mode, while when our users choose the 21:9 option in OSD Menu\Screen\Zoom Mode, the video/picture will
be proportional enlargement until the black area at top/bottom disappear, that is, the partial right/left side of video/picture
will be cut off, just for your information.
Содержание BDL4245E/00
Страница 35: ...35 5 Block Diagram 5 1 Scaler Board ...
Страница 78: ...78 78 3 Remove all the screws as follow ...
Страница 79: ...79 4 Remove the main frame from the panel ...
Страница 83: ...83 3 Remove all the screws as follow ...
Страница 84: ...84 84 4 Remove the main frame from the panel ...
Страница 89: ...89 3 Set the parameters as below figure ...
Страница 91: ...91 6 Click Commands batch to load the file isp_psi_ext txt ...
Страница 95: ...95 ...
Страница 97: ...97 ...
Страница 100: ...100 100 5 Click Auto to upgrade 6 Update processing ...
Страница 101: ...101 7 Upgrade successfully 6 Troubleshooting Not connected error The way to cure it by select correct ISP Target ...
Страница 104: ...104 104 2 Tick the Analog DVI and click Loadfile to set the parameters 3 Select the EDID folder ...
Страница 137: ...137 ...
Страница 138: ...138 138 15 Monitor Exploded View ...
Страница 139: ...139 ...
Страница 140: ...140 140 ...
Страница 144: ...144 144 17 General Product Specification Please refer to the Product Specification the next page ...


