background image

www.princetoninstruments.com

Nano-XF System Manual

4411-0116
Issue 5
October 4, 2019

Содержание Princeton Instruments Nano-XF

Страница 1: ...www princetoninstruments com Nano XF System Manual 4411 0116 Issue 5 October 4 2019...

Страница 2: ...accurate as of the publication release date However Teledyne Princeton Instruments does not assume any responsibility for any consequences including any damages resulting from the use thereof The inf...

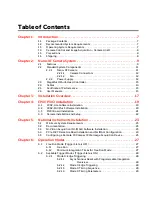
Страница 3: ...19 4 2 XCAP Std Plus Software Installation 20 4 3 PIXCI Board Installation 21 4 4 Camera Installation and Setup 22 Chapter 5 National Instruments Installation 23 5 1 Minimum System Requirements 23 5...

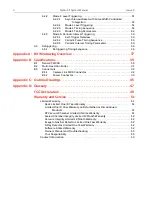
Страница 4: ...tions 39 B 1 Nano XF 11000 39 B 2 Multi Head Controller 41 B 3 Connectors 42 B 3 1 Camera Link MDR Connector 42 B 3 2 Power Connector 43 Appendix C Outline Drawings 45 Appendix D Glossary 47 FCC Decla...

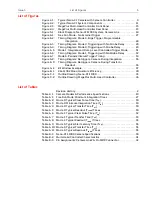
Страница 5: ...6 9 Timing Diagram Retrigger a Camera During Transfer or Readout 36 Figure A 1 Bit Window Example 37 Figure B 1 KAI 11002 Mono Quantum Efficiency 40 Figure C 1 Outline Drawing Nano XF 11000 45 Figure...

Страница 6: ...6 Nano XF System Manual Issue 5 This page is intentionally blank...

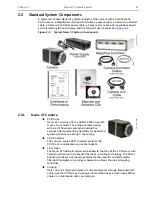
Страница 7: ...al imaging 1 1 Package Contents The total package you receive will depend on the camera and components you ordered Please check to make sure that at a minimum all of the items listed are included in y...

Страница 8: ...and NI IMAQ software REFERENCES Refer to Section 2 3 MegaPlus Multi Head Controller on page 13 for additional information 1 5 Precautions Controller to Camera Cables DO NOT HOT PLUG THESE CABLES Turn...

Страница 9: ...e from the CCD the Nano XF camera is able to maintain cooler CCD temperatures and achieve lower noise and higher dynamic range than comparable cameras See Figure 2 1 Figure 2 1 Typical Nano XF Camera...

Страница 10: ...he camera Strobe Output Trigger Out The strobe output from the controller provides a trigger signal that can be used to control strobed illumination sources or other synchronous events This function s...

Страница 11: ...fiberoptic extended outside the vacuum offers outstanding flexibility for optimized system performance at any X ray energy CCD Chamber The vacuum sealed CCD chamber protects the CCD from condensation...

Страница 12: ...camera by the internal fan through the slots on the side of the camera and exhausted through the slots on the rear then removes the heat produced by the Peltier device The fan is always in operation...

Страница 13: ...olution of the Nano XF camera only one head is supported with this controller See Figure 2 3 Figure 2 3 MegaPlus Multi Head Controller Front Panel Rear Panel CAUTION Make sure the controller power swi...

Страница 14: ...specification is available for purchase from the Automated Imaging Association website Bookstore accessed via www machinevisiononline org Camera Link 2 A connector that enables limited use of the Cam...

Страница 15: ...which are useful when contacting Teledyne Princeton Instruments Customer Support 2 6 User Manuals Nano XF System User Manual This manual describes how to install and use the Nano XF system components...

Страница 16: ...16 Nano XF System Manual Issue 5 This page is intentionally blank...

Страница 17: ...gns of damage verify that the appropriate power cord has been supplied with the power supply 4 If the application software has not already been installed on the host computer refer to the appropriate...

Страница 18: ...18 Nano XF System Manual Issue 5 Figure 3 1 illustrates a typical Nano XF system block diagram Figure 3 1 Block Diagram Nano XF 11000 System Camera Link 4411 0116_010...

Страница 19: ...ter functionality purchase XCAP Plus or XCAP Std from EPIX For a detailed comparison of the family of XCAP software programs refer to the XCAP Feature Chart located on the www epixinc com website 4 1...

Страница 20: ...irectory is C XCAP 6 At the end of the installation select No when prompted to run the software to finish the installation 7 Close all open Windows 8 Insert the USB key provided into a USB port on the...

Страница 21: ...Install from a list or a specific location Advance c Click Next d Select Search for the best driver in these locations e Deselect the box Search removable storage media f Select the box Include this...

Страница 22: ...wer has been turned on 5 On the host computer select Start All Programs 6 From the menu locate and open the XCAP Imaging folder 7 Select XCAP for Windows 8 When the License Agreement is displayed sele...

Страница 23: ...re The documentation ships as Adobe Acrobat portable document format PDF files and HTML Help files 5 3 Ni Vision Acquisition NI IMAQ Software Installation Perform the following procedure to install th...

Страница 24: ...the computer and restart Windows 4 Turn the power on to the Camera Controller There are two switches that must be turned on One on the power supply The other is on the controller 5 Wait until the Mega...

Страница 25: ...components enable the remote device to acquire and analyze images as directed by the host machine NOTE Install NI IMAQ and the LabVIEW Real Time Module on the remote system before you install and con...

Страница 26: ...26 Nano XF System Manual Issue 5 This page is intentionally blank...

Страница 27: ...ontinuous Video mode This mode requires no external control signals and provides high frame rates by overlapping the readout time with the exposure time An internally generated fixed frequency trigger...

Страница 28: ...takes place After the readout the system is ready for another EXT TRIG signal See Figure 6 2 Figure 6 2 Timing Diagram Mode 0 Edge Trigger Programmable Integration 6 2 1 2 Mode 0 Edge Triggering In E...

Страница 29: ...s an optional user adjustable delay from the start of the Clear Pulse to the issue of the Strobe Pulse By default the strobe pulse begins at the time the Clear Pulse ends i e Tsd 0 The delay is under...

Страница 30: ...sfer Time This interval represents the time it takes to transfer data from the photosites to the vertical shift register This time is sensor dependent Refer to Table 6 4 for typical values Tread Reado...

Страница 31: ...iod See Figure 6 5 Figure 6 5 Mode 1 Integrate and Dump Level Controlled Trigger Mode 6 2 2 2 Mode 1 Level Triggering In Level mode triggering the camera responds to a trigger edge by clearing the sen...

Страница 32: ...the Clear Pulse Tcp plus the Integration Time Tint minus any optional Strobe Delay Tsd By default the Strobe Pulse begins at the time the Clear Pulse is sent to the sensor The start of the Strobe Puls...

Страница 33: ...dout Times that have been measured Tr Recovery Time This interval represents the time from the end of sensor readout to the time the system can accept another trigger pulse The recovery time is approx...

Страница 34: ...quence Figure 6 7 illustrates the timing sequence in periodic pulse trigger mode While waiting for a trigger the sensor is continually being flushed of charge When a trigger arrives via the rear panel...

Страница 35: ...Time This interval represents the time it takes to read the image from the sensor Tr Recovery Time This interval represents the time from the end of sensor readout to the time the system can accept a...

Страница 36: ...e 6 8 Timing Diagram Retrigger a Camera During Integration Figure 6 9 illustrates the camera s response to a second trigger if it arrives during the Transfer or Readout cycle of the first trigger In t...

Страница 37: ...d Various bit windows are selected by determining whether the start bit is 0 1 2 3 or 4 When the start bit of 4 is selected the full scale output of the analog to digital A D is output as 8 bits So a...

Страница 38: ...38 Nano XF System Manual Issue 5 This page is intentionally blank...

Страница 39: ...gapixels 10 71 Active Area 36 0 mm H x 24 0 mm V Imager Size 42 52 mm diagonal Spectral Mono Saturation Signal 60 000 e Well Capacity 60 000 Output Bit Depth Up to 12 bit per channel Dynamic Range 66...

Страница 40: ...4x4 binning 13 23 FPS 30 MHz Gain Settings 0 36 dB Binning Yes Standard Cooling 10 C Dark Current Doubling Temperature 7 C Incremental Housing Size L x W x H 6 66 169 00 mm x 3 75 95 25 mm x 3 75 95 2...

Страница 41: ...trigger in strobe output Output Video Ports DVI Dimensions L x D x H 157 mm x 157 mm x 50 8 mm Weight 900g Operating Temperature 0 40 C non condensing Vibration 3 g sinusoidal from 10 Hz to 500 Hz Sho...

Страница 42: ...ns Table B 3 Pin Assignments Camera Link 26 Pin MDR Connector Pin Number Signal Name Description 1 Inner Shield DC Ground 14 Inner Shield DC Ground 2 X0 Data from Camera Link Transmitter 15 X0 3 X1 16...

Страница 43: ...Camera Controller has a LEMO elbow receptacle EPG 0B 302 HLN for 12 VDC power input This receptacle mates with the FGG 0B 302 CLAD56 plug Pin 1 is 12 VDC and Pin 2 is connected to ground For more info...

Страница 44: ...44 Nano XF System Manual Issue 5 This page is intentionally blank...

Страница 45: ...1 28 6 35 169 06 6 66 44 11 11 R E L L O R T N O C O T R E L L O R T N O C O T R E W O P O T Y L P P U S R I A S T E L T U O 3 4 7 9 0 1 15 86 62 24 10 95 5 9 3 1 4 2 R I A S T E L N I S E T O N B L 5...

Страница 46: ...er Remote Head 2 Remote Head 3 Remote Head 1 Remote Head 4 160 7 50 8 57 34 6 23 8 3X 55 6X M3 6H 80 7 8 9 3X 22 6 158 3 115 6 55 2X 2X 173 2X 98 3 Camera Link 1 Camera Link 2 IEEE 1394 Ethernet DVI M...

Страница 47: ...rameters can then be applied to the camera Multiple sets of camera parameters can be stored and retrieved Gain Controls the gain applied at the CCD Values are specified in dB The value can be written...

Страница 48: ...ge is acquired The controller provides a variety of trigger modes Trigger logic can be specified as negative or positive Trigger signals can be sourced from the connector on the rear panel of the cont...

Страница 49: ...rence to radio communications However there is no guarantee that interference will not occur in a particular installation If this equipment does cause harmful interference to radio or television recep...

Страница 50: ...50 Nano XF System Manual Issue 5 This page is intentionally blank...

Страница 51: ...ANTIES EXPRESS OR IMPLIED this product against defects in materials or workmanship for a period of up to one 1 year after shipment During this period Teledyne Princeton Instruments will repair or repl...

Страница 52: ...e burn damage which carry NO WARRANTIES EXPRESSED OR IMPLIED all image intensifier products for a period of one 1 year after shipment Refer to additional Limited One 1 year Warranty terms and conditio...

Страница 53: ...ion an authorized service center 4 Before products or parts can be returned for service you must contact the Teledyne Princeton Instruments factory and receive a return authorization number RMA Produc...

Страница 54: ...d countries do not allow limitations on how long an implied warranty lasts when an action may be brought or the exclusion or limitation of incidental or consequential damages so the above provisions m...

Страница 55: ...This page is intentionally blank...

Страница 56: ...1 877 474 2286 France 33 1 60 86 03 65 Germany 49 0 89 660 7793 UK Ireland 44 0 1628 472 346 Singapore 65 6408 6240 China 86 10 659 16460 Japan 81 3 5639 2741 Copyright 2019 Teledyne Princeton Instru...

Отзывы: