


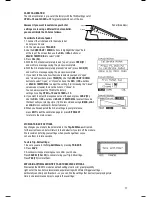


VELOCITY CURVE
The
CURV
page lets you set the velocity curve for the triggers, which
determines how a sound’s volume is affected by how hard you strike it –
that is, how responsive the triggers’ dynamics are to changes in your
playing.
1. Press
TRIG EDIT
to enter the main T
rig. Edit
Menu page. Press
TRIG (F2)
.
2. Select the trigger whose parameters you want to edit by pressing
PAD ID
then striking the desired trigger. Alternatively, you
can highlight the trigger name at the top of the screen using the
CURSOR UP / DOWN
buttons to highlight it and use the
DEC-/INC+
buttons or
VALUE / TEMPO DIAL
to change it.
3. Use
CURSOR UP / DOWN
to move through the menu items and
DEC- / INC+
buttons or the
VALUE / TEMPO DIAL
to adjust the
settings:
• Linear:
The triggers will be consistently responsive to
changes in your playing, increasing at the same rate as the
force of your hits.
• Log 1-4:
The triggers will be more responsive to changes in
your playing at lower velocities and become less responsive
at higher velocities.
• Exp 1-4:
The triggers will be more responsive to changes in
your playing at higher velocities and become less responsive
at lower velocities.
• Spline 1-4:
The triggers will be more responsive to changes
in your playing at lower and higher velocities and less
responsive at moderate velocities.
• Offset:
The triggers will be consistently responsive to
changes in your playing at lower and medium velocities and
play sounds at the maximum volume at high velocities.
• Constant:
The triggers will play sounds at the maximum
volume regardless of how hard or soft you hit them.
4. When you have finished making your edits, you can press
EXIT
or
any button that will enter another screen (e.g.,
KIT SELECT, UTILITIES
, etc.
Your edits will remain for that session (i.e., until you turn off the module).
MODE (RIDE BOW & BELL)
You should adjust this setting for the kind of ride cymbal you are using –
a dual-zone ride (which has bow and bell triggers) or a three-zone ride
(which has edge, bow, and bell triggers).
To do this:
1. Press
TRIG EDIT
to enter the main
Trig. Edit
Menu page.
2. Select the ride’s bow or bell by pressing
PAD ID
then
striking that zone on your cymbal trigger. Alternatively, you can
highlight the trigger name at the top of the screen using the
CURSOR UP / DOWN
buttons to highlight it and use the
DEC-/INC+
buttons or
VALUE / TEMPO DIAL
to select either “RideBell”
or “RideBow.”
3. Press
MODE (F4).
4. Use
DEC- / INC+
buttons or the
VALUE / TEMPO DIAL
to select “2 Zones”
if your ride cymbal is a dualzone or “3 Zones” if your ride cymbal is a three-zone.
5. When you have finished making your edits, you can press
EXIT
or any button that will enter another screen
(e.g.,
KIT SELECT, UTILITIES
, etc. Your edits will remain for that session (i.e., until you turn off the module).
26
Содержание Red Box RBM 20
Страница 1: ...R B M 2 0 O W N E R S M A N U A L ...
Страница 44: ...Copyright 2010 Pearl Corporation All rights reserved ...


