Wireless Smart Gate
Connect the Sensor Wirelessly in PASCO Capstone
20
013-16123A
Connect the Sensor
Wirelessly in PASCO
Capstone
1.
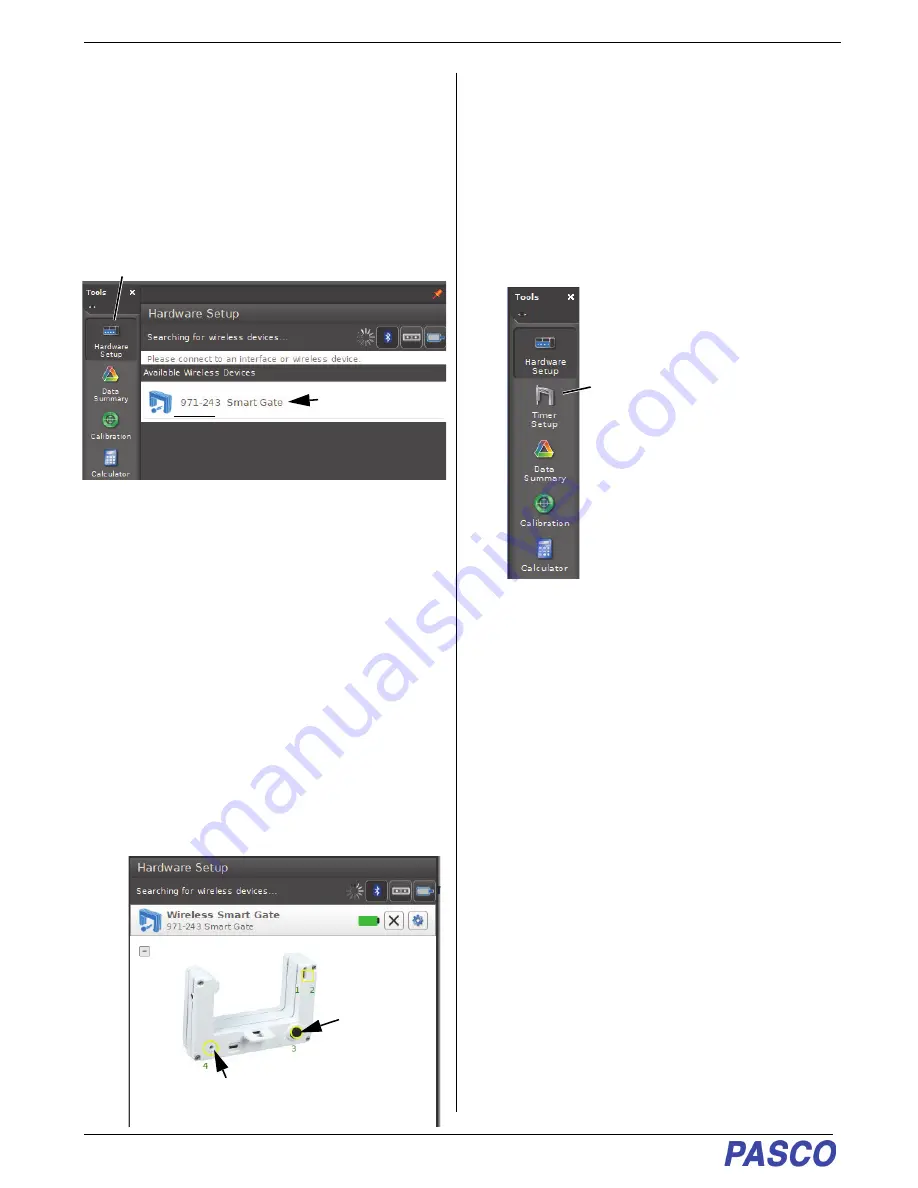
Turn on the sensor and start the software. In the
PASCO Capstone Tools palette, click the “Hard-
ware Setup” icon to open the Hardware Setup
panel.
•
If no device is connected, the panel says
“Searching for wireless devices…”. and, below
that, “Please connect to an interface or wireless
device.” The panel shows the “Available Wireless
Devices”.
2.
Under “Available Wireless Devices,” click the
sensor that matches the XXX-XXX Device ID
number that is on one side of the Wireless Smart
Gate.
•
A “Connecting to the sensor” message appears
briefly.
•
The Hardware Setup panel changes to show the
image of the Wireless Smart Gate including Port 3,
the Auxiliary Port. and Port 4, the Laser Detector
Port.
•
The default setup choice is “Smart Gate (Single
Flag)”.
Smart Gate (Single Flag) Setup
1.
Click the “Hardware Setup” icon in the Tools pal-
ette to close the “Hardware Setup” panel.
2.
Click the “Timer Setup” icon in the tools palette to
open the Timer Setup panel.
•
The Timer Setup panel is revealed.
Click to select the
sensor
Device ID
Port 3, the
Auxiliary Port
Port 4, the Laser
Detector Port
Timer
Setup
Icon
Hardware Setup Icon


