


32
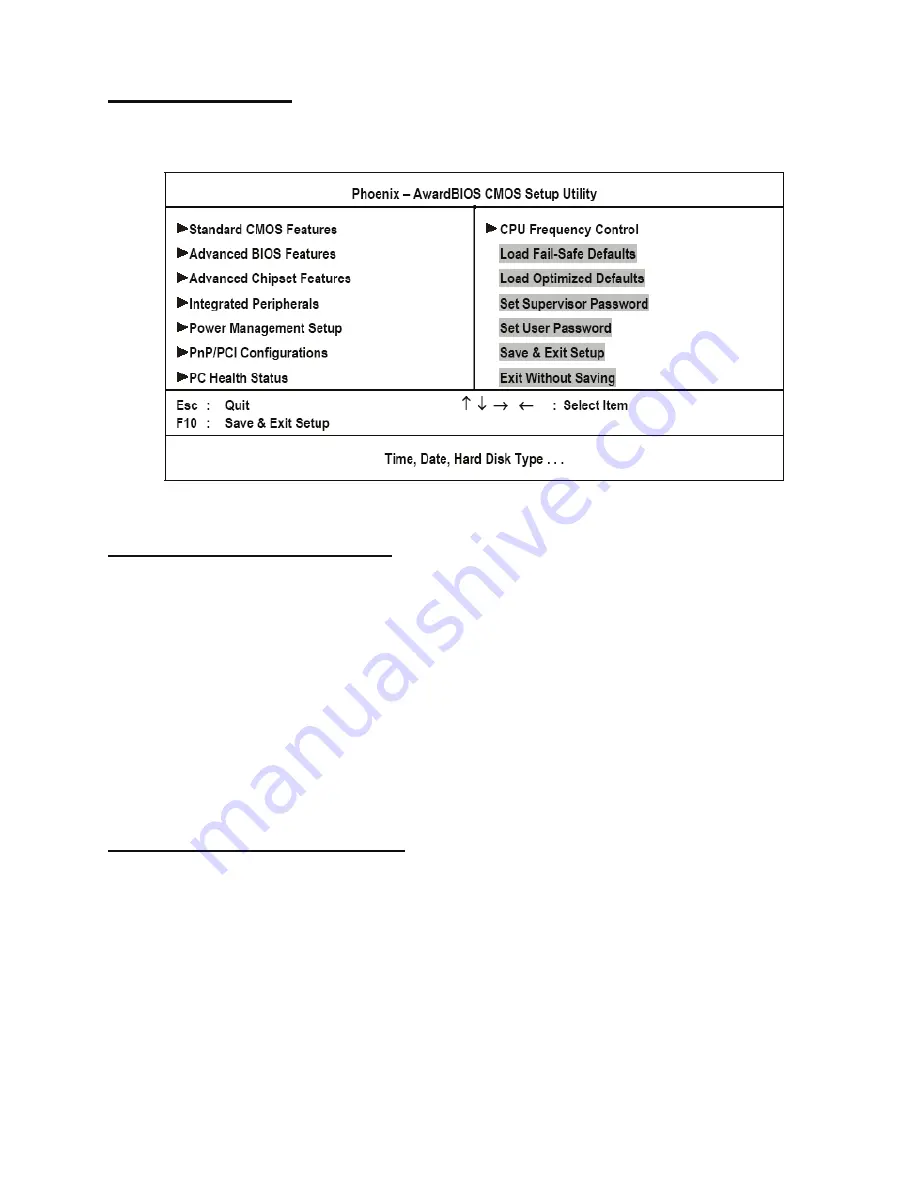
BIOS Setup Utility
Other BIOS Options
This section covers the other options that are available from the main menu:
Load Fail-Safe Defaults Option
This option opens a dialog box that lets you load fail-safe defaults for all appropriate items in the Setup Utility.
Follow these instructions:
1. From the main menu, scroll to Load Fail-Safe Defaults.
2. Press <Enter> to open the Load Setup Fail-Safe Defaults menu.
3. Press <Y>.
4. Press <Enter> to load the defaults.
The fail-safe defaults place no great demands on the system and are generally stable. If the system is not functioning
correctly, try loading the fail-safe defaults as a first step in getting the system working properly again. If you only want
to load fail-safe defaults for a specific option, select and display that option, and then press <F6>.
Load Optimized Defaults Option
This option opens a dialog box that lets you load optimized defaults for all appropriate items in the Setup Utility.
Follow these instructions:
1. From the main menu, scroll to Load Optimized Defaults.
2. Press <Enter> to open the Load Optimized Defaults menu.
3. Press <Y>.
4. Press <Enter> to load the defaults.
The optimized defaults place demands on the system that may be greater than the performance level of the compo-
nents, such as the CPU and the memory. You can cause fatal errors or instability if you load the optimized defaults
when the hardware does not support them. If you only want to load Setup defaults for a specific option, select and dis-
play that option, and then press <F7>.
Содержание PT-5700
Страница 1: ...PT 5700 Service Manual...
Страница 2: ......
Страница 8: ...vi...
Страница 14: ...6 Getting Started...
Страница 42: ...34 BIOS Setup Utility...
Страница 45: ...Chipset driver 37 5 Click Next to continue 6 Select Yes I want to restart my computer now and then click Finish...
Страница 48: ...40 Installing Drivers and Software 5 Click Next to continue 6 Click Next to continue...
Страница 50: ...42 Installing Drivers and Software 4 Click Install to continue 5 Click Finish...
Страница 53: ...Touch screen driver 45 8 Click Next to continue 9 Click Next to continue...
Страница 62: ...54 Locating the Problem...
Страница 71: ...Replacing Parts 63 5 Disconnect the 2 cables 6 Remove the 3 screws M3 x 4 mm silver 7 Remove the MSR...
Страница 76: ...68 Replacing Field Replaceable Units FRUs 5 Remove the 4 screws M3 x 4 mm silver 6 Remove the mainboard...
Страница 80: ...72 Replacing Field Replaceable Units FRUs 4 Remove the waterproof seal...
Страница 86: ...78 Appendix Exploded Diagrams and Parts List Display Parts and Cables Figure 6 2 Exploded diagram cables...
Страница 88: ...80 Appendix Exploded Diagrams and Parts List...