


Using the setup menu
This manual describe procedures for operating system
controller WV-CU650.
All setting configuration procedures start from the
setup menu. This section explains how to display the
setup menu and provides details about the menu items
that it contains.
■
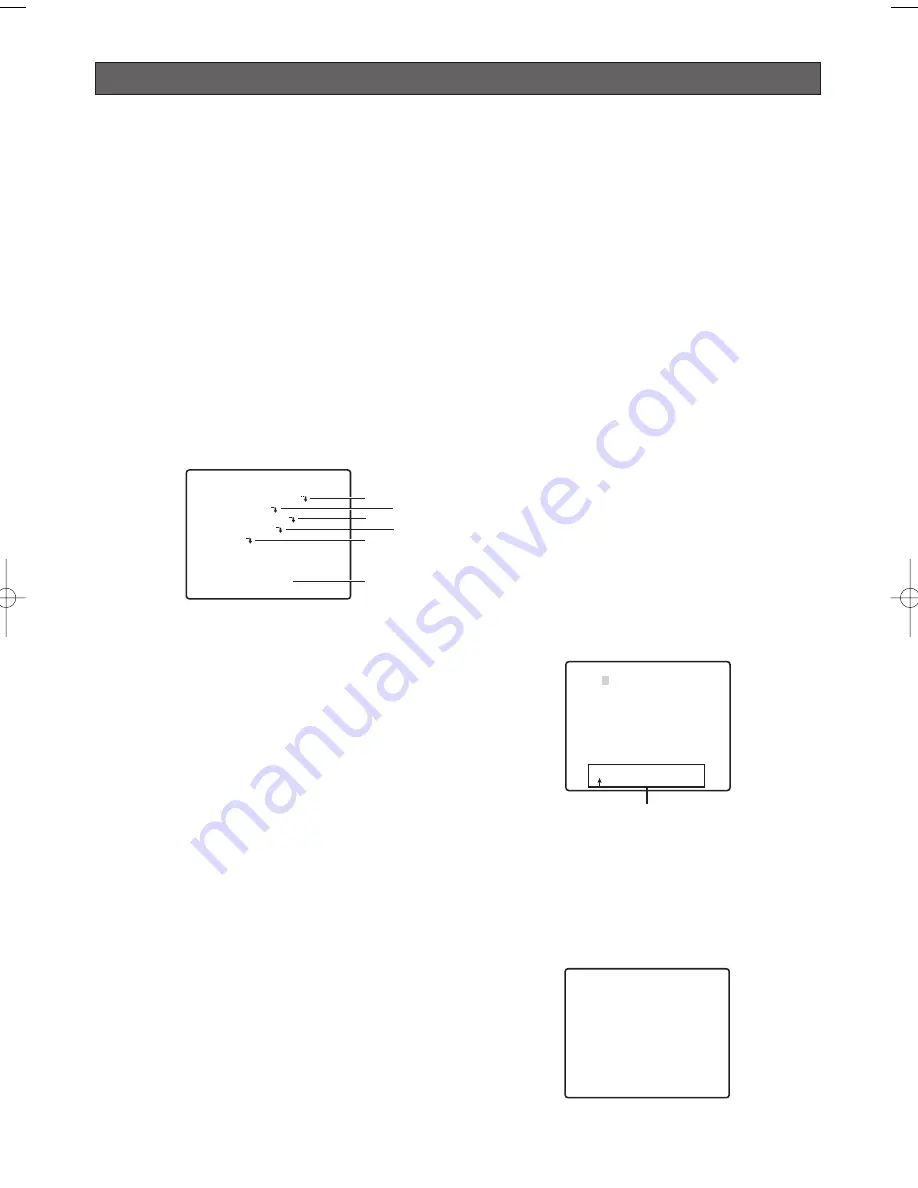
Displaying the Setup Menu
●
When using the WV-CU650
(1) Select the camera (this camera), and the
monitor where displays the setup menu.
(2) Press the MENU button to display LCD MENU
CAM 101.
(3) Press the ENTER button or CAM (SET) button to
display CAMERA SETUP.
(4) Press the F1 button.
Refer to the pages below for details.
q
CAMERA ID
Camera ID Settings
This page
w
SCENE SELECT
Scene Select Settings
Page 25
e
PRESET POSITION
Preset Position Settings
Page 25
r
AUTO TRACKING
Auto Track Settings
Page 41
t
LANGUAGE
Language Setting
Page 27
y
ADVANCED SETUP
Advanced Menu Settings
Page 27
■
Camera ID Settings
The camera ID is a series of alphanumeric
characters that indicate the location of the camera.
This item can be used to turn display of the camera
ID on the monitor screen on or off, and to input the
camera ID.
1. Move the cursor to CAMERA ID, and then tilt the
joystick left or right to toggle camera ID display on
and off.
2. Select ON or OFF, and then press the CAM (SET)
button. The factory default setting is OFF.
3. Use the joystick to move the cursor the character
you want to input, and then press the CAM (SET)
button.
This will cause the selected character to appear in
the camera ID input area. Repeat step 3 as many
times as necessary to input all of the characters for
the camera ID. (Example: DOOR)
To input a blank space
Move the cursor to SPACE, and then press the
CAM (SET) button.
To delete all previously input characters
Move the cursor to RESET, and then press the CAM
(SET) button.
To change previously input characters
Use the joystick to move the cursor to the camera
ID input area. Next, tilt the joystick left and right to
move the
↑
pointer to the character you want to
change. Finally, use step 3 above to input the new
character.
4. Move the cursor to POSI, and then press the CAM
(SET) button.
This will display the ID position setting menu.
5. Use the joystick to select a camera ID display
position, and then press the MON (ESC) button.
This registers the camera ID display position and
returns to the camera setting menu.
-24-
MODEL WV-CW970 SERIES
CAMERA ID OFF
SCENE SELECT
PRESET POSITION
AUTO TRACKING
LANGUAGE
→
ADVANCED SETUP
y
q
t
r
w
e
CAMERA ID---
0123456789
ABCDEFGHIJKLM
NOPQRSTUVWXYZ
().,'":;&#!?=
+-*/%$
SPACE
---- POSI RET RESET
DOOR............
DOOR
Camera ID Input area
WV-CW970 974̲ENG.qxd 07.2.6 2:02 PM ページ24
Содержание WV-CW970
Страница 2: ......
Страница 62: ...62...
Страница 186: ...186...
Страница 311: ...311 3 CAUTION RISK OF ELECTRIC SHOCK DO NOT OPEN RUSSIAN VERSION...
Страница 312: ...312 1 2 3 4 5 6 7 8 9 10 11 12 13 S3125A...
Страница 313: ...313 1 2 3 4 5 6...
Страница 315: ...315 WV Q122 353 340 10 354 355 354 355 354 355 1 5 316 1 2...
Страница 317: ...317 348 350 359 RS485 331 362 WV CW974 WV CW864 WV CW864A 30 Panasonic CCTV 352 360...
Страница 318: ...318 WV Q122 40 C o 50 C 240 1 RS485 DIP 322 DIP DIP 316 10 C 40 C...
Страница 319: ...319 1 2 3 ZOOM...
Страница 321: ...321 352 WV CW970 WV CW974 WARNING INPORTANT...
Страница 325: ...325 WV Q122 1 1 2 3 2 1 3 M6 58 60 25 85 40 1 1 2A 30 MAX PT11 40 1 1 2B 30 MAX PT11 x3...
Страница 326: ...326 2 4 M6 3 1 2 3 4 4 2 2 REAR 5 0 51 4 1 START 2 4 START x4...
Страница 327: ...327 3 3 1 2 3 5 0 51 1 1 2 3 3...
Страница 328: ...328 4 START LOCK 5 5 0 51...
Страница 330: ...330 A 3 y 3 MOLEX 57027 5000 UL Style Cable UL1015 57026 5000 UL Style UL1007 24 2...
Страница 352: ...352 AGC 14 1...
Страница 353: ...353 1 335 O q 0 1 1 2 50M 30 0M 2 50M 1 2 50M 30 0M 2 2 1 3 1 4 1 TOP 2 50M q r w e t o i 0 y u 1 2 2 5 30...
Страница 354: ...354 5 1 6 1 7 1 8 1 5 1 356 CNT CLS1 9 1 O 10C 20C 30C 40C 50C 1 2 3 5 10 1C 10C 30C 1 3 5...
Страница 355: ...355 2 3 10 349 3 10 1 SET SET I 128 1 8 ZOOM MODE TOP 20 55 351...
Страница 361: ...361 1 335 O CAM SET 336 H TOP...
Страница 366: ...366 339 340 340 340 339 340 317 343 352 318 343 SENS UP...
Страница 367: ...367 318 359 360 341 339 340 342 342 342 359 322 324 329 331 Super Dynamic 3 DNR PIX OFF 317...
Страница 368: ...368 362 358 347 346 357 358 356 357 A IN 4 A IN...
Страница 369: ...369 346 360 336 337 351 352 317 318 353 354 354 353 353...
Страница 370: ...370 353 43 353 343 353 353 353...
Страница 373: ......
Страница 374: ......


