– 59 –
Chapter 4 Operation — Basic operation of the menu
Basic operation of the menu
The setting of the camera can be changed with the menu in accordance to the shooting scene or recording contents.
Set data is written and saved in the camera memory.
f
There are two methods of operation, a method to operate with the jog dial button or the cursor operation button, and a method to touch the LCD
monitor.
Configuration of the menu
The menu is structured in categorized levels according to intended use and setting frequency.
Displayed by pressing the <MENU> button.
[THUMBNAIL] menu
Performs confirmation or deleting of the recording clip.
Can be set when the thumbnail screen is displayed.
[CAMERA] menu
Sets the basic function of the camera.
Cannot be set when the thumbnail screen is displayed.
[SCENE FILE] menu
Sets the setting regarding scene file.
Sets the detailed image quality adjustment of the camera video. Also, selection of the scene file, writing the scene file
data to the camera memory, and loading from the camera memory can be performed.
Cannot be set when the thumbnail screen is displayed.
[AUDIO] menu
Sets the input/output function of audio.
[VIDEO OUT/LCD/VF] menu
Configures the settings for the external output, the information to display in the LCD monitor or viewfinder and the output
format.
[RECORDING] menu
Sets the various items in the recording function.
[NETWORK] menu
Sets the setting regarding the network function.
[SYSTEM] menu
Configures the settings regarding the recording format of video and audio.
[OTHERS] menu
Configures the settings for writing/loading/initializing of the user file into the camera memory and other settings.
r
[OPTION] menu
A special menu is prepared considering additional functions in the future.
This is displayed by pressing the <MENU> button while holding down the <SHIFT> button.
Basic operation of the menu
The setting of the camera can be changed with the menu in accordance to the shooting scene or recording contents.
Set data is written and saved in the camera memory.
Various settings are possible from the menu.
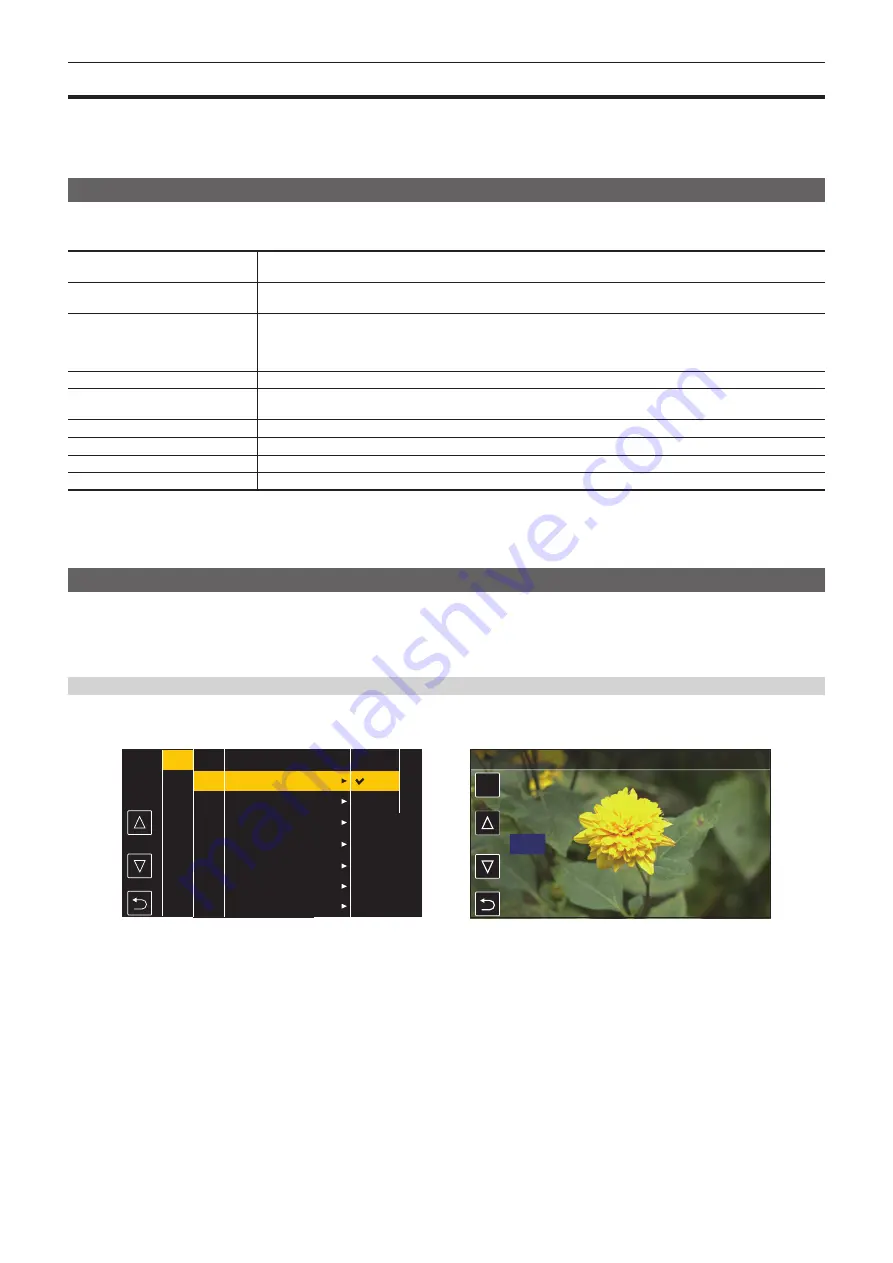
There are two methods of operation, a method to operate with the jog dial button or the cursor operation button, and a method to touch the LCD monitor.
When operating with the button
Operate by turning or pressing the jog dial button on the camera.
It can also be operated by pressing the cursor operation button and the <SET> button.
SET
50
Fig. 1
Fig. 2
CAMERA
SCENE FILE
AUDIO
VIDEO OUT/LCD/VF
RECORDING
NETWORK
SYSTEM
OTHERS
EXIT
SHUTTER SPEED
SW MODE
USER SW
WHITE BALANCE MODE
USER SW GAIN
LENS/IRIS
LENS ADJ.
POSITION1
POSITION2
POSITION3
POSITION4
POSITION5
POSITION6
ON
OFF
EXIT
MENU>CAMERA>LENS/IRIS>A.IRIS LEVEL
SYNCHRO SCAN
EXIT
ON
1/100
1/120
1/250
1/500
1/1000
1/2000
1
Press the <MENU> button when not recording.
The menu is displayed.
2
Select the menu to set.
1) Turn the jog dial button to move the cursor to the item to set.
The cursor can also be moved by pressing the cursor operation button.
2) Press the jog dial button or the <SET> button.
The lower level menu is displayed.
f
The confirmation screen is displayed depending on the menu.
f
Perform the similar operation if there is next level.
f
In some menus, a screen to set the numeric value is displayed in the camera image. (Fig. 2)
f
In some menus, a message is displayed if a menu cannot be executed.
f
To return to one level higher, perform the following operation.
Содержание AJ-CX4000G
Страница 12: ...Before using the camera read this chapter Chapter 1 Overview ...
Страница 177: ...This chapter describes about the output image Chapter 7 Output ...
Страница 185: ...This chapter describes how to use the camera by connecting to a network Chapter 9 Network Connection ...
Страница 202: ...Maintenance of the camera and error message are described Chapter 10 Maintenance ...
Страница 210: ...This chapter describes the dimensions specifications and connector signals Chapter 11 Specification ...
Страница 221: ...Web Site https www panasonic com Panasonic Corporation 2019 ...


