Main Mode: Recording/Playback Screen
7
Ma
in
Mod
e
■
Hot Swap Recording
With a P2 card in both card slots it is possible to make one
continuous recording that spans both cards. You can also
record continuously on 3 or more cards (hot swap recording)
by replacing one card while recording on the other.
◆
NOTE:
• P2 card recognition may be delayed and prevent hot swap
recording depending on when (immediately prior to or after
recording continues onto the other card) a P2 card is inserted in the
empty slot.
A P2 card should be inserted when there is still 1 minute or more
time left on the card that is being recorded.
• This machine does not support hot-swapping during playback.
■
LOOP REC
When a P2 card is inserted in each slot, LOOP REC allows you
to record continuously by successively switching cards.
When available space on the P2 cards has been used up,
recording continues from the first card overwriting previously
recorded loop recording.
Choose the SETUP - BASIC - LOOP REC - ON menu setting to
use the LOOP REC function.
◆
NOTE:
• Turning the unit off turns off the LOOP REC function and it will remain
off when the unit is turned on next time.
• Loop recording requires P2 cards with at least one minute of free
space each.
• During loop recording, the access LEDs for the two P2 cards used
in the recording light orange. Note that removing any of the P2 cards
will terminate loop recording.
• When the SETUP - BASIC - LOOP REC - ON menu setting is
selected, “LOOP” is displayed on the first line of the OSD.
However, if only one card is inserted, or remaining recording time on
a card is less than 1 minute, the LOOP REC function will not work.
even if LOOP REC is set to ON. Then the OSD flashes “LOOP.”
• When the SETUP - BASIC - LOOP REC menu setting is ON, the
standard guaranteed recording time remaining on the P2 cards is
indicated for the selected recording format. When loop recording is
stopped right after deleting old data, the time that remains on the
card may be shorter than indicated.
• Shot marks cannot be added or deleted during loop recording.
• Text memos cannot be added during loop recording.
• LOOP REC is not available during VFR (Variable Frame Rate)
recording.
Terminating Loop Recording Mode
Use one of the following two methods.
• Hold down the POWER button for 2 seconds to turn the unit
off.
• Choose the SETUP - BASIC - LOOP REC - OFF menu
setting.
■
Variable Frame Rate (VFR) Recording
Choose the SETUP - BASIC - VFR REC - ON menu setting to
record only the active frames from the variable frame rate
output of a variable frame rate camera. This enables instant
viewing of slow-motion and fast-motion speed effects
immediately after shooting.
◆
NOTE:
• The VFR function is enabled when the SETUP - SYSTEM - FORMAT
menu setting is 720p, and the SETUP - SYSTEM - FREQUENCY
menu setting is 59 - 23 or 60 - 24.
• Audio and external time codes cannot be recorded in this mode.
• The P2 card that is being recorded cannot be changed during
recording.
• In this mode, the remaining P2 card capacity at 60p (50p), the
slowest slow-speed effect, is indicated.
• When the SETUP - SYSTEM - FREQUENCY menu setting is set to 59
- 23 or 60 - 24, movement in HD SDI video output may look unnatural
when the input frame rate is something other than 24p.
• Changing the frame rate while recording a video signal from a
variable frame rate camera may result in frame loss in the
changeover phase.
■
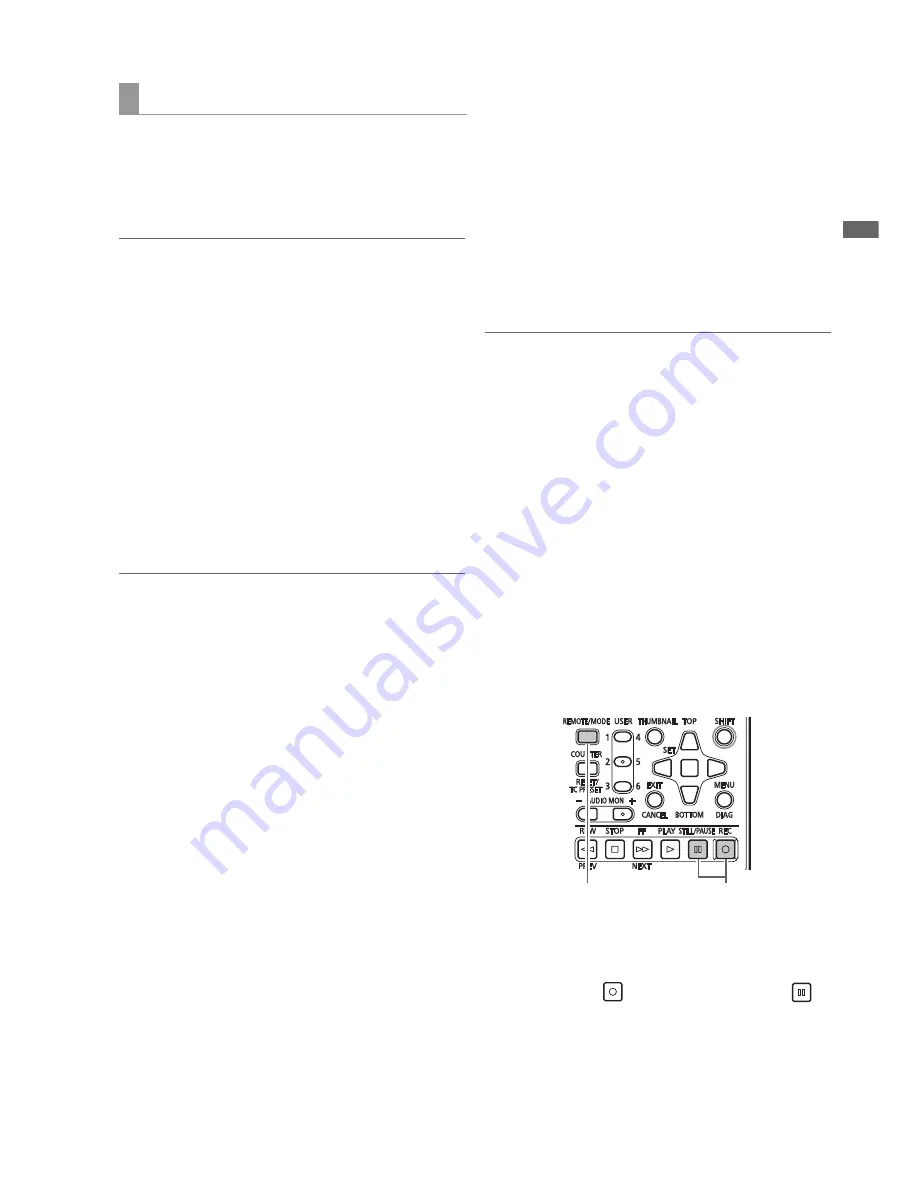
AUTO REC
When the unit is connected to a camera via SDI, starting and
stopping recording on the unit can be automatically controlled
using the REC START/STOP function on the camera.
1.
Choose the SETUP - BASIC - AUTO REC menu
setting to make adjustments for the camera.
(
➝
Setup Menu “BASIC” - “AUTO REC” page 59)
2.
Press the REC
button and STILL/PAUSE
button simultaneously to engage REC PAUSE mode.
3.
Press the REMOTE/MODE button to set REMOTE.
Now you can start and pause recording on the unit using
the REC START/STOP function on the camera.
Various types of recording
2
3


