


45
Experiment name and save location
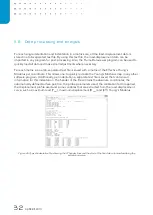
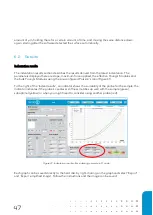
In the top-left of the Piuma software suite the experiment name and save location of each
experiment series can be defined. In order to select a path for saving the experiment series, click on
the File button. A pop-up will emerge, displaying a windows explorer window where a folder can be
created or selected. Input of an experiment name will automatically result in the creation of a
subfolder in the main save location. This way, each experiment is saved in a different folder by only
changing the experiment name.
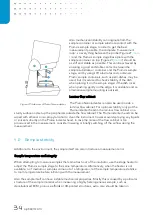
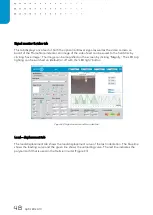
X, Y and Z-stage
The top left of the front panel shows the stage map, which displays the probe position relative to
the stage movement. It is shown as a blue dot on a white field, while the edges of the field
represent the maximum and minimum positions of the X and Y stages. The total size of this field is
12 mm by 12 mm (Figure 36).
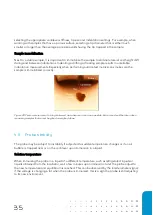
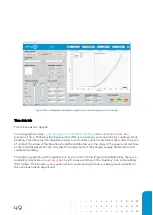
The controls to operate the X and Y stages of the Piuma are placed to the right of the stage map,
and the controls of the Z-stage next to that. A stage can be moved by defining a step size in µm and
clicking the arrow to the direction in which it should move. Each stage is limited to 12 mm of
movement. Alternatively, one can also use the keyboard arrow keys and the arrows keys at the
numbering pad (‘Num Lock’ should be ‘off’) (Figure 38). Arrow keys stage movement can be
activated
in the ‘Advanced’ tab of the ‘Options’ menu (Figure 19).
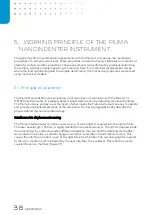
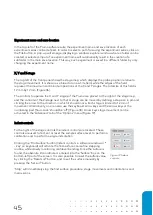
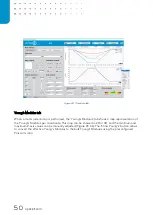
Indent controls
To the right of the stage controls the indent controls are located. These
controls are used to find, set or reset the sample surface level, to perform a
calibration and to perform a single indentation.
Clicking the ‘Find surface’ button (Indent controls in software window or ‘*
-
key’ on keyboard) will activate the find
-surface coarse-fine stepping
routine, while closely monitoring cantilever bending. Once the surface is
found, the absolute Z-
coordinate is entered into the ‘Surface’ box on the
bottom-left part of the screen. It is also possible to reset the surface value
by clicking the ‘Reset surf’ button, and to
set the surface manually by
pressing the
‘
Set surf
’ button.
‘Stop’ will immediately stop the find surface procedure, stage movements and indentations and
matrix scans.
Figure 37: Indent
controls.
Содержание CHIARO NANOINDENTER
Страница 1: ...PIUMA NANOINDENTER USER MANUAL ...
Страница 63: ...63 Flowchart Calibration ...
Страница 65: ......