


36
optics11.com
Air bubble
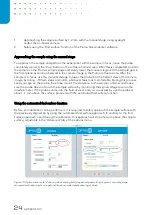
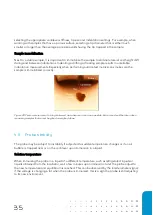
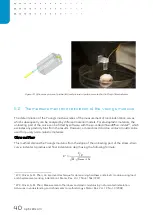
As the probe and cantilever are made of glass, it can occur that an air bubble gets trapped between
the probe and the cantilever: this will result in a failed probe calibration or excessive noise in the
measurements. An air bubble on the probe can be detected by observing the probe through the
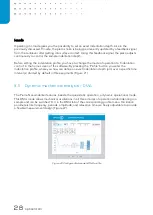
side of a petri-dish while immersed in a transparent medium (Figure 29).
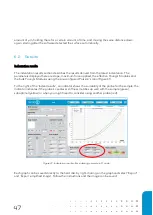
Figure 29: Side-view of a Piuma probe while immersed in a transparent medium. As indicated by the red arrow, an
air bubble is present at the base of the cantilever.
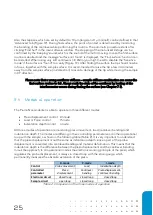
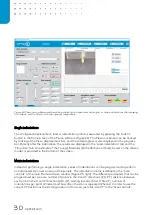
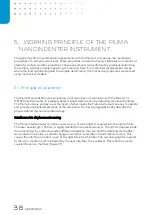
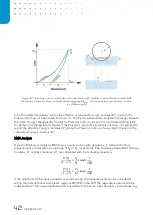
To remove an air bubble, lift the probe out of the medium and
carefully take it out of the probe mount. Now draw the liquid out of the
cantilever-probe gap by holding a tissue to the side of the probe.
Once the bubble pops, the surface tension is released, and when
immersed again, the air bubble will not form. Note that you should
avoid directly touching the cantilever: the cantilever is very fragile and
can break easily when touched. Holding the tissue at a safe distance
will also allow you to dry the probe without touching the cantilever
(Figure 30).
Suitable probe cantilever stiffness
In order to perform successful indentation experiments, it is necessary to have a probe cantilever
with a suitable stiffness compared to that of the sample. When the probe cantilever is too soft or
too stiff, there will be too little indentation or cantilever bending, respectively, likely resulting in
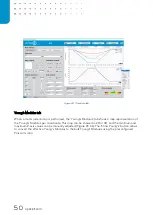
inaccurate measurements. The ‘Probe suitability’ indicator in the bottom
-right corner of the
software indicates the suitability of the probe in use. Please see the probe selection guide for more
information on selecting the appropriate probes for your experiments.
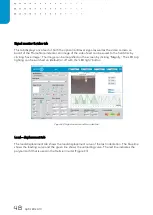
Figure 30: Removing an air
bubble by drying the probe.
Содержание CHIARO NANOINDENTER
Страница 1: ...PIUMA NANOINDENTER USER MANUAL ...
Страница 63: ...63 Flowchart Calibration ...
Страница 65: ......