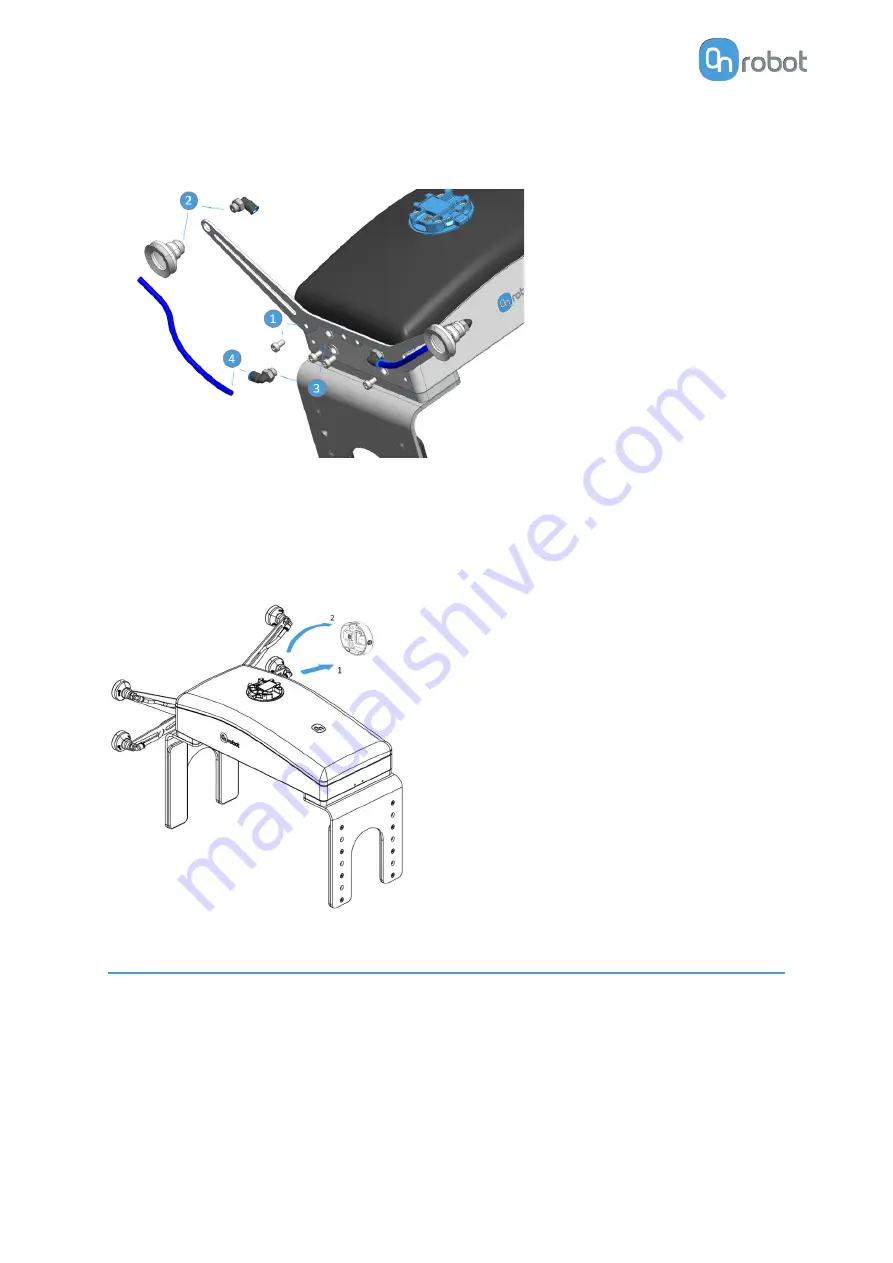
4. Connect the tubes to the angle fittings by pushing them inside. To ensure that the tubes
are completely attached try to gently pull the tubes out. If a tube needs to be removed,
simply press the blue part of the angle fitting and pull the tube.
For more information about the vacuum cups customization, go to the Vacuum cups section in
the
.
4.2.2.2. 2FGP20
Step 1:
Move the tool close to the Quick Changer as
illustrated.
The hook mechanism (rod and hook tongue)
will keep the lower part locked once mounted.
Step 2:
Flip the tool until it is fully mated, and you hear
a clicking sound.
To unmount the tool, press the aluminum
button on the Quick Changer and repeat the
steps in the reverse order.
4.3. Compute Box Mount
4.3.1. Optional - Clip-on Bracket
Optionally, fix the Compute Box to a surface using the provided Clip-on Brackets ( included
only from 17th December 2020).
HW INSTALLATION
14
Содержание 2FGP20
Страница 1: ...USER MANUAL FOR UR ROBOTS v1 13 0 Original Instructions...
Страница 55: ...On the Users tab click on the Add new user button to add more users ADDITIONAL SOFTWARE OPTIONS 55...
Страница 62: ...Illustration Pad position Maximum force N 2 200 3 100 4 400 HARDWARE SPECIFICATION 62...
Страница 71: ...8 2 3 Tools 8 2 3 1 2FGP20 All dimensions are in mm and inches HARDWARE SPECIFICATION 71...
Страница 79: ...12 Certifications CERTIFICATIONS 79...
Страница 80: ...12 1 EMC 12 2 2FGP20 Environment CERTIFICATIONS 80...
Страница 81: ...12 3 Declaration of Incorporation 12 3 1 2FGP20 CERTIFICATIONS 81...


