4-14 ChartView Software Reference
ChartScan User’s Manual
9.
Choose channels for the selected chart. With
ChartView
Plus,
you can select up to four
overlapping channels per chart. With the basic
ChartView
program, you are limited to one channel
per chart. There are four methods of adding channels. These are as follows:
•
Highlight an available channel using the cursor and left-hand mouse button; then click the Add button.
Repeat for each channel to be added.
•
Double-click on the channel (in the available channels list to add; in the selected channels list to remove)
•
Hold down the keyboard’s
Shift Key
and use the left-hand mouse button to select a block of consecutive
available channels (up to 4); then click the Add button. Example: CH3, CH4, CH5,CH6.
•
Hold down the keyboard’s Ctrl button and use the left-hand mouse button to select up to 4 available
channels (these can be non-consecutive); then click the Add button.
Example: CH1, CH3, CH5, CH7, as in the previous figure.
Note:
You can also remove channels in a similar manner by highlighting a channel(s) in the Select
Channels box, and then clicking on the Remove button. In the previous figure, CH7 (in the
select box) is highlighted. Clicking the Remove button would delete the channel from
Chart1.
Note:
When a chart contains overlapping channels [and the channels share values such that their
traces reside on top of each other], then the channels that are listed lower in the display list
(the most recently added channels) will obscure the channels higher in the list (those that
were added first).
10.
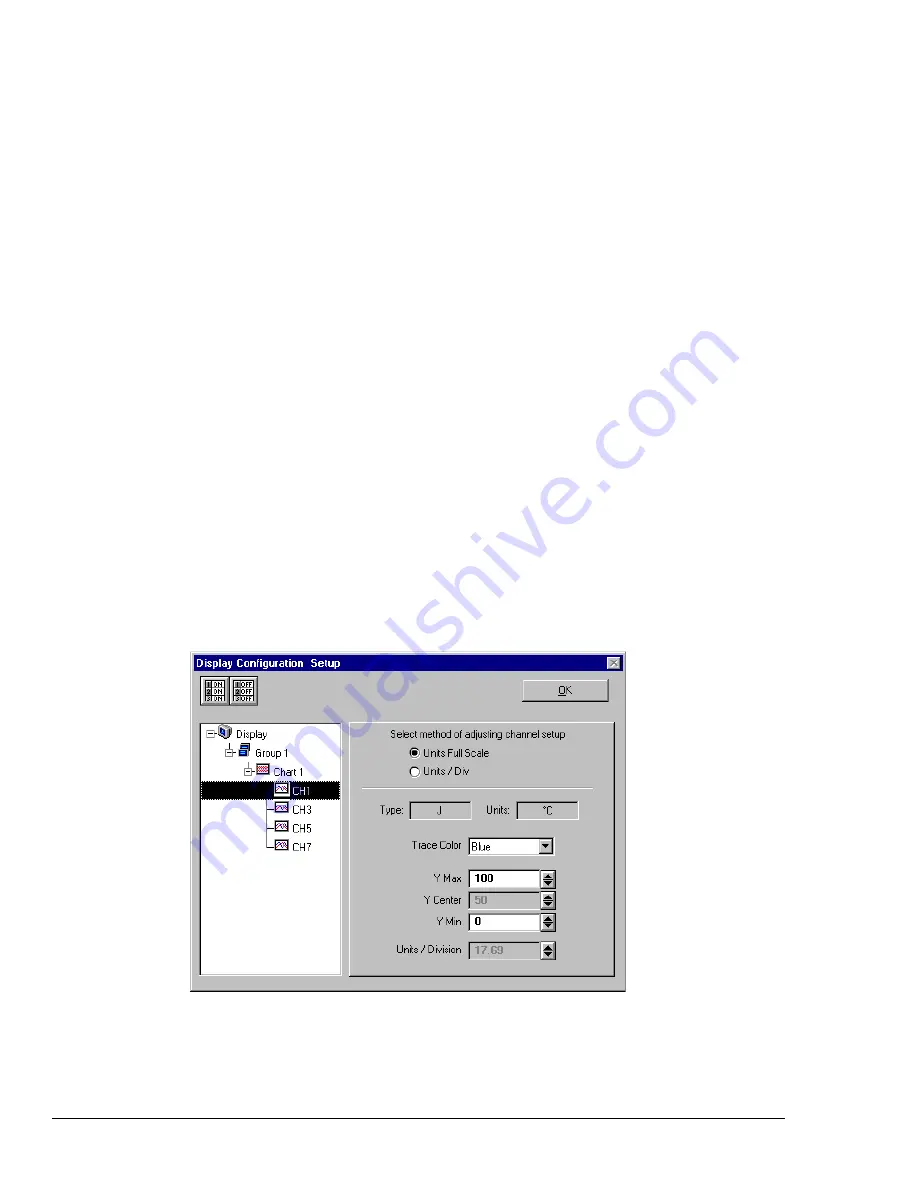
In the display area (on the left-hand side of the screen) click on a channel to check the channel’s
configuration and to re-configure the channel, if desired. The
Display Configuration Setup
Window will appear similar to the following figure.
Note:
Changing the display configuration does not change the existing channel and alarm
configuration. It only changes how the chart groups, charts, and channels will be displayed.
This screen contains two “radio buttons” for selecting the method of adjusting the display mode
and channel setup. It is the same screen discussed in the sub-section,
Editing an Existing Display
Configuration.
From this screen you need to choose
Units Full Scale
or
Units/Div
. Each method
was previously discussed (see page 4-11).
Adjusting Channel Setup for Channel 1
Remember, you can enable additional channels from the
Channel and Alarm Setup window
. Enabling
additional channels allows you to acquire more data; however, it will not change your display on
ChartView’s Main Window
. In other words, you can acquire data from channels you do not monitor.
Содержание OMB-CHARTSCAN 1400
Страница 1: ...August 2002 OMB CHARTSCAN 1400 Portable Data Recorder p n OMB 483 0901 Rev 3 1...
Страница 6: ...iv ChartScan User s Manual...
Страница 24: ...ChartScan User s Manual...
Страница 32: ...2 8 General Information ChartScan User s Manual Notes...
Страница 56: ...3 24 ChartScan User s Manual Notes...
Страница 117: ...ChartScan User s Manual Calibration 6 13 1 Connect an applicable calibration harness to each card Refer to figure below...
Страница 124: ...6 20 Calibration ChartScan User s Manual...
Страница 126: ...A ii ChartScan User s Manual...
Страница 136: ...API Commands Appendix A A 10 ChartScan User s Manual Notes...
Страница 176: ...API Commands Appendix A A 50 ChartScan User s Manual...
Страница 230: ...Appendix C Registers Data Formats Queries ChartScan User s Manual C 13...
Страница 237: ...Registers Data Formats Queries Appendix C C 20 ChartScan User s Manual Notes...
Страница 257: ...E 2 ChartScan User s Manual Notes...
Страница 265: ...ASCII Code Summary Appendix F F 8 ChartScan User s Manual Notes...
Страница 269: ...Abbreviations Appendix H H 2 ChartScan User s Manual Notes...
Страница 271: ...ChartScan User s Manual...


