BASIC
COPYING
FEATURES
4 - 3
ENGLISH
❏
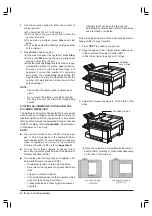
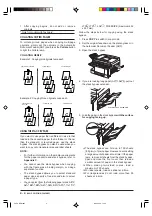
When enlarging or reducing an original, select
the paper size in accordance with the degree of
enlargement or reduction. The direction to set
the original also depends on the direction the
paper is set in. Determine the direction in which
to place the original by the markings on the near
edge of the platen glass. See “Direction of the
Original According to its Size and Magnification
Ratio” when setting the original.
NOTE:
■
Make sure that the paper in the paper in the paper
cassette is loaded in the same direction as the
original is placed in the original is placed in the
Automatic Document Feeder (ADF).
■
A5-size originals must be placed vertically in the
Automatic Document Feeder (ADF).
■
To make a same-size copy of an A4-size original,
set the original to A4 . Setting A4
slightly slows
the copy speed.
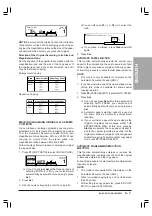
4. Press
F2
(PAPER SELECT) to select the paper size.
❏
The selection changes every time you press
F2
.
❏
If you have installed one of the optional paper
cassettes, the display sequence is as follows:
➊
paper size loaded in upper cassette,
➋
paper size loaded in lower cassette, Stack
bypass, AUTO PAPER automatic paper
selection.
❏
When you select OFF for all settings under the
CASSETTE ELIGIBLTY setting, AUTO PAPER
will not be displayed. (refer to Chapter 4, for the
base model, or page 14-23 of the Facsimile
User’s Guide for the other models).
❏
AUTO PAPER (automatic paper selection)
automatically selects the correct paper size.
5. Press
Set
.
❏
If you do not press
Set
within three seconds of
selecting the paper size above, the paper you
selected will be automatically set without you
having to press
Set
.
❏
If you have installed the optional paper casset-
te, you should to load the paper size you use
most frequently in the upper cassette.
❏
You can also make a reduced or enlarged copy
of your original.
❏
You can also select 2 on 1 copying.
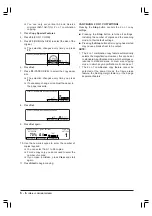
6. Use the numeric keypad to enter the number of
copies required.
❏
You can select from 1 to 99 copies.
❏
For one copy only, you do not need to enter the
number of copies.
❏
If you make a mistake, press
Clear
and start
again.
❏
You can also adjust the copy exposure and image
quality of the original.
7. Press
Start
to begin copying.
❏
If LOAD THE APPROPRIATE SIZE PAPER
appears after you specified AUTO PAPER and
pressed
Start
, the correct size of paper for the
original has not been set. In that case, select
another paper size using the
F2
(PAPER
SELECT) button. At this time, pressing the
Start
button again automatically selects the paper
closest in size to the original (minimizing loss of
part of the original or excessive margins on the
paper) and starts copying.
❏
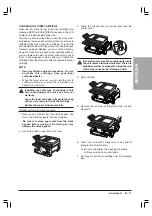
To suspend copying while copying is in progress,
press
Stop
. Suspending copying while copying
is in progress can cause documents to jam under
the Automatic Document Feeder (ADF) cover.
In this case, open the cover and remove the
original.
❏
If you press
Stop
during copying, a white sheet
may be output from the unit.
❏
Note that pressing
Stop
resets ALL the settings,
including the number of copies, paper selection,
and scan mode to their default settings. For
example, if you set the number of copies and
scan mode, then press
Stop
while setting the
magnification, not only the magnification but the
number of copies and scan mode return to their
default settings.
NOTE:
•
Ensure that the platen glass is always kept clean.
•
Do not touch the platen cover while copying.
Rocking the cover can distort the image being
copied.
•
Storing too many originals in memory can prevent
copying. If, during copying, the display shows
MEMORY FULL, either print out the documents
stored in memory or send the documents reserved
for sending, then try copying again.*
•
Even when memory is full, copying can continue
from the platen glass. Sheet-by-sheet copying can
also continue from the Automatic Document Feeder
(ADF).
•
When you switch your unit to copy mode via the
COPY
button, such settings as image quality for
scanning the document, resolution, and the number
of copies return to the default settings. The default
settings can also be changed.
•
You cannot switch to fax mode during copying.
Either press the
Stop
button to suspend copying
or wait until copying is finished before switching to
fax mode. Automatic fax reception still functions
during copying.*
•
If the unit is not operated for two minutes in copy
mode, the autoclear time feature is activated and
the unit is automatically set to its default settings.
The timing interval of autoclear time can be changed.
Содержание Copia 9916
Страница 1: ......
Страница 12: ...2 6 SETTING UP YOUR UNIT BACK VIEW...


